This page details every step you need to take to implement the G2 + Pipedrive integration.
For a first-time installation, these steps should be completed by a Pipedrive admin.
Before getting started
You must repeat the implementation steps for each of your G2-listed products. If your my.G2 user account cannot access all of your organization’s products that receive Buyer Intent, please use a different account, or ask a user in your organization with access to the missing product to invite you.
To verify the products you can access:
- Go to my.G2.
- Open the product dropdown at the top of the page to reveal your my.G2 product access.

- Confirm that your user account can access the necessary G2-listed products. To access products that are not listed in the dropdown, please ask a user in your organization with access to the missing product to invite you, or contact your G2 representative.
1. Authentication
Only organizations that have been authenticated can utilize the G2 Pipedrive integration. To authenticate your organization:
- Go to my.G2, then Integrations > Integration Hub.
- Select the Pipedrive tile.
- Select Authenticate Now.
- If not already logged into Pipedrive, you will be redirected to a Pipedrive log-in page. Enter your Pipedrive user credentials.
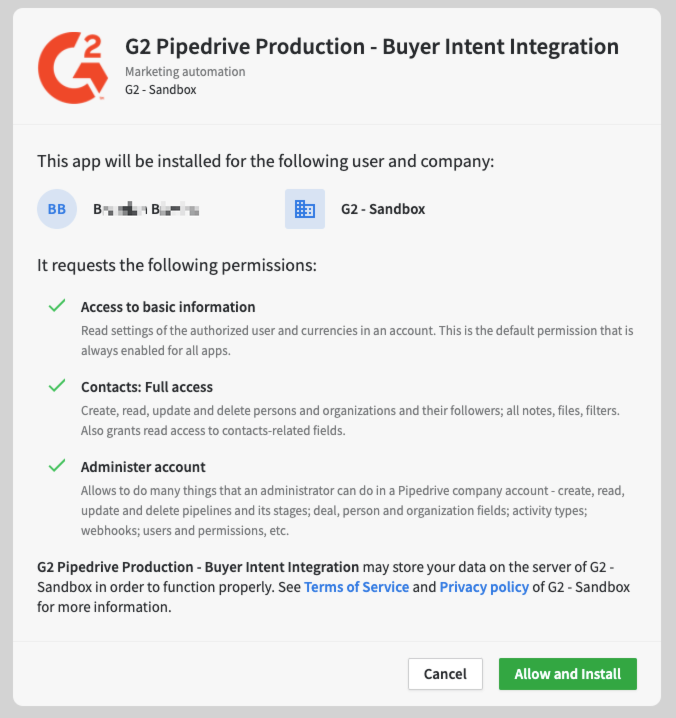
- You will be prompted to confirm permissions for G2. Review the permissions, and then select Allow and Install to complete the authentication process and install the G2 managed app in your organization’s Pipedrive environment.

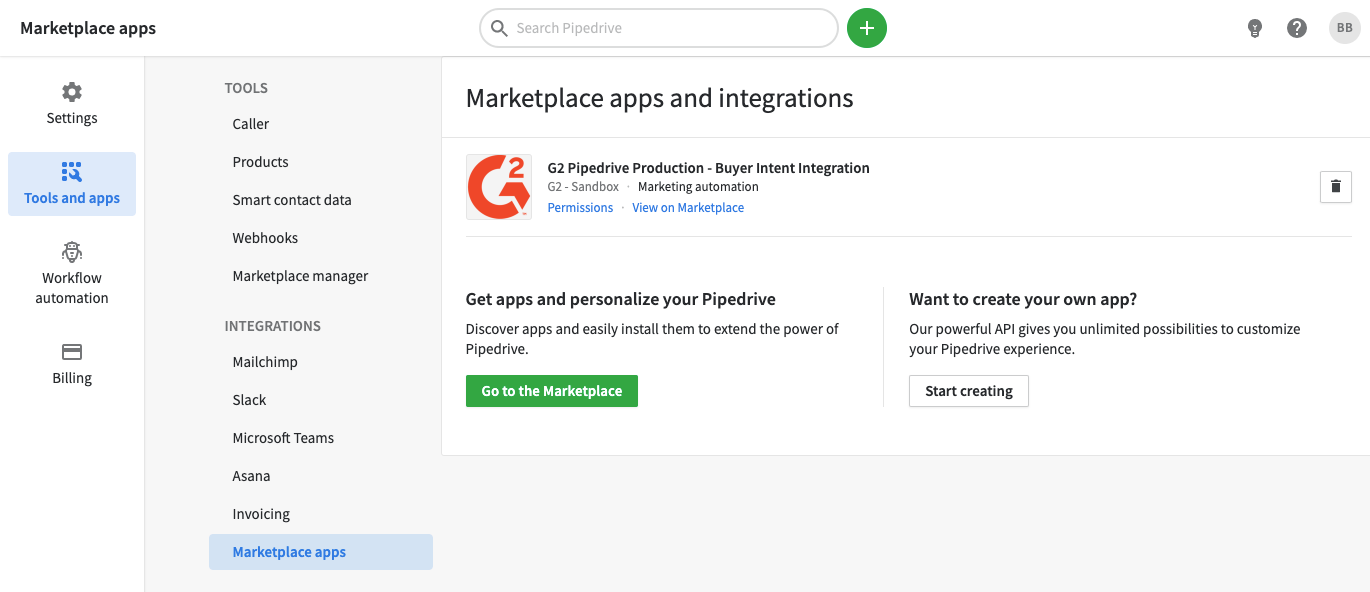
- Confirm that the Pipedrive authentication section on my.G2 displays a “Pipedrive is successfully connected” message. You can also confirm that the G2-managed app appears in Pipedrive by going to Tools and apps > Marketplace apps.

2. Enable G2 Buyer Intent data
With your organization authenticated, you need to enable the flow of G2 Buyer Intent data to Pipedrive:
- In the same Pipedrive tile in my.G2, select the Integration Status slider to move it from Not Active to Active.
- (Optional) If you want organizations to be automatically created in Pipedrive based on G2 Buyer Intent data, select the Allow G2 to automatically create company accounts in Pipedrive upon buyer intent matches? slider to move it from Not Active to Active. With this option enabled, Buyer Intent signals that are not mapped to existing organizations will be used to create new organizations.
Buyer Intent data should begin flowing to Pipedrive within 24 hours of activation.

3. (Optional) Bulk create buyer organizations in Pipedrive
Once the Pipedrive integration has been successfully implemented, the auto-creation process for organizations starts as new Buyer Intent signals are generated. However, any buyer organizations that generated Buyer Intent prior to you setting up this integration are not automatically created in Pipedrive.
Pipedrive’s import data option enables you to bulk create organizations based on Buyer Intent that pre-dates the integration start date.
To bulk create organizations in Pipedrive:
- Go to my.G2, then Buyer Activity > Buyer Intent > Your Signals.
- Adjust the date range based on the amount of Buyer Intent data you want to include in the file, then select Download CSV.

-
In the spreadsheet, delete all columns of data except the following three:
- company_name
- company_state
- company_country
If your organization has a designated field in Pipedrive to indicate how an organization was created, you can add a fourth column to your spreadsheet and enter G2 Buyer Intent for every row. This can help track the buyer organizations that you are going to import.
Although data for other G2 custom fields such as g2_total_pageviews can be mapped via this process, new Buyer Intent signals will override the data that you import.
- Save your file in the CSV format to your local machine.
- In the left-side panel in Pipedrive, select … > Import data.
- Select From a spreadsheet to upload your file.
- Drag the following default Pipedrive fields from the organization’s tab to match with your spreadsheet columns, and then select Next:
| Your column name | Pipedrive default field |
|---|---|
| company_name | Name |
| company_state | State/county (Address) |
| company_country | Country (Address) |

- Choose either Merge data or Create multiple records. G2 recommends merging the Buyer Intent import with your existing organizations in Pipedrive.
- Review the import preview, then select Start import.
When the import is complete, the new organizations should be available in your Pipedrive environment. By default, the assigned owner for the newly created organizations is the user that imported the data.