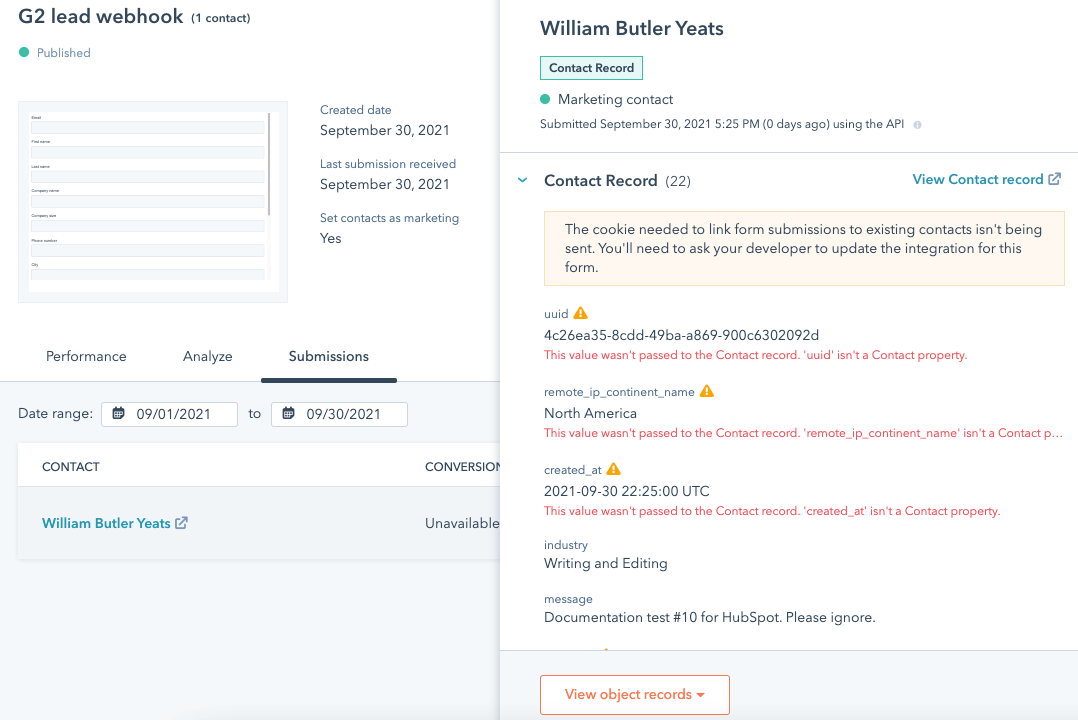
You can use HubSpot forms to automatically deliver your organization’s G2 leads via a webhook to your HubSpot environment. This means any leads generated from your G2.com product profile page are instantly added to your HubSpot instance and ready to be worked by your marketing and sales teams.
The following information details examples of how to set up the webhook for this process. There could potentially be dozens of fields that need to be matched between your G2 lead form and HubSpot, and these fields will differ depending on the G2 leads data that you want delivered to HubSpot. Your organization should adjust steps 6-9 based on your own selections.
You should set up your G2 lead form before starting this process.
To send your G2 leads to HubSpot:
- Log in to HubSpot and go to Marketing > Lead Capture > Forms.
- Select Create form.
- Choose the Embedded form option and then select Next.
- Choose the Blank template option and then select Start.
- Name your form. The name should indicate to HubSpot users in your organization that G2 leads data is being delivered via this form. For this example, G2 entered the name G2 lead webhook.
- Add and remove the HubSpot contact properties for your leads.
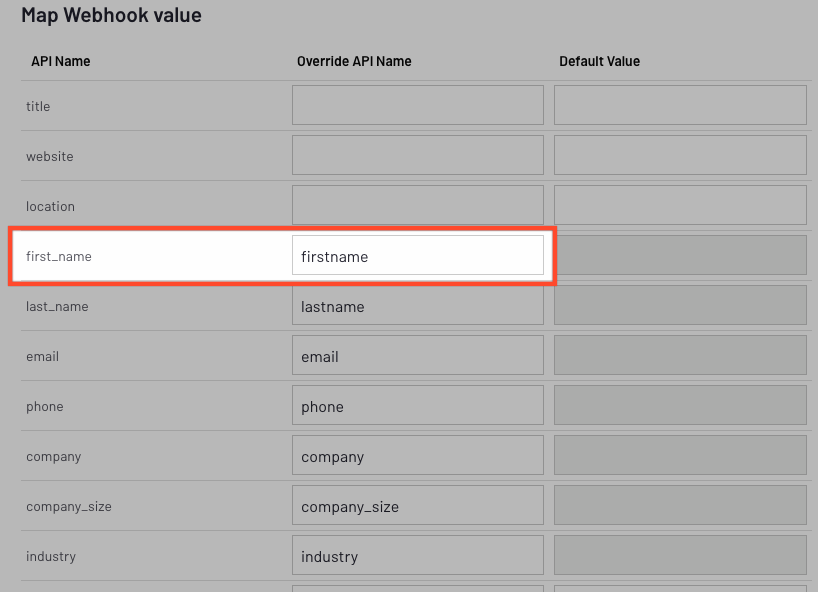
The properties you move to the HubSpot form should ultimately match with both the standard and custom fields you choose to include in the G2 lead form. For example, the standard First Name (first_name) field in the G2 lead form could match with the default First name (firstname) field in HubSpot.
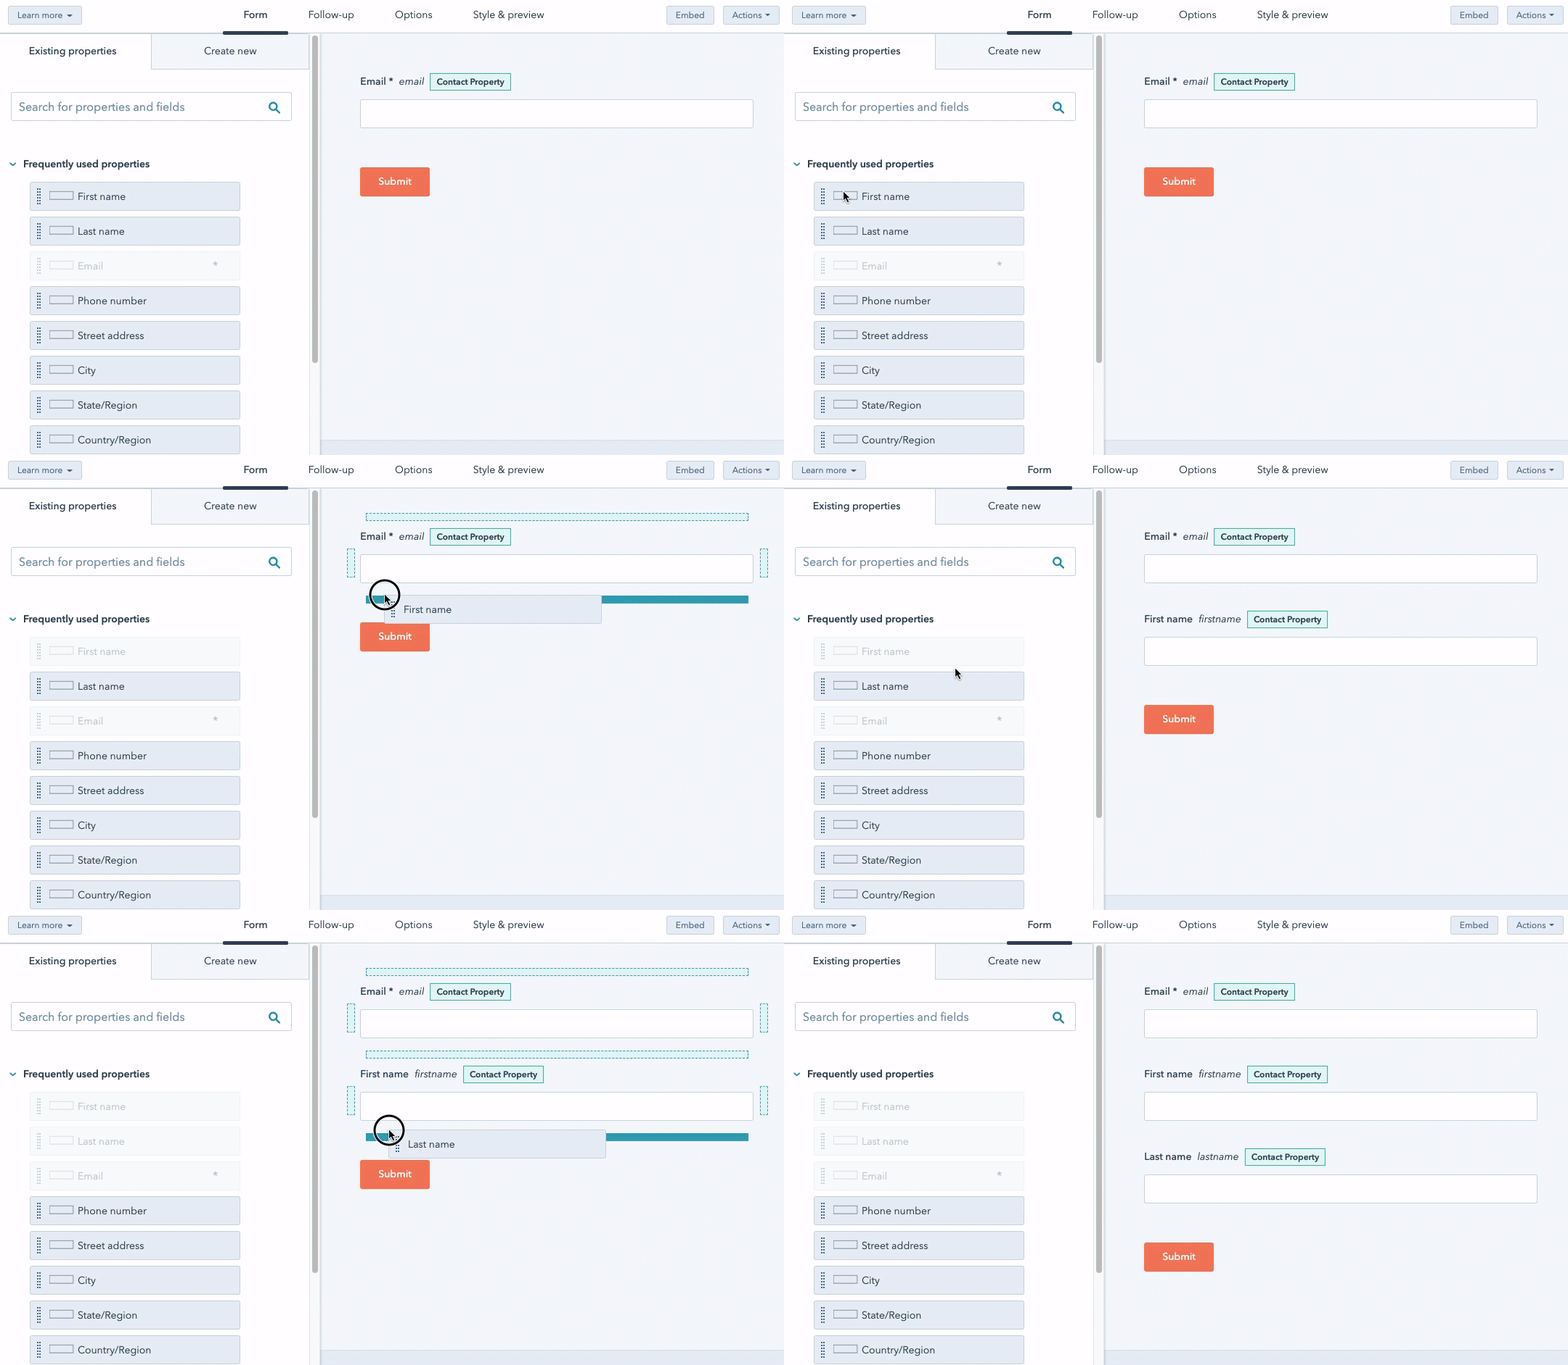
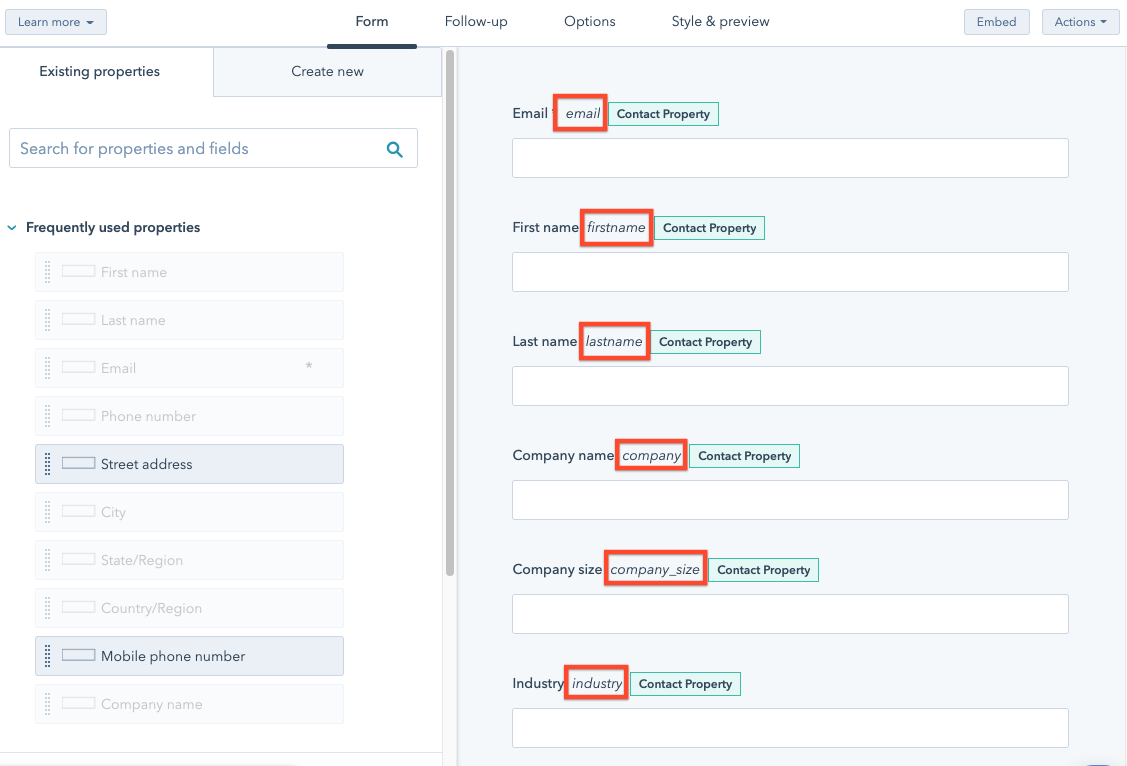
- In the HubSpot form builder, find the various API fields for each of your chosen HubSpot properties from step 5. Each of these field values need to be transferred to the corresponding fields in your G2 lead form.
The API fields are listed in italics to the right of the property names. For example, the standard HubSpot contact property Company size has an API field value company_size.
- With each of the API fields copied in step 6, go to the my.G2 Lead Webhooks tab and find the API Name for the matching G2 lead form field. Paste your copied HubSpot fields into the matching Override API Name field.
- Repeat steps 6-7 to find and map each of your HubSpot properties to the fields in your G2 lead form, and then select Save. This should include any custom fields that have been created for your G2 lead form.
- Review the Options tab in the HubSpot form builder and adjust your settings as needed. For example, G2 enabled the Set contacts created as marketing contacts option, which means each G2 lead delivered to HubSpot is used to automatically create a marketing contact.
- Select Update and then Publish.
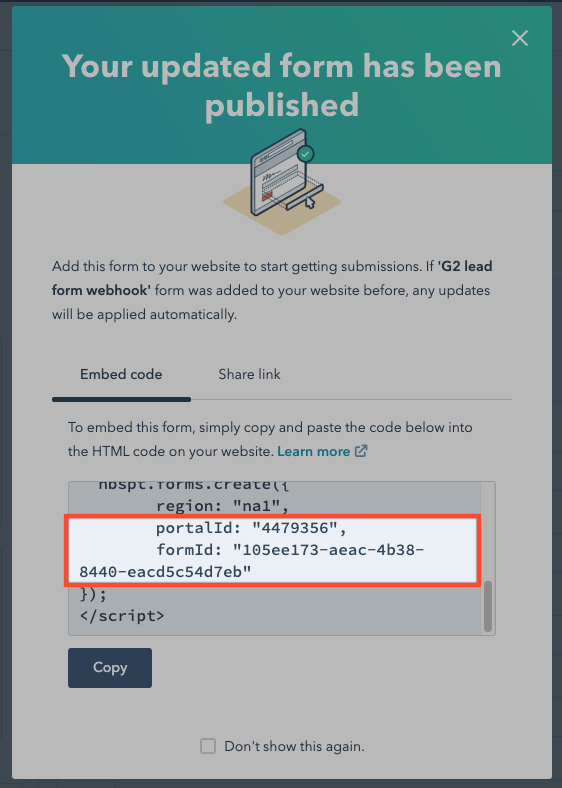
- In the pop-up that appears, there should be embed code for your HubSpot form. Select Copy and paste that embed code into a text editor or other editable document to use in the next step.
- Go to the my.G2 Lead Webhooks tab. Paste the following HubSpot API endpoint URL into the Choose endpoint field and select the Form Data option:
https://forms.hubspot.com/uploads/form/v2/:portal_id/:form_guid
To document this example, G2 used a v2 version of a HubSpot API endpoint. You can find more information about the endpoint in HubSpot’s API documentation.
The updated v3 version of the same endpoint is also available, but G2’s attempt to use this version for the same purpose was not successful. If you would like to try to use v3, review HubSpot’s API documentation and utilize these same steps with the updated endpoint URL.
- Two items in the endpoint URL need to be replaced with information from the embed cody you copied in step 12:
- :portal_id: Look for a snippet similar to portalId: "4479356", in your embed code. Replace :portal_id in the endpoint URL with the number inside the quotation marks.
- :form_guid: Look for a snippet similar to formId: "105ee173-aeac-4b38-8440-eacd5c54d7eb" in your embed code. Replace :form_guid in the endpoint URL with the number inside the quotation marks.
- Confirm that the endpoint URL you have entered is formatted similarly to the following example, and then select Save.
https://forms.hubspot.com/uploads/form/v2/4479356/105ee173-aeac-4b38-8440-eacd5c54d7eb

- With the endpoint URL and all HubSpot fields saved to the appropriate spots in your my.G2 dashboard, the webhook should be established between your G2 lead form and HubSpot.
Test the webhook by going to your G2 product profile page and submitting a lead form. If the webhook has been successfully connected, the lead data you submit to G2 should appear in your HubSpot environment almost immediately.
If any fields in your HubSpot leads are not populating appropriately, go back to HubSpot to edit your form and repeat steps 6-9 to change your field mapping. Ensure that the fields you add to your HubSpot form match the fields that you include in your G2 lead form.
If you successfully receive a G2 lead in your HubSpot environment, the webhook is working and future G2 leads should also be delivered to HubSpot.
When G2 leads are added to HubSpot, they are routed according to your organization’s existing HubSpot rules. If you would like to learn more about how to automatically assign leads to contact owners in HubSpot, review HubSpot’s Workflows documentation.
Depending on your HubSpot settings, you could receive an email notification for each G2 lead that is delivered to HubSpot.
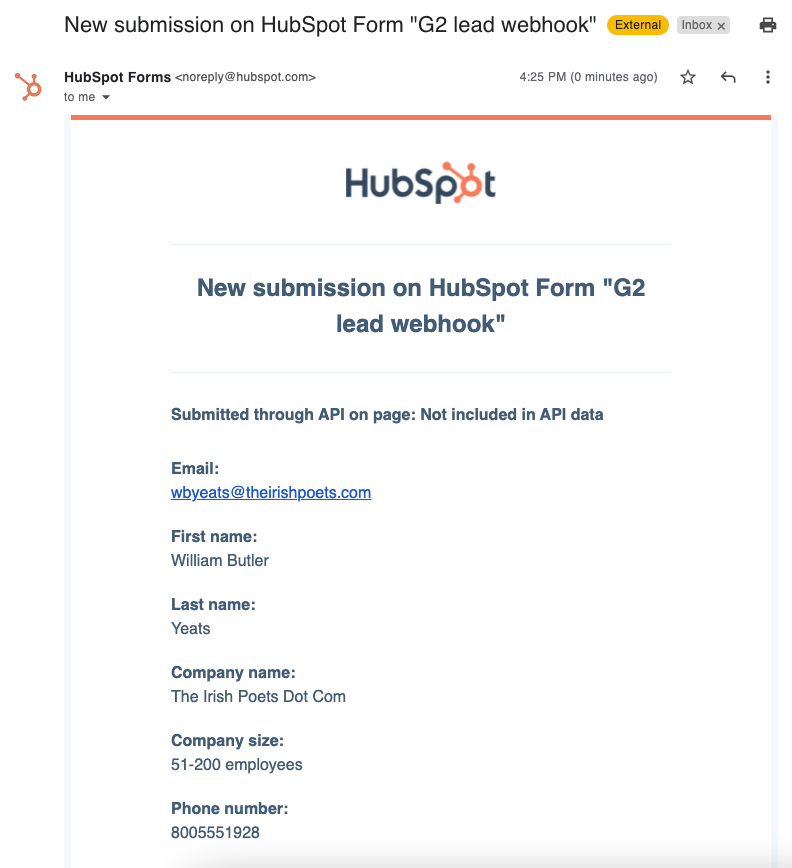
You can also review all G2 leads that have been delivered via this webhook. In HubSpot, go to Marketing > Lead Capture > Forms and select the form you created for this process.
The Views and Conversion Rate figures will always be null, but the Submissions number should increase as each G2 lead is added. You can also review the HubSpot contact record for each G2 lead.
