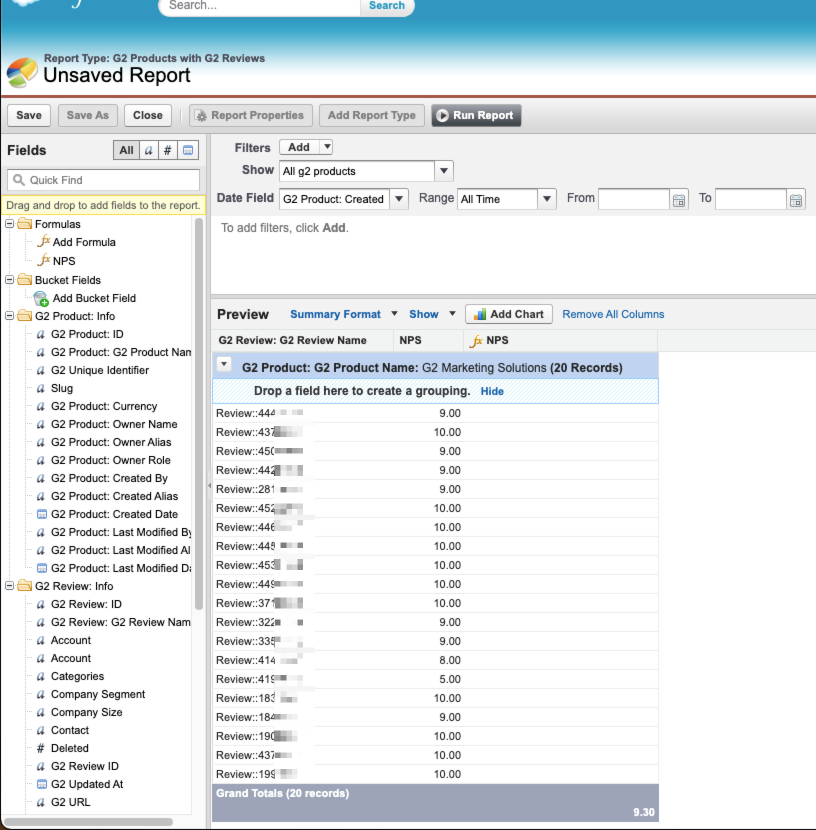
This example report shows the average NPS for a product with G2 reviews. The NPS score provides an overall sentiment of whether a reviewer would recommend a product to other users.
Complete the following steps to run this report:
- Go to the Salesforce Reports tab and select New Report....
- Select the **Other Reports **folder and then G2 Products with G2 Reviews, or search directly for G2 Products with G2 Reviews.
- Select Create.
- At the top of the page, select the Show drop-down and select All g2 products.
- In the Date Field dropdowns, select the desired options for the date range the report should cover (for example, Current and Previous Month). For this report, G2 recommends selecting All Time for the Range field.
- In the Preview window, select the Format dropdown and select Summary to change the report format.
- Select the G2 Product: G2 Product Name column header dropdown and select Group by this Field to turn G2 Product: G2 Product Name into a report grouping.
- In the left-hand side Fields bar, double-select Add Formula to open the Custom Summary Formula pop-up. Then, make the following selections:
- Column Name: Enter a name for the formula.
- Where will this formula be displayed?: Select Grand summary only. This option places the average NPS score at the bottom-right of each product grouping summary.
- Formula: Select the Summary Fields dropdown, and then select NPS > Average.

- At the top of the page, select Save.
- In the Save Report pop-up, enter a Report Name and a Report Description. Report Unique Name auto-populates.
- Pick a Report Folder from the dropdown, and then select Save.
The report should now be available in the Salesforce Reports tab in the report folder that was selected as the storage location.
Enhancing example report #8: Customer satisfaction by company segment and industry
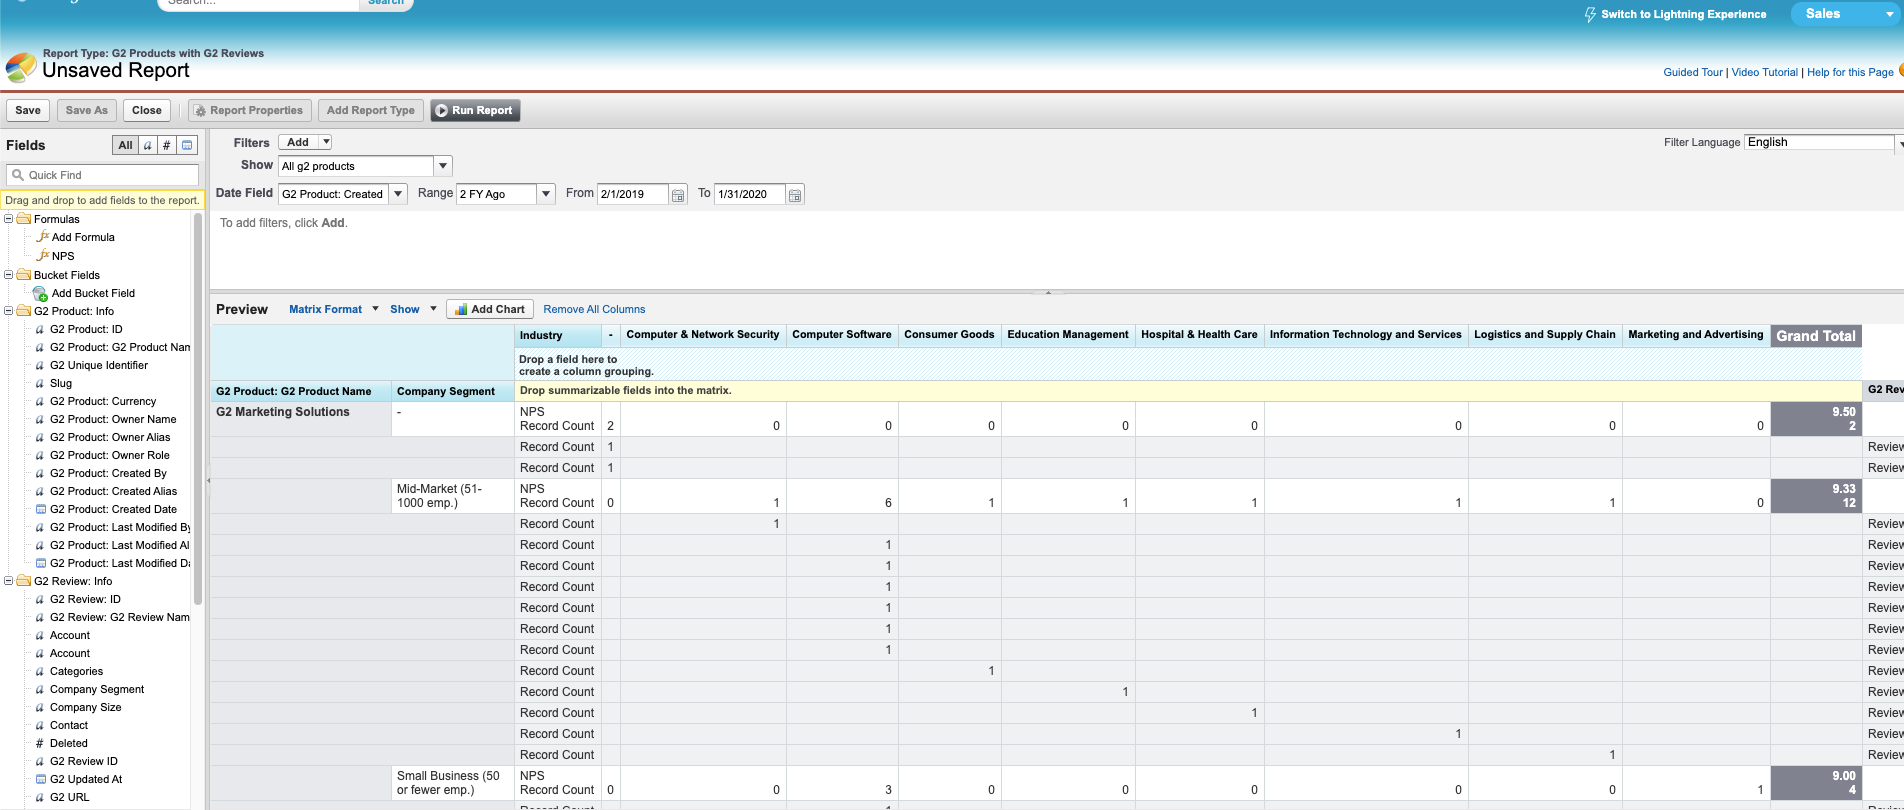
Example report #8 provides an average NPS score for a product, but you can also gain a more granular understanding of reviewer sentiment by adding filters for company segments, industry, and date ranges.
Complete the following steps to run this report:
- Go to the Salesforce Reports tab and select New Report....
- Select the Other Reports folder and then G2 Products with G2 Reviews. Or search directly for G2 Products with G2 Reviews.
- Select Create.
- At the top of the page, select the Show dropdown and select All g2 products.
- In the Date Field dropdowns, select the desired options for the date range the report should cover (for example, All Time). For this report enhancement, G2 recommends selecting options like Current and Previous Month or Current CY for the Range field to assess customer sentiment for certain periods and how it changes.
- Select the G2 Product: G2 Product Name column header drop-down and select Group by this Field to turn G2 Product: G2 Product Name into a report grouping.
- In the Preview window, select the Format dropdown and select Matrix to change the report format.
- Select and drag the Company Segment field (G2 Review: Info folder) from the left-hand side Fields bar to the right of G2 Product: G2 Product Name to create a row sub-grouping.
- Select and drag the Industry field (G2 Review: Info folder) from the left-hand side Fields bar to the top of the Preview window to add it as a column grouping.
- In the left-hand side Fields bar, double-select Add Formula to open the Custom Summary Formula pop-up. Then, make the following selections:
- Column Name: Enter a name for the formula.
- Where will this formula be displayed?: Select At a specific row/column grouping level, and then Company Segment from the dropdown. This option places the average NPS score in the Grand Total column for each company segment row.
- Formula: Select the Summary Fields dropdown, and then select NPS > Average.

- At the top of the page, select Save.
- In the Save Report pop-up, enter a Report Name and a Report Description. Report Unique Name auto-populates.
- Pick a Report Folder from the dropdown, and then select Save.
The report should now be available in the Salesforce Reports tab in the report folder that was selected as the storage location.