A G2 lead is a buyer who submits your lead form to view gated content, such as videos and downloads, or to ask your organization to contact them. These buyers are interested in your product and willing to hear from you directly.
These instructions apply to your G2 profile only. They aren’t available for Capterra, Software Advice, or GetApp.
Leads activity
Go to my.G2, then select Buyer Activity > Leads to see all the leads generated for your product.
Use Request type to filter leads by the buyer’s activity on your G2 product profile. Use Email Contains to search the email addresses submitted with your lead form.
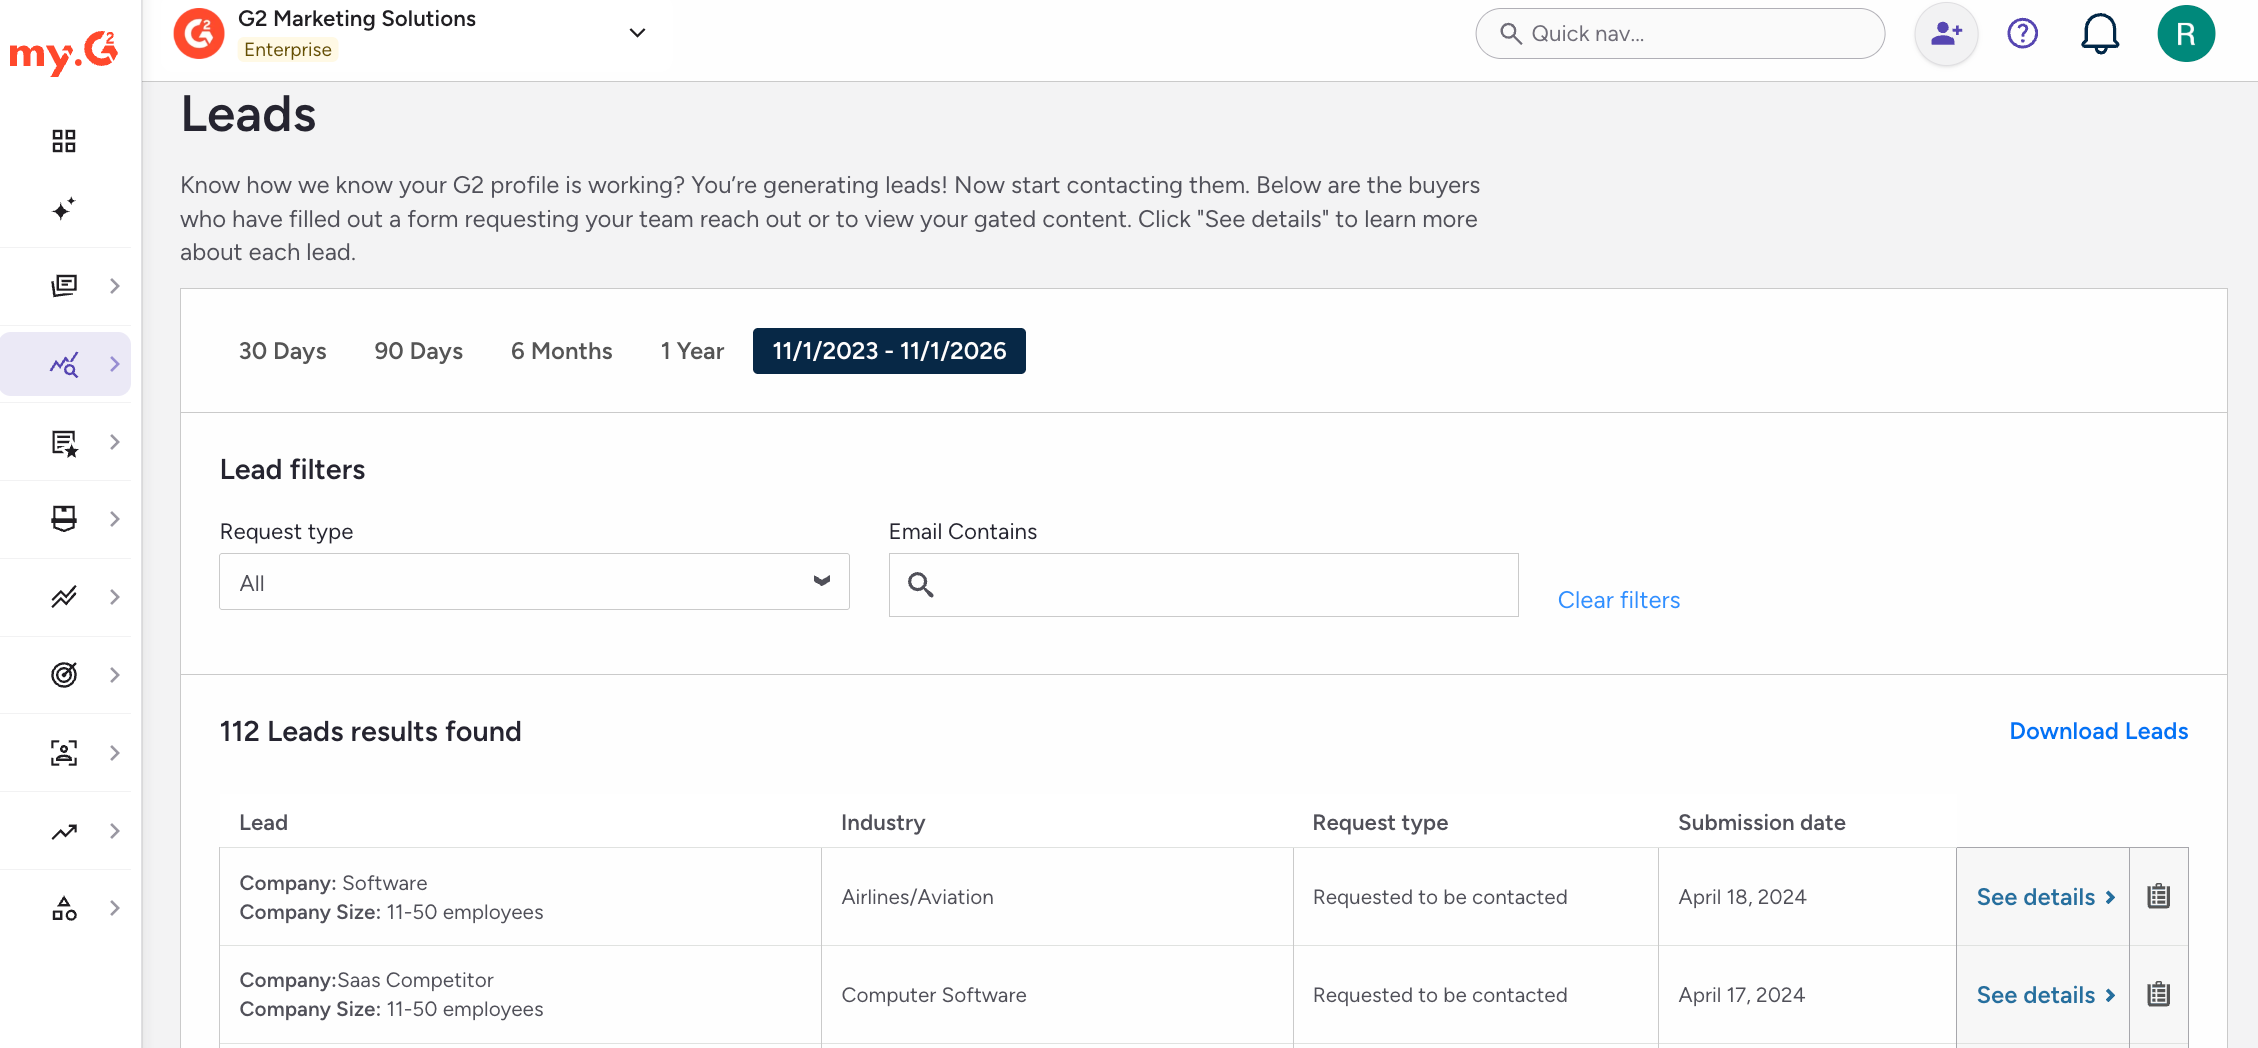
Select See details on a lead to review everything the buyer submitted.
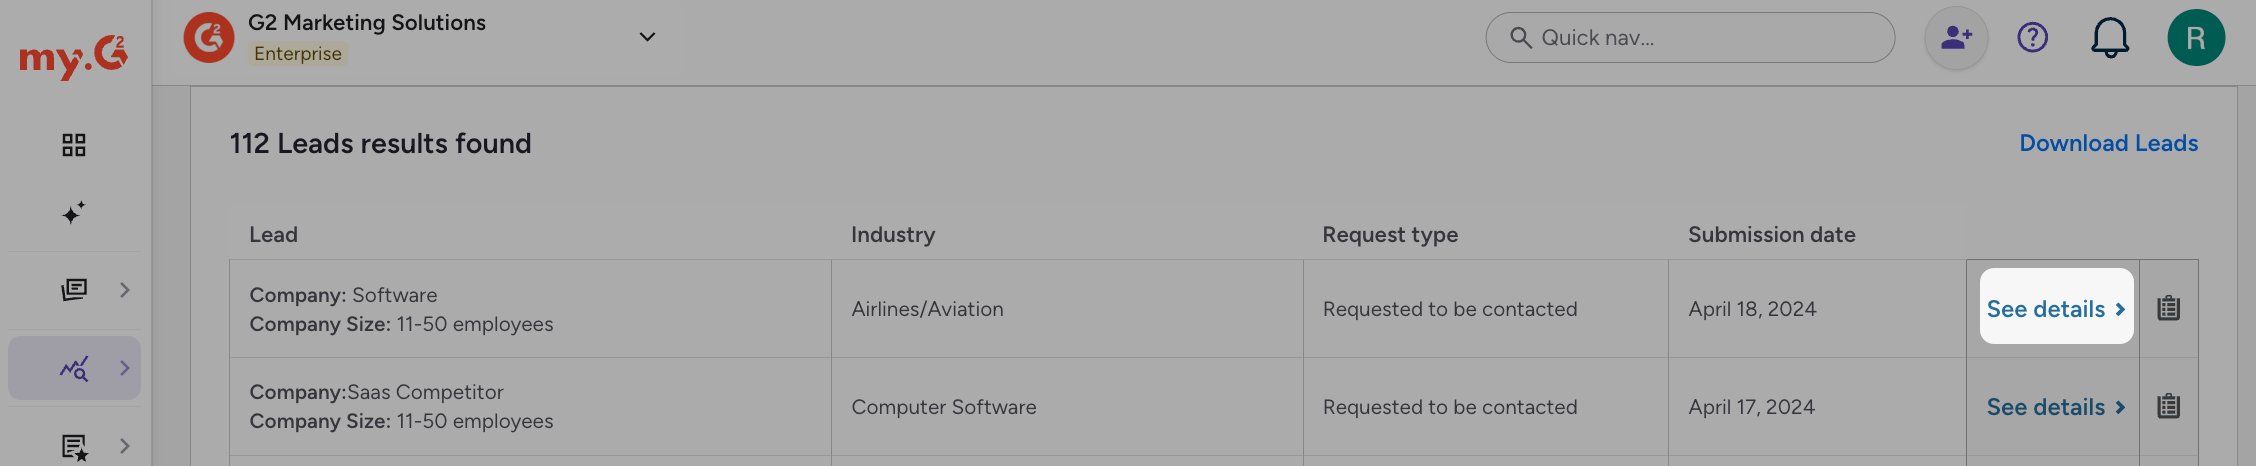
To export your leads to a CSV file, set the date range at the top of the page, then select Download Leads.
Lead form
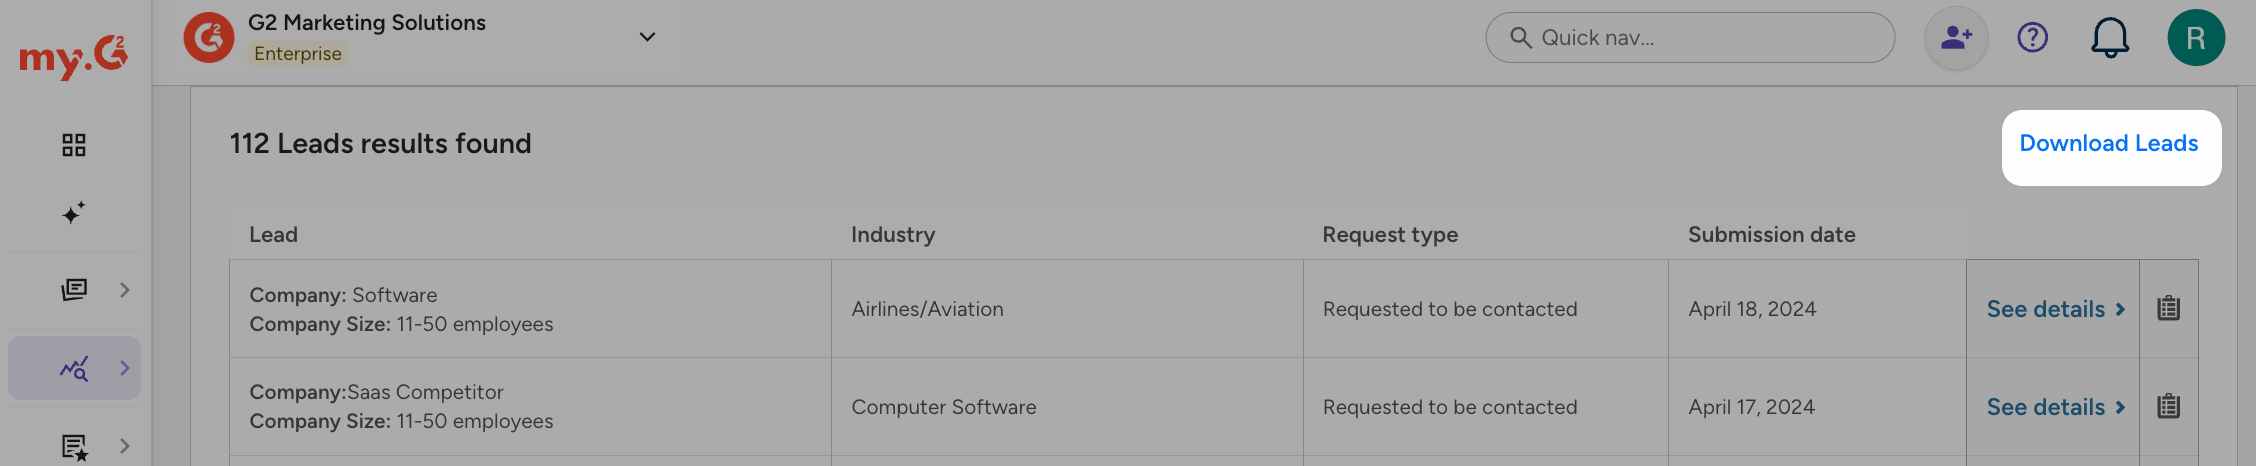
You can customize the default G2 lead form to collect more information from leads, add tracking information, or supply fields that third-party systems need. To make changes, go to my.G2, then select Listings > Manage Listings > G2 > Lead Form.
If you want to send leads to a third-party system such as Salesforce, set up a webhook after you edit your lead form. Webhooks make it easier to fit G2 leads into your sales and marketing workflows.
Standard lead form fields
Most standard fields can’t be removed. You can only change whether the Phone Number field is required.
When a buyer opens a lead form, G2 checks the buyer’s IP address against a third-party intent provider’s system. If the IP address matches a known organization, G2 removes fields such as Company, Company Size, and Industry from the form. When you receive the lead, G2 fills in those fields with details from the IP address match.
The G2 lead form includes these standard fields:
| Field | Is it required by G2? | Notes about the field |
|---|---|---|
| First Name | Y | |
| Last Name | Y | |
| Business Email | Y | |
| Phone Number | N | This is the only standard field where you can change the requirement. Select the Required checkbox to require buyers to enter a phone number. Clear it to make the field optional. |
| Company | Y | |
| Company Size | Y | Buyers must choose one of these options:
|
| Industry | Y | Buyers choose an industry from a dropdown. |
| Message | N | This free-text field appears only when the buyer opens the form from certain entry points, such as the Contact CTA. You can’t remove this field, but buyers don’t have to fill it in. |
| Country | Y | G2 collects the buyer’s location from their IP address. G2’s Privacy Policy covers this data collection. |
Custom lead form fields
Custom fields let you ask buyers for more information and add your own tracking information to the lead form. Tracking information is especially useful if you send leads to another system through webhooks.
To add custom fields to your lead form:
-
On the Lead Form tab, select Add Field.
-
(Optional) In the new field row, select the Required checkbox to make the field mandatory.
-
Enter a name in the Label field. G2 fills in the API Name from the label.
If you paste a field name from a third-party system, the generated API name might not match it exactly. For example, extended underscores might convert to shortened underscores.
-
From the Field Type dropdown, choose one of these options:
- Text Field: Buyers enter free-form text.
- Menu: Buyers choose one option from a list you provide. Enter one option per line.
- Checkbox: Adds a checkbox to the form.
- Hidden: Buyers don’t see this field. Use it to add tracking information specific to your organization, and enter the value in Field Value.
Changes should appear on the lead form on your G2 product profile immediately.
Examples of custom lead form fields
The custom fields you add depend on what your organization wants to collect and track, and on what a third-party system needs if you set up a lead webhook.
For example, add a question about the buyer’s job title. Use the Text Field type so buyers can enter any answer, which saves you from listing every possible job title.

To ask how many people in the buyer’s organization might use your product, use the Menu type and offer ranges of users.

To track leads from a specific campaign, add a tracking code. Use the Hidden type to set a default value for every submission that has meaning within your organization.

Privacy policy settings
The lead form links to G2’s Privacy Policy by default. You can also add a link to your organization’s privacy policy and a pre-built statement that tells buyers how you’ll use their information.
If you add your own privacy policy, buyers must select a checkbox to acknowledge it before they can submit the lead form.
To add your own privacy policy and pre-built statement to the lead form:
- Enter a link to your organization’s policy in the Privacy Policy URL field.
- Choose the G2-provided privacy policy statement that best describes how you’ll use the buyer’s information.
- Select the Privacy Policy Active? slider so it turns blue. This adds your privacy policy to the lead form.
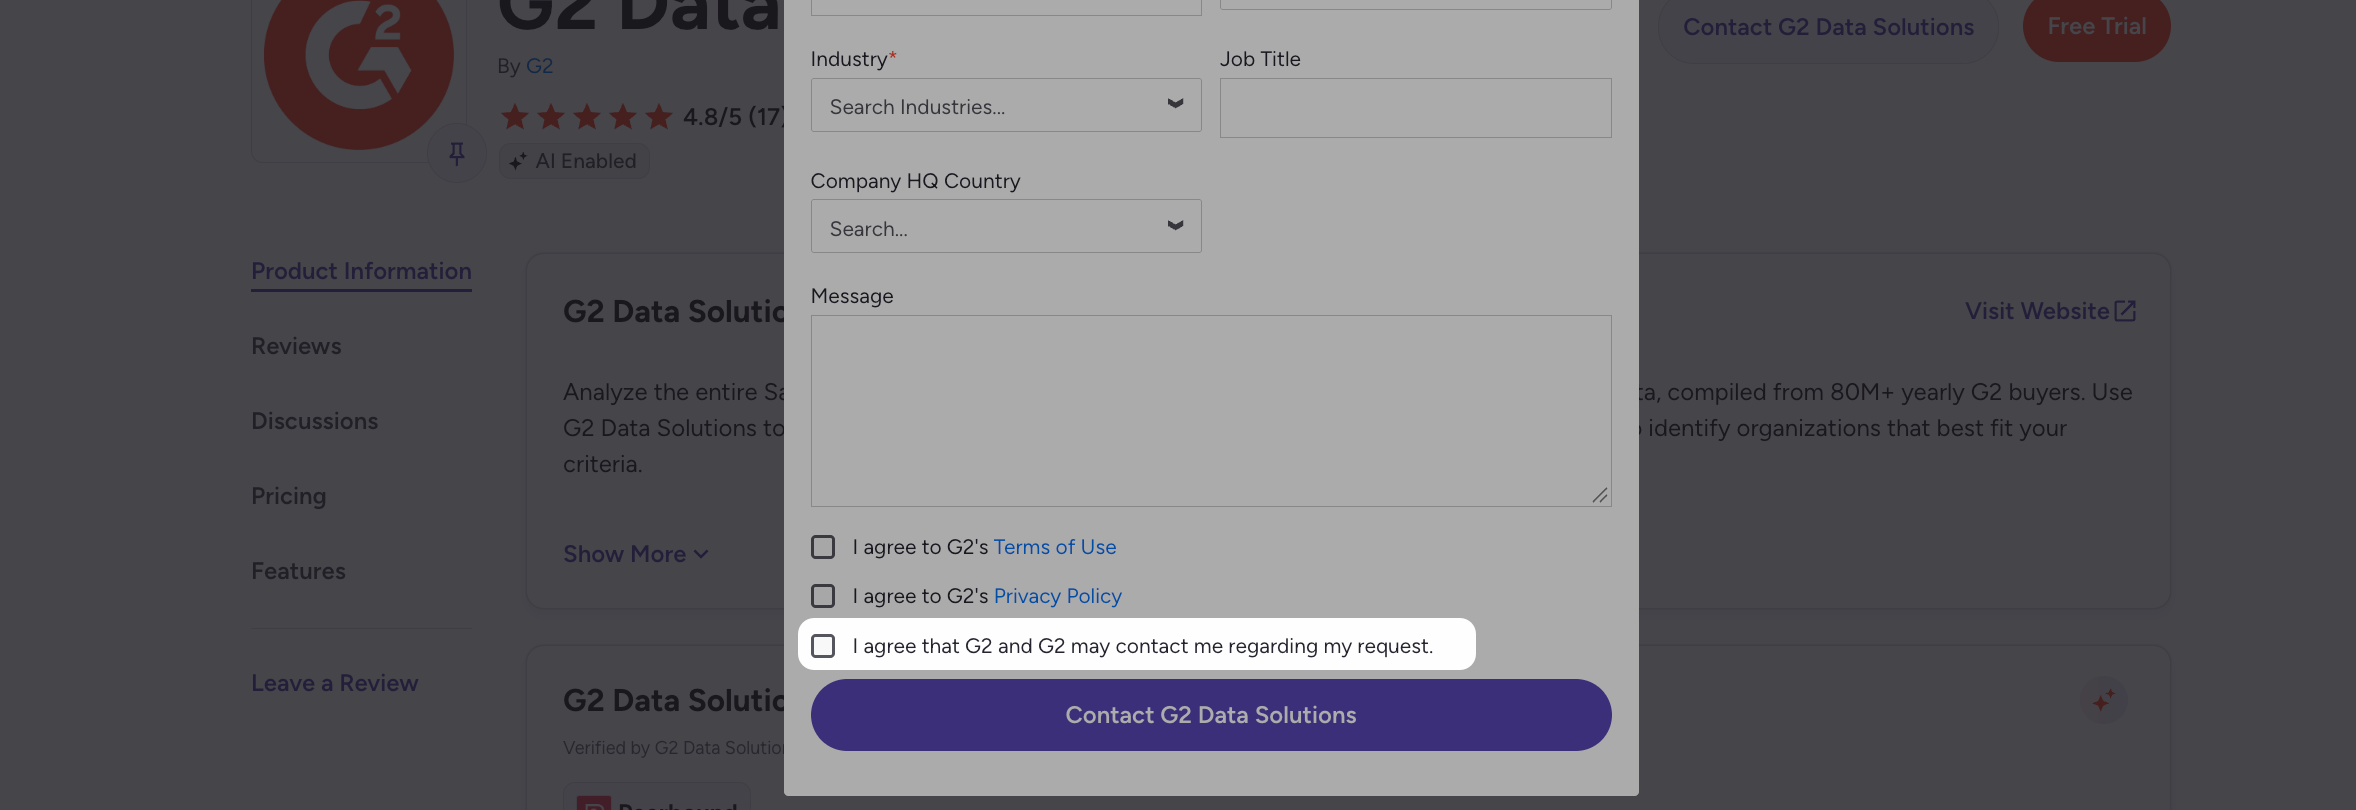
Your privacy policy link and statement should appear on the lead form immediately. G2 also adds the API field is_privacy_compliant to the details you receive with every lead submission.
Lead emails
G2 sends lead email notifications to your G2 admins. To notify other people or groups in your organization who aren't G2 admins, add their email addresses in the Lead Emails settings.
To manage who receives lead emails, go to my.G2, then select Buyer Activity > Leads. In the Lead Emails panel, select Manage.
To add recipients:
- Select Add Lead Email.
- Enter the email address of the person or group that should receive lead notifications.
- Repeat steps 1 and 2 to add more addresses.
To remove an email address, select the trash icon next to it.
Each time a buyer submits your lead form, the addresses you added should receive a notification email right away.
To test notifications, submit a lead form on your G2 product profile. The email should arrive in less than five minutes.
If an address doesn’t receive the email, check your email provider’s spam filter settings and make sure it accepts G2 emails.
Lead webhooks
In the context of G2 leads, webhooks enable you to automatically take leads submitted via your G2 product profile page and send them to third-party systems such as Salesforce and HubSpot.
Webhooks can be used to send G2 leads data nearly instantly after a buyer submits your leads form, which means that your sales and marketing teams can work a new lead immediately.
The process to set up webhooks for G2 leads is specific to the third-party system that you plan to use. Generally, the set-up process follows this general pattern:
- Identify a endpoint URL for the third-party system
- Match the API field names between your G2 lead form and your third-party system form
- Potentially set up hidden custom fields for your G2 leads form that supplies needed information to the third-party system
G2 has tested and supplied instructions specifically for the following third-party systems:
You can also set up leads for Marketo via G2's integration. You do not have to enable Buyer Intent for Marketo if you prefer to only receive leads data.
To set up webhooks for other third-party systems, review the system’s own documentation and use G2’s documentation as an example of how to complete the process.
CTA settings
Add call-to-action (CTA) buttons to your G2 product profile to send buyers directly to your own webpages without submitting a G2 lead form.
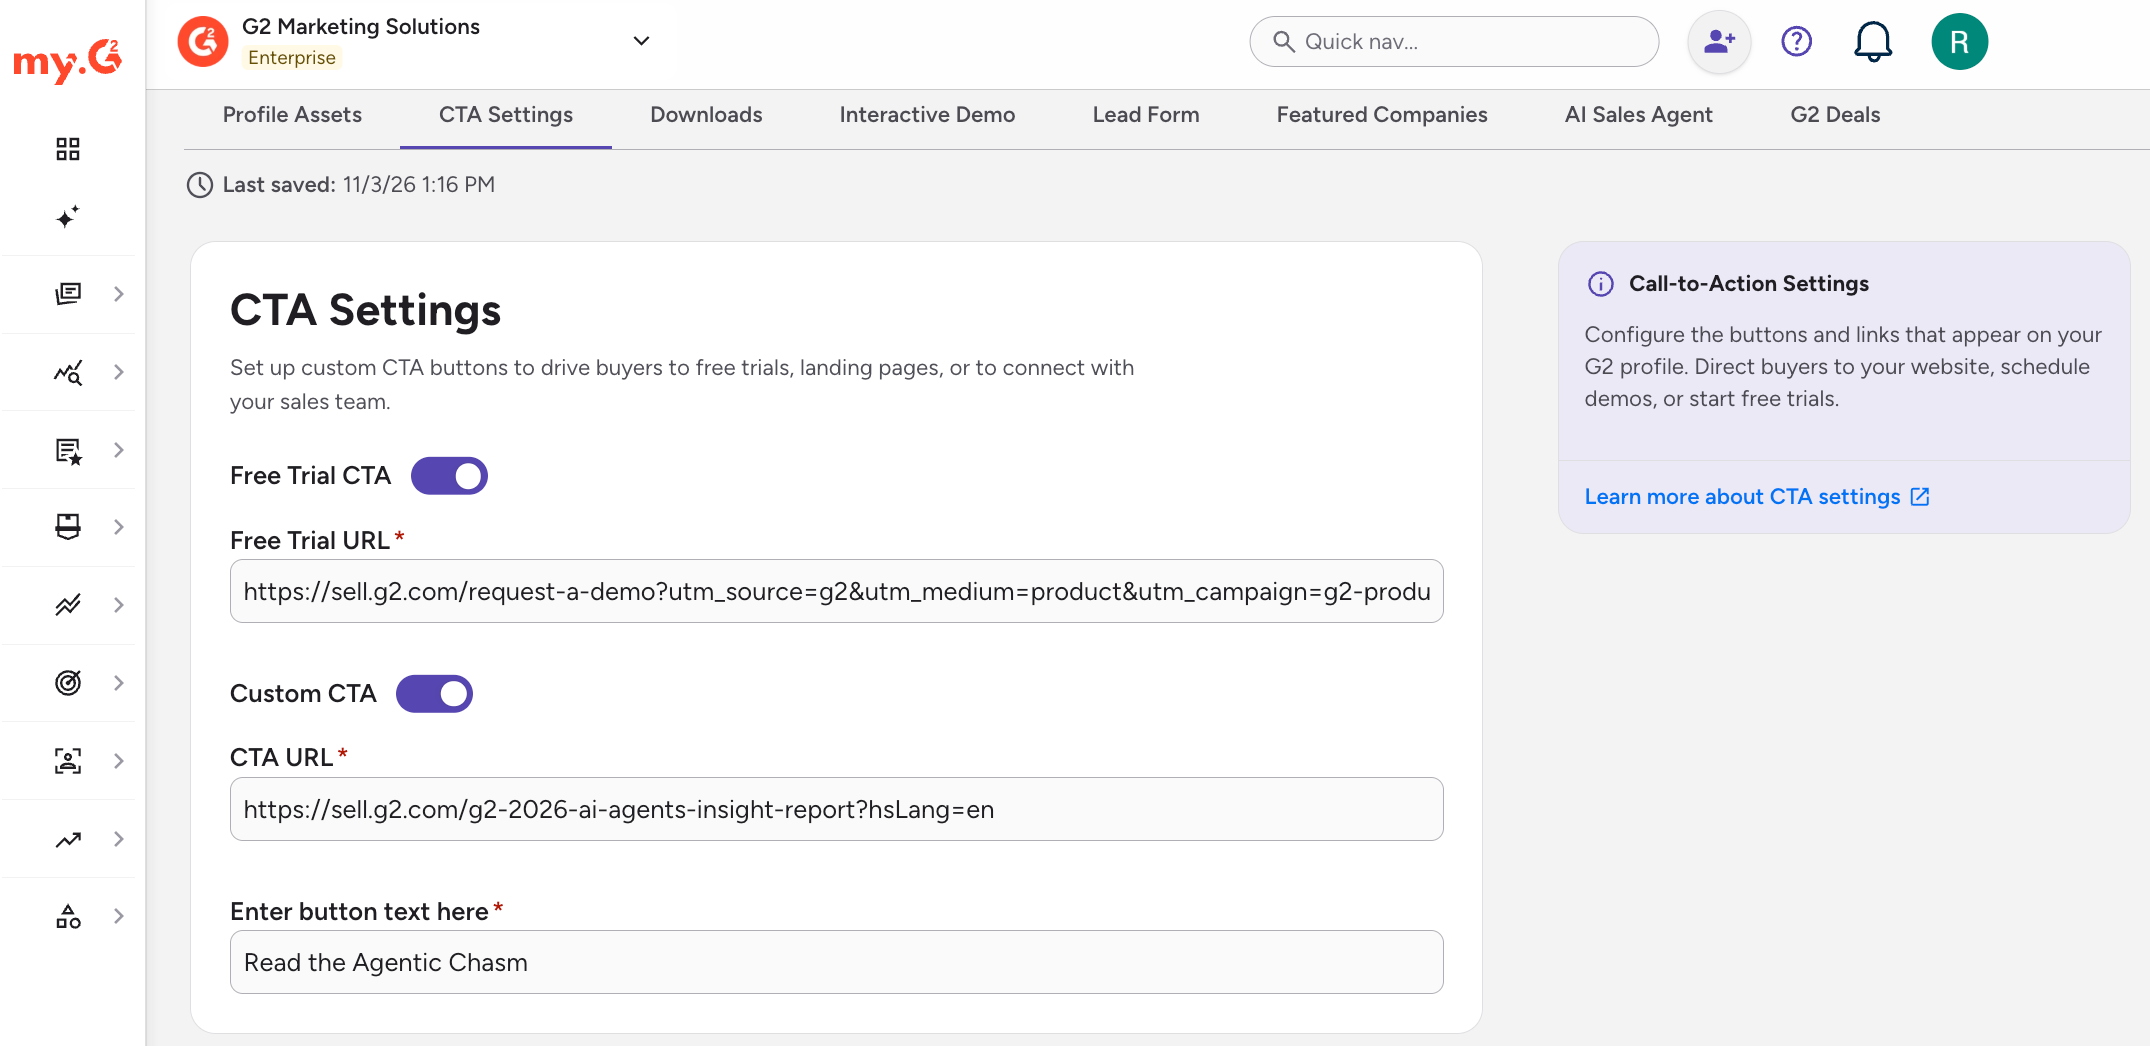
Consider adding a UTM tracking code to the URLs for both the Free Trial CTA and the Custom CTA so you can track the traffic these buttons generate. To set UTM parameters for your product and company website URLs, see UTM Params.
To add CTAs, go to my.G2, then select Listings > Manage Listings > G2 > CTA Settings. This page offers two CTA options: the Free Trial CTA and the Custom CTA.
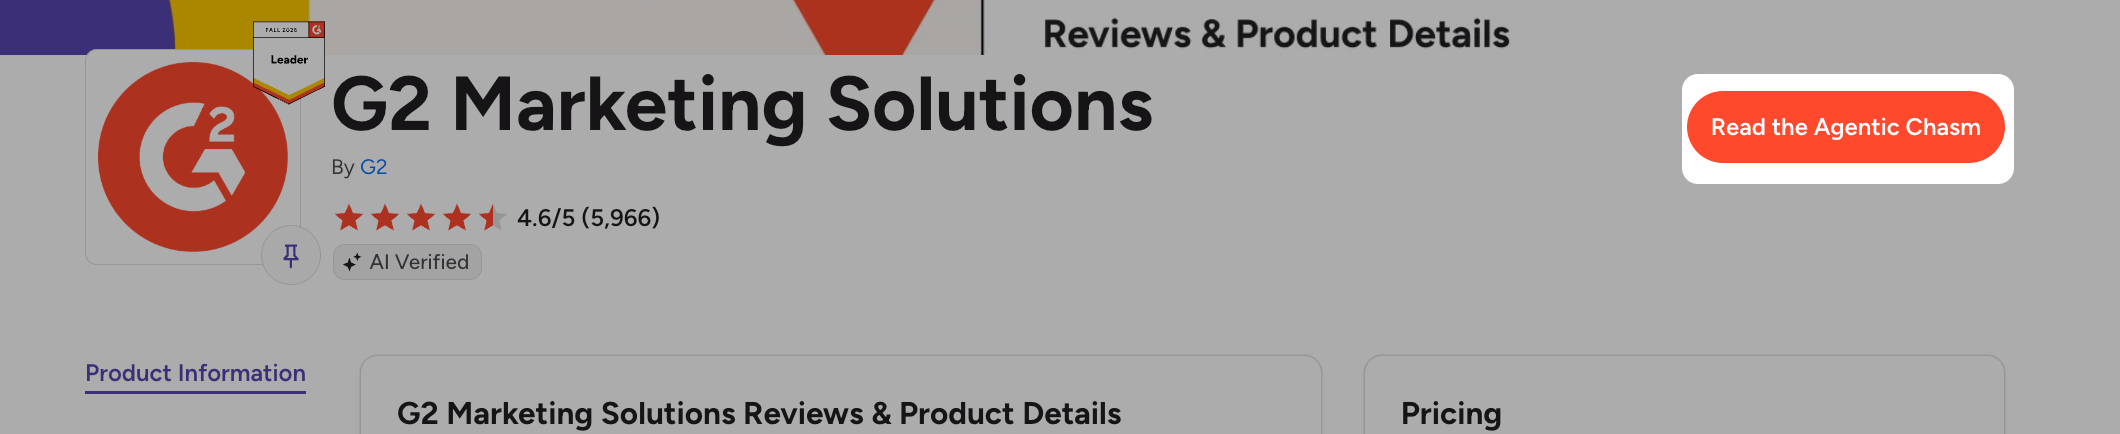
When you enable both options, the Custom CTA replaces the Free Trial CTA on your product profile, so only the Custom CTA button appears.
Other G2 pages still show the Free Trial CTA button.
Free Trial CTA
The Free Trial CTA adds a Try [your product name] free button to the top right of your G2 product profile. It also adds a Try for free button to your product listing on G2 category, comparison, and alternatives pages.
Use it to send buyers to a free demo environment or a demo sign-up form.
To add the Free Trial CTA:
- In the Free Trial URL field, enter the URL of the page where you want to send buyers.
- Set the Free Trial CTA slider to ON.
The following image shows the Free Trial CTA on a G2 product profile page.

The following image shows the Free Trial CTA on a G2 product comparison page.

Custom CTA
The Custom CTA adds a button with your own text and URL to your G2 profile, so you can send buyers to any webpage.
You can connect the Custom CTA to AWS Marketplace. When enabled, buyers who select the button go to the AWS Marketplace checkout page to complete their purchase.
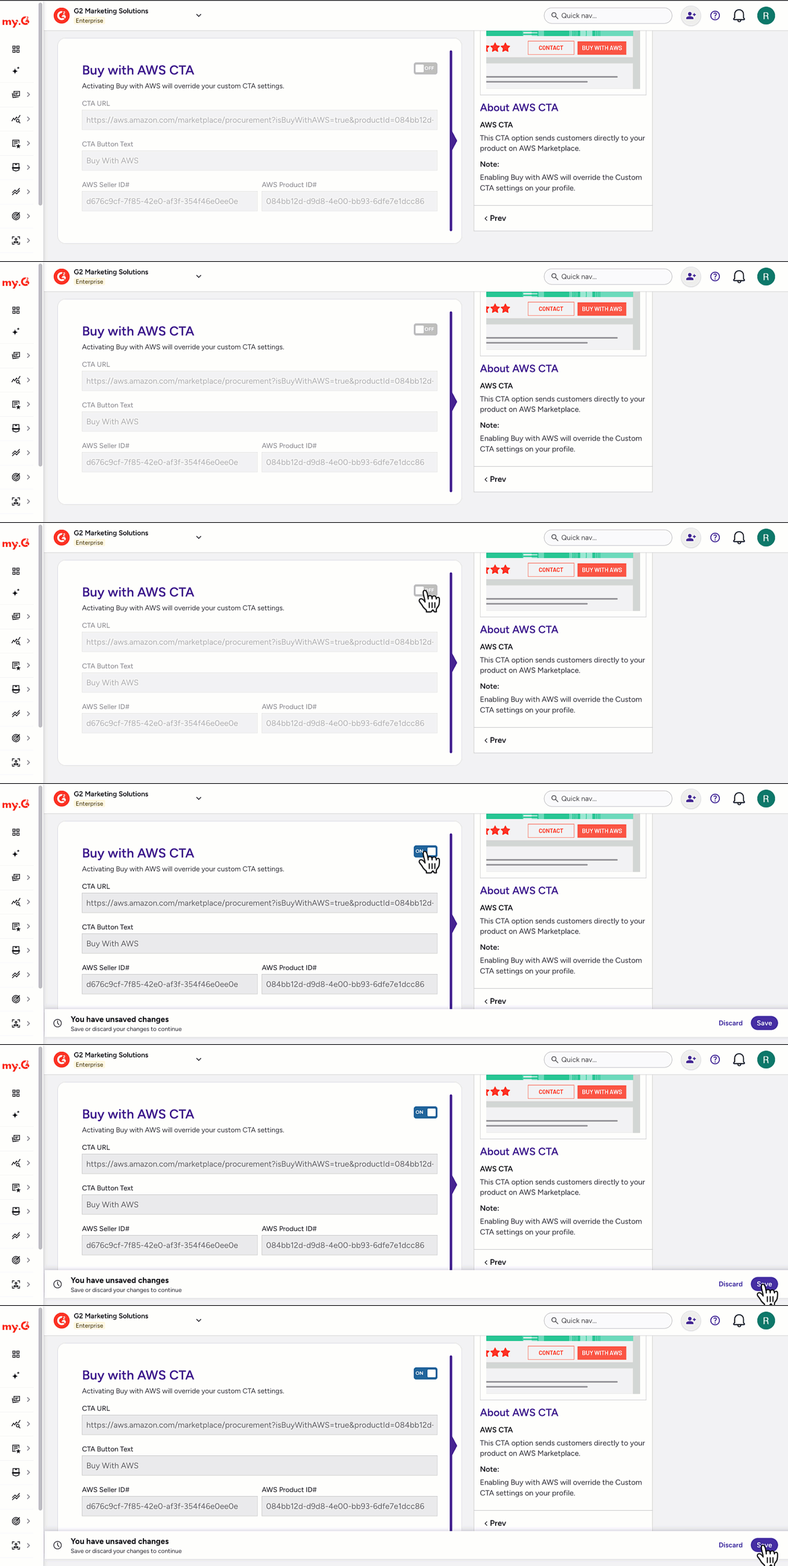
All purchasing actions are completed through AWS Marketplace, with charges appearing on the buyer’s AWS bill.
To add a custom CTA to your G2 profile:
-
Go to my.G2, then select Listings > Manage Listings > G2 > CTA Settings.
-
Under Custom CTA, enter the destination URL in the CTA URL field and the button text in the Enter button text here field.
-
Set the Custom CTA slider to ON.
-
(Optional) In the Buy with AWS CTA panel, set the slider to ON. The CTA URL, CTA Button Text, AWS Seller ID#, and AWS Product ID# fields fill in automatically from your AWS product listing.
To enable the Buy with AWS CTA, your G2 profile must be mapped to an AWS Marketplace listing. If it isn’t, contact your G2 representative.
Turning on Buy with AWS overrides your current custom CTA settings. Turning it off restores your previous custom CTA configuration.