Access to G2 CRM Connector for Salesforce must first be provisioned by your G2 representative. If you have not yet discussed G2 CRM Connector with your G2 representative, please contact them before proceeding.
This page details every step you need to take to implement G2 CRM Connector for Salesforce.
Before getting started
The full implementation process should be completed by your organization's Salesforce admin. During the implementation process, you will:
- Install the G2 managed package to create the custom objects in your Salesforce environment.
- Create a dedicated Integration User account, which will be used to authenticate G2's access to your Salesforce environment.
- Configure G2 CRM Connector for your Salesforce environment.
- Assign G2 licenses and permission sets to your Salesforce users.
Before proceeding with the following steps, make sure that you’ve received the following information from your G2 representative:
- The G2 managed package installation URL(s)
Refer to the Installation URLs for G2's managed package section for more information.
- Your API connection URL
- A Read / Write API token and a Read Only API token
To implement this integration, your Salesforce user account must have a System Administrator profile.

Implementation instructions are for Salesforce Lightning. To switch from Classic to Lightning, select Switch to Lightning Experience from the header of any Salesforce page.

Adding G2 IP addresses to your Salesforce allowlist
G2 sends data to Salesforce from a fixed set of IP addresses. Salesforce blocks traffic from unknown sources. Adding these IP addresses ensures that data is transferred only from trusted G2 systems. This is a required security step.
Required G2 IP addresses
Add the following IPv4 addresses as trusted IP ranges. Use the same value for the start and end IP when adding a single address.
| IP address | Purpose |
|---|---|
3.226.1.59 |
Inbound connection from G2 systems |
54.243.110.203 |
Inbound connection from G2 systems |
Adding G2 IP addresses to organization-wide trusted IP ranges
- Log in to your Salesforce production environment with an administrator account.
- Select the Setup icon, then select Setup.
- In Quick Find, enter Network Access, then select Network Access.
- Select New.
- For Start IP Address, enter
3.226.1.59. For End IP Address, enter3.226.1.59. Enter a short description, then select Save. - Repeat step 5 for
54.243.110.203.
Some Salesforce organizations enforce additional IP restrictions at the profile level or through Connected App policies. If your org uses these settings, work with your Salesforce admin to apply the same G2 IP addresses in those locations.
1. Install the managed package
G2 CRM Connector is implemented via a Salesforce managed package, which allows G2 to push updates as new features are released.
Installation URLs for G2's managed package
You might opt to demo the implementation process in a Salesforce sandbox before installing in production. G2 offers a unique managed package for both sandbox and production Salesforce environments.
Production
https://login.salesforce.com/packaging/installPackage.apexp?p0=04tKh000001zrkA
Sandbox
https://test.salesforce.com/packaging/installPackage.apexp?p0=04tKh000001zrkA

To install the managed package:
- In a private browser window, navigate to the managed package installation URL appropriate for your Salesforce environment, then log in to Salesforce using your admin credentials when prompted.
- Choose an installation option, then select Install. G2 recommends installing the managed package for All Users.
Selecting Install for Specific Profiles enables you to assign either No Access or Full Access permission sets according to specific Salesforce profiles, such as Marketing or Sales roles, across an organization.

You should only use this if you are an experienced Salesforce admin. For more information on permission sets for the G2 CRM Connector for Salesforce, refer to step 7.
- Grant G2 access to your Salesforce environment by selecting the Yes, grant access to these third-party web sites checkbox, then select Continue to begin installing G2's custom objects.
Depending on your Salesforce environment, the installation process can take up to one hour. You will receive an email notification when the managed package installation is complete.
2. Create a dedicated Integration User and assign a G2 license
G2 strongly recommends using a dedicated Integration User profile to authenticate G2's access to your Salesforce environment.
While it’s possible to connect an existing user account to this integration, creating a dedicated Integration User makes it easier to troubleshoot Salesforce issues and ensures that you won’t experience any interruptions in data flow when a user leaves your organization.
For more information, refer to Salesforce's The Value of Having A Dedicated Salesforce Integration User blog post.
To create a dedicated Integration User:
- In the top-right corner of any any Salesforce page, select the Setup icon, then select Setup.
- From the left sidebar, search for and select Users to access the All Users page.

- Select New User, then enter a Last Name, Alias, Email, Username, and Nickname for your Integration User.
Make sure that your team can access the email you associate with the Integration User. In the following example, we created an Integration User with the email address of sysadmins@g2.com.
All other fields listed in step 3 do not impact this integration.

- Assign a User License of Salesforce, and a Profile of Standard User.

- Select Save to create your Integration User.
To assign a G2 license to the Integration User:
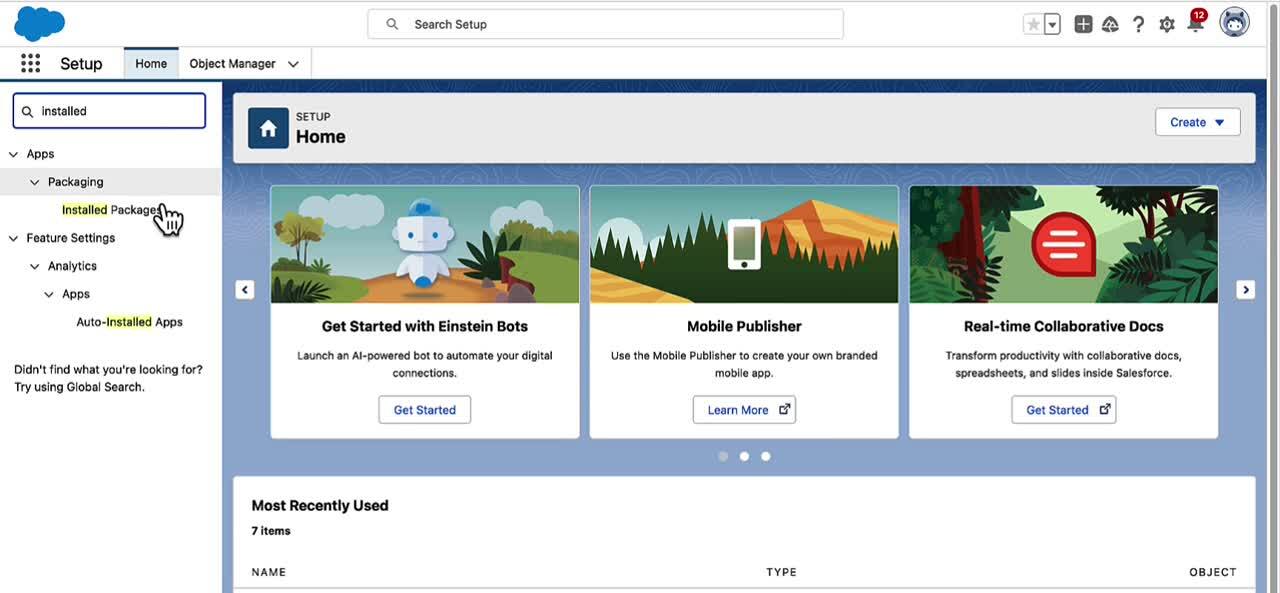
- From the left sidebar, search for and select Installed Packages.
- Find the G2 CRM Connector package, then select Manage Licenses.

- From the Licensed Users panel, select Add Users, choose your Integration User, then select Add.

After assigning a G2 license, log in to the email you associated with the Integration User to access the Salesforce welcome email, then follow the prompts to set a password for your Integration User.

3. Authenticate G2's access to Salesforce
G2's access to update the custom objects in your Salesforce environment is authenticated by connecting the Integration User you created in the step 2.
You will use the API connection URL provided by your G2 representative in this step.
Your API connection URL should follow the format https://my.g2.com/salesforce_app_configurations/{product id}.

To connect G2 CRM Connector to your Salesforce environment:
- In a new private browser window, open the API connection URL link provided by your G2 representative.
- Select Connect to Salesforce or Connect to Salesforce Sandbox depending on your Salesforce environment, then log in using the credentials for your Integration User.
If your Salesforce environment uses a custom domain, you might be required to enter it before logging in.

Your custom domain precedes my.salesforce.com in the URL for your Salesforce environment. For example, in the following URL:
https://empathetic-wolf-178aau-dev-ed.trailblaze.my.salesforce.com/
The custom domain is empathetic-wolf-178aau-dev-ed.trailblaze.
- Verify that the email associated with your Integration User appears within the prompt, then select Allow to complete the user authentication process. If successful, you will be returned to the API connection URL landing page and no error messages will be displayed.
If the Allow Access? prompt displays your Salesforce admin email instead of the Integration User email, try logging out of Salesforce, opening a new private browser window, then repeating steps 1-3.
4. Run the Configuration Assistant
The G2 Configuration Assistant helps verify several critical steps to ensure the implementation process is successful, including:
- Verifying the Integration User has been authenticated
- Assigning an integration license and G2 permission set to the Integration User
- Validating your organization’s API tokens
The Configuration Assistant can only be run by a Salesforce admin with the G2 Full Access permission set. If you cannot access the Configuration Assistant, refer to the Assign G2 permission set section for more information.
To run the Configuration Assistant:
- In a private browser window, log in to your Salesforce environment using your personal Salesforce admin credentials.
- From the App Launcher, search for and select G2 Config Assistant. If you successfully completed the previous implementation steps, you will be brought to the Permission Set Assignment tab.
If you were brought to a different tab, follow the troubleshooting instructions in the Configuration Assistant.
- Select Assign Automatically to assign the G2 Full Access permission set to your Integration User.

- From the API Tokens Validated tab, enter the Read / Write and Read Only API tokens provided by your G2 representative into the corresponding fields, then select Continue to complete the implementation process.

If you encounter issues at any step in the Configuration Assistant, select Contact G2 Support and describe your issue. G2's Support team will contact you for further assistance.
Post-implementation management
In order for a member of your organization to access G2 data in Salesforce, they need to be assigned both a G2 CRM Connector license and a G2 permission set.
You must be a Salesforce admin to assign licenses and permission sets.
Assigning G2 licenses
G2 CRM Connector includes 5,000 licenses by default. If your organization requires more licenses, please contact G2 Support for assistance.

To assign licenses to Salesforce users:
- In the top-right corner of any any Salesforce page, select the Setup icon, then select Setup.
- From the left sidebar, search for and select Installed Packages.
- Find the G2 CRM Connector package, then select Manage Licenses.
- From the Licensed Users panel, select Add Users, select the checkbox for each user you want to assign a license, then select Add.
You can check the number of licenses in use from the Installed Packages page.

Assigning G2 permission sets
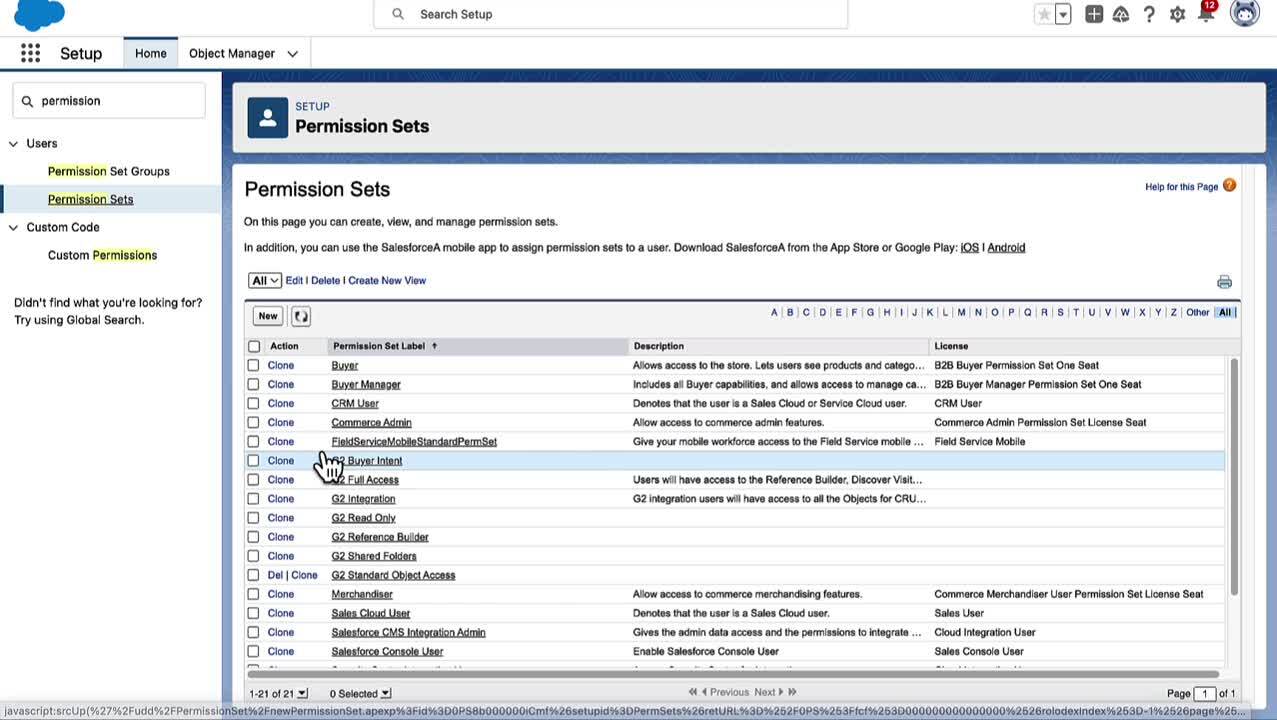
G2 offers several permission sets to help you provide the correct access level to G2 data for different roles in your organization.
| G2 permission set | Access level |
|---|---|
| G2 Full Access | Complete access to G2 CRM Connector. To create a new report, you need the following additional permissions: Account Access, Create and Customize Reports, and Report Builder permissions. |
| G2 Read Only | |
| G2 Buyer Intent | G2 Read Only access, plus access to the G2 Buyer Intent tab. |
| G2 Reference Builder | G2 Read Only access, plus access to the G2 Reference Builder tab. |
| G2 Shared Folders | G2 Read Only access, plus the ability to create shared folders in the G2 Folders tab. |

To assign G2 permission sets to Salesforce users:
- In the top-right corner of any any Salesforce page, select the Setup icon, then select Setup.
- From the left sidebar, search for and select Permission Sets.
- Search for and select the G2 permission set you want to assign, then select Manage Assignments.
- Select Add Assignments, then select the checkbox for each user you want to add.
- Select Next, then select Assign to complete the permission set assignment.