G2 Partner Dashboard enables you to seamlessly map products from G2 to your marketplace, generate API tokens, and view analytics to gain deeper insight into how G2’s content is performing in your marketplace.
Your G2 representative will provide you an access link for the dashboard.
Analytics
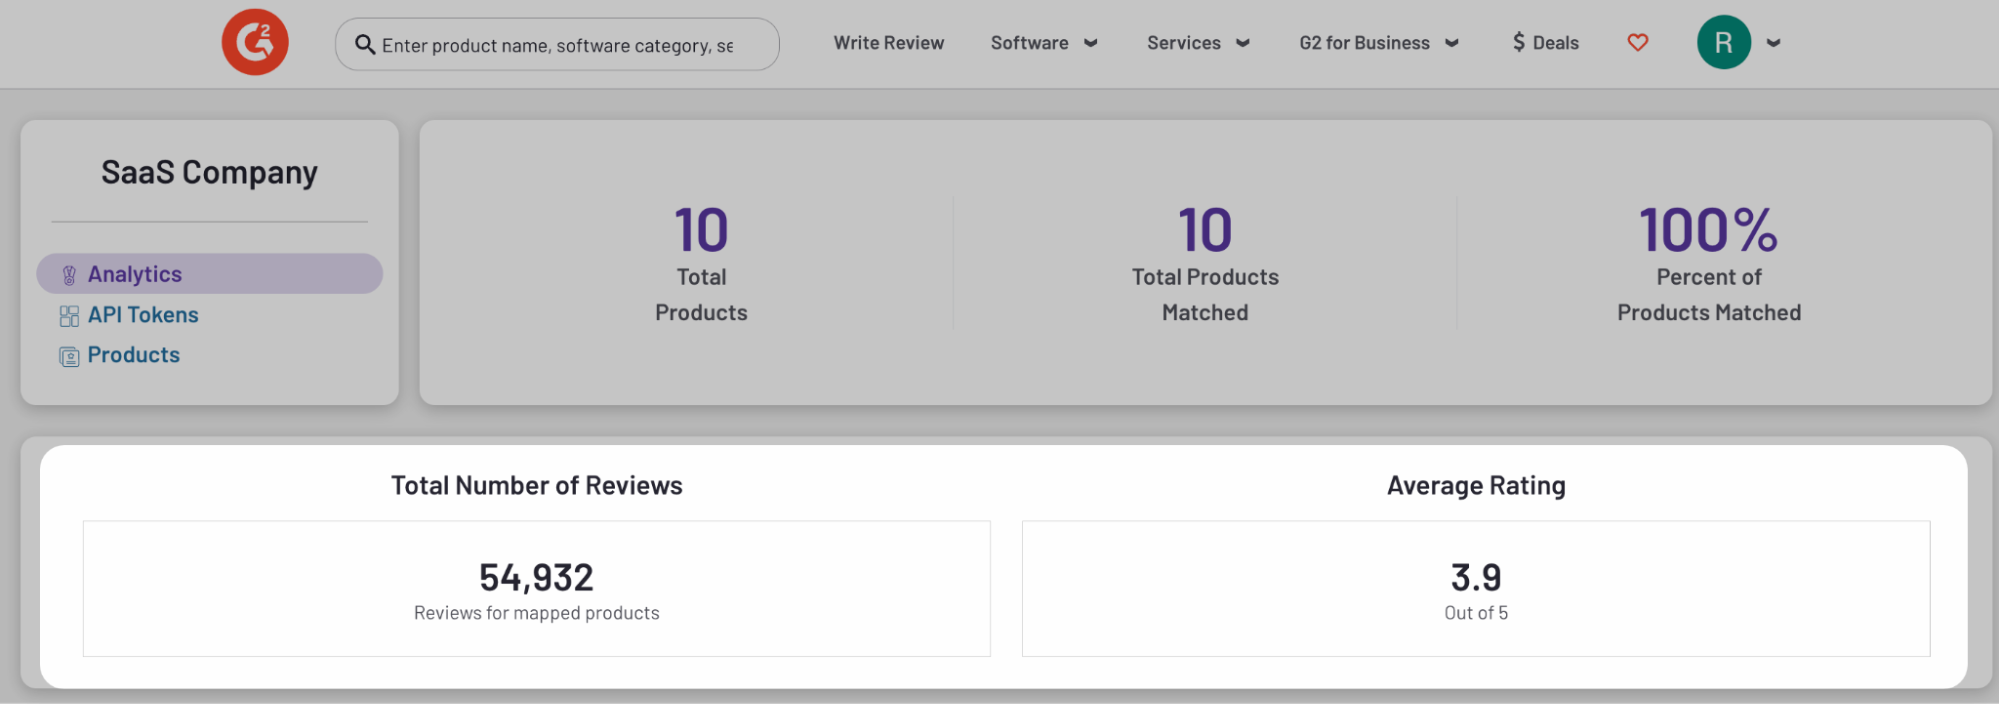
The Analytics tab provides an overview of your total mapped products, total reviews, and percentage of products mapped so you can easily understand how much of G2’s content is syndicated to your site.
G2 reports several data points to provide general insights from your mapped products, including total number of reviews for mapped products and average rating.
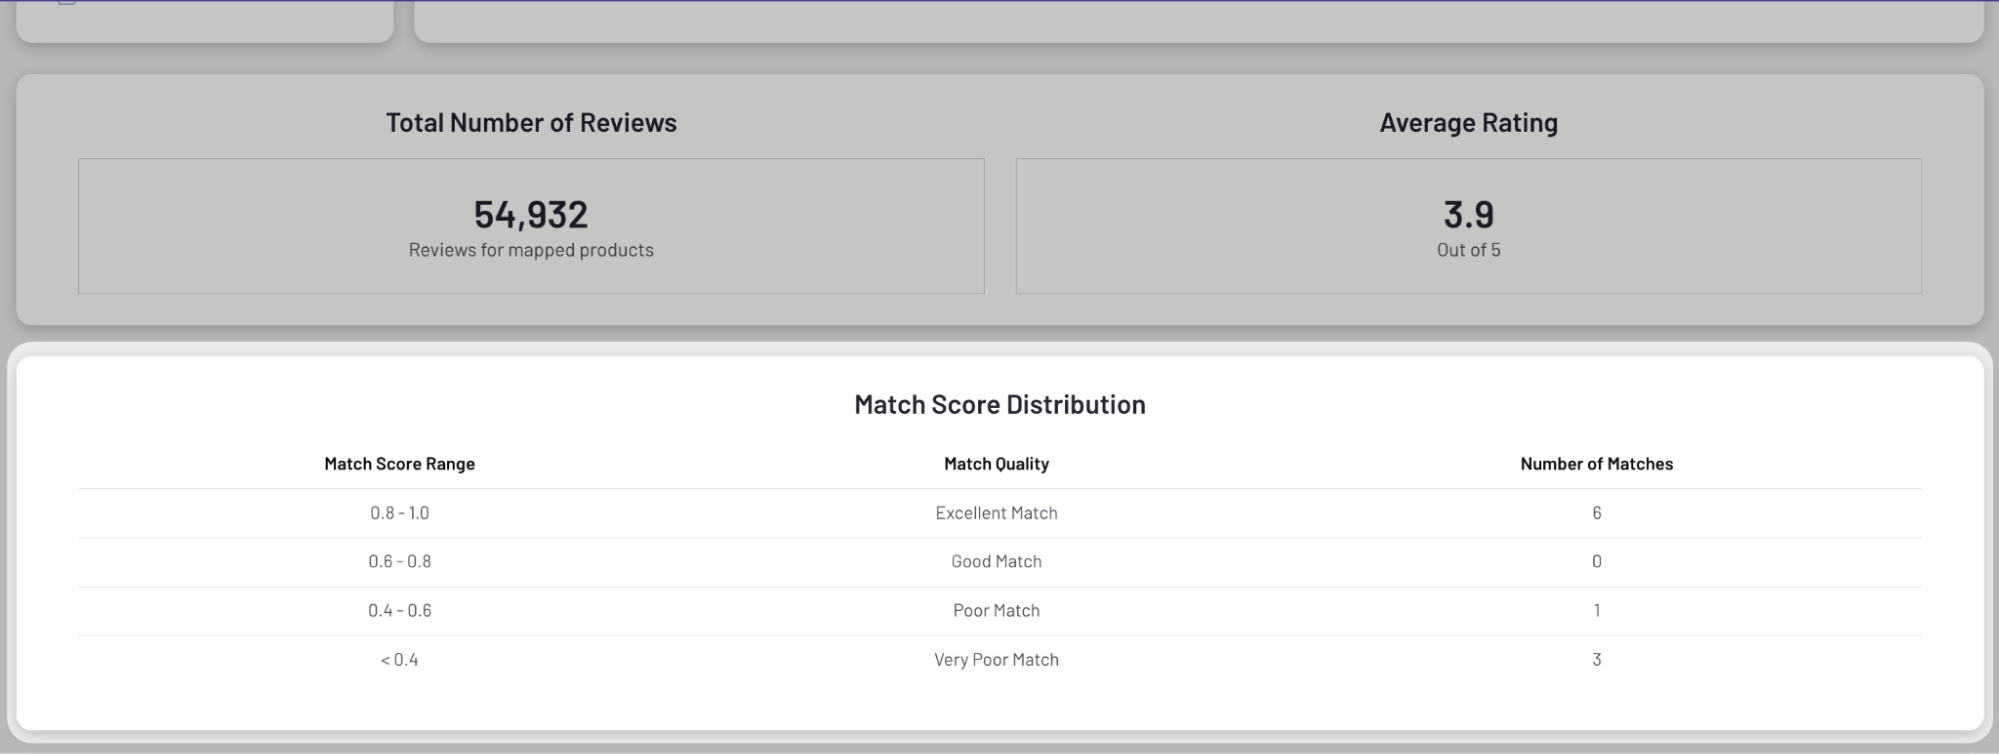
The Match Score Distribution table reports the number of matches within specific quality ranges to provide a high-level overview of the mapping success between G2-listed products and products in your marketplace.
The Number of Reviews table displays the top eight by review volume. Hover over an interval on the horizontal axis to reveal the associated values and review count.
API Tokens
The API Tokens tab enables you to to generate new tokens, and view the access roles associated with each token. Your API tokens are used to authenticate requests for G2 syndicated content.
To learn more about G2’s review syndication API, refer to the Get started with G2 review syndication documentation. For a full list of endpoints available to G2 partners, refer to G2's partner API reference documentation.
To create a new API token:
- Enter a Label for your API token and select Generate a token. G2 adds your token to the API Tokens panel.
Access roles are dependent upon your subscription. For more information, please contact your G2 representative.
Products
The Products tab enables you to easily add and manage product mappings without using G2’s syndication API. Mappings can then be used to retrieve data via the API or obtain the UUID for the G2 product to make API calls.
Product Matching
The Product Matching panel enables you to manually define individual product mapping relationships or bulk upload products for mapping via G2’s match algorithm.
To manually map products:
- Select the product name from G2’s marketplace in G2 Product.
- Enter your marketplace’s unique ID for the product in Product ID.
- Optionally enter the product’s Vendor and URL.
To bulk map products via CSV:
- Generate a CSV of your products.
In order to map products in your marketplace to products listed on G2, you must first provide a CSV containing basic information that G2 can use for mapping.
Your CSV must contain the following headers:
partner_product_id: The unique identifier for the product in your marketplace.partner_product_name: The product's name.partner_product_vendor_name: The product vendor's name.partner_product_url: The URL for the product's website. This is not the URL for the product's listing on your marketplace.
For example, when populated with data, your CSV should contain the following structure:
| partner_product_id | partner_product_name | partner_product_vendor_name | partner_product_url |
|---|---|---|---|
| 001 | Super Widget | Acme Corporation | www.superwidget.com |
| 002 | Mega Gadget | Beta Company | www.megagadget.com |
| 003 | Hyper Device | Gamma Industries | www.hyperdevice.com |
You can only upload 50,000 products at a time. Once uploaded, the file status is displayed within the CSV Upload History table.
- Select Upload CSV.
G2’s automated product matching process uses the partner product data, vendor, and domain to find product matches in G2. All results will have a match score that reflects the confidence of the match, with 0 being low confidence and 1 being high confidence.
CSV Upload History
The CSV Upload History table displays a list of CSV files that you have uploaded, including the date the file was uploaded, and the status of the file.
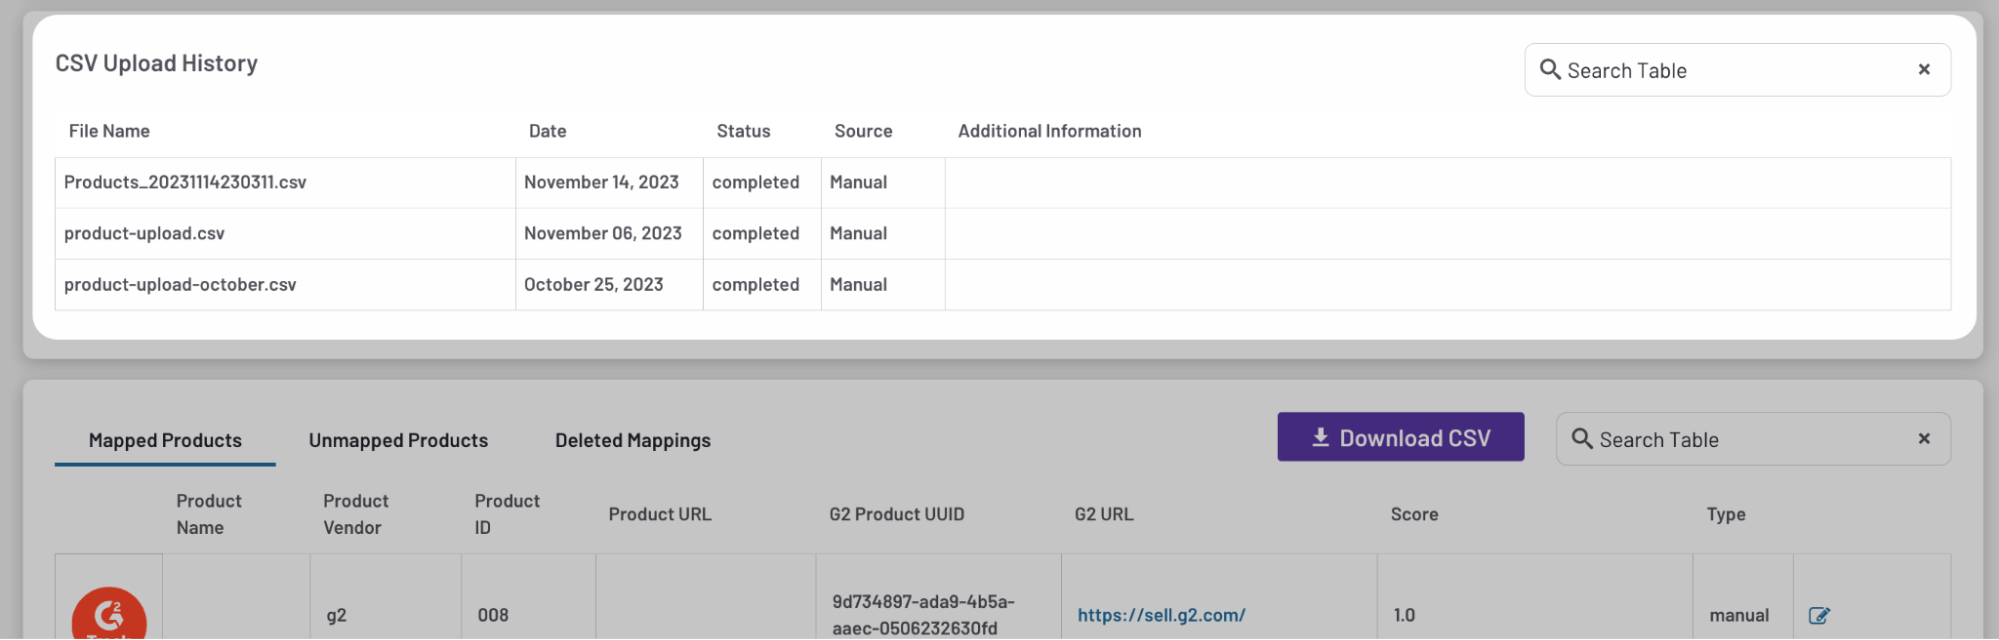
A Source of Manual indicates the CSV file was uploaded through the dashboard, while a source of Automated indicates the CSV was uploaded via the API. If an upload fails, further details can be found in the Additional Information field.
Mapped products
G2 displays your mapped product details within the products table, including G2’s UUID for the product, the product URL on file with G2, match score, and type of upload.
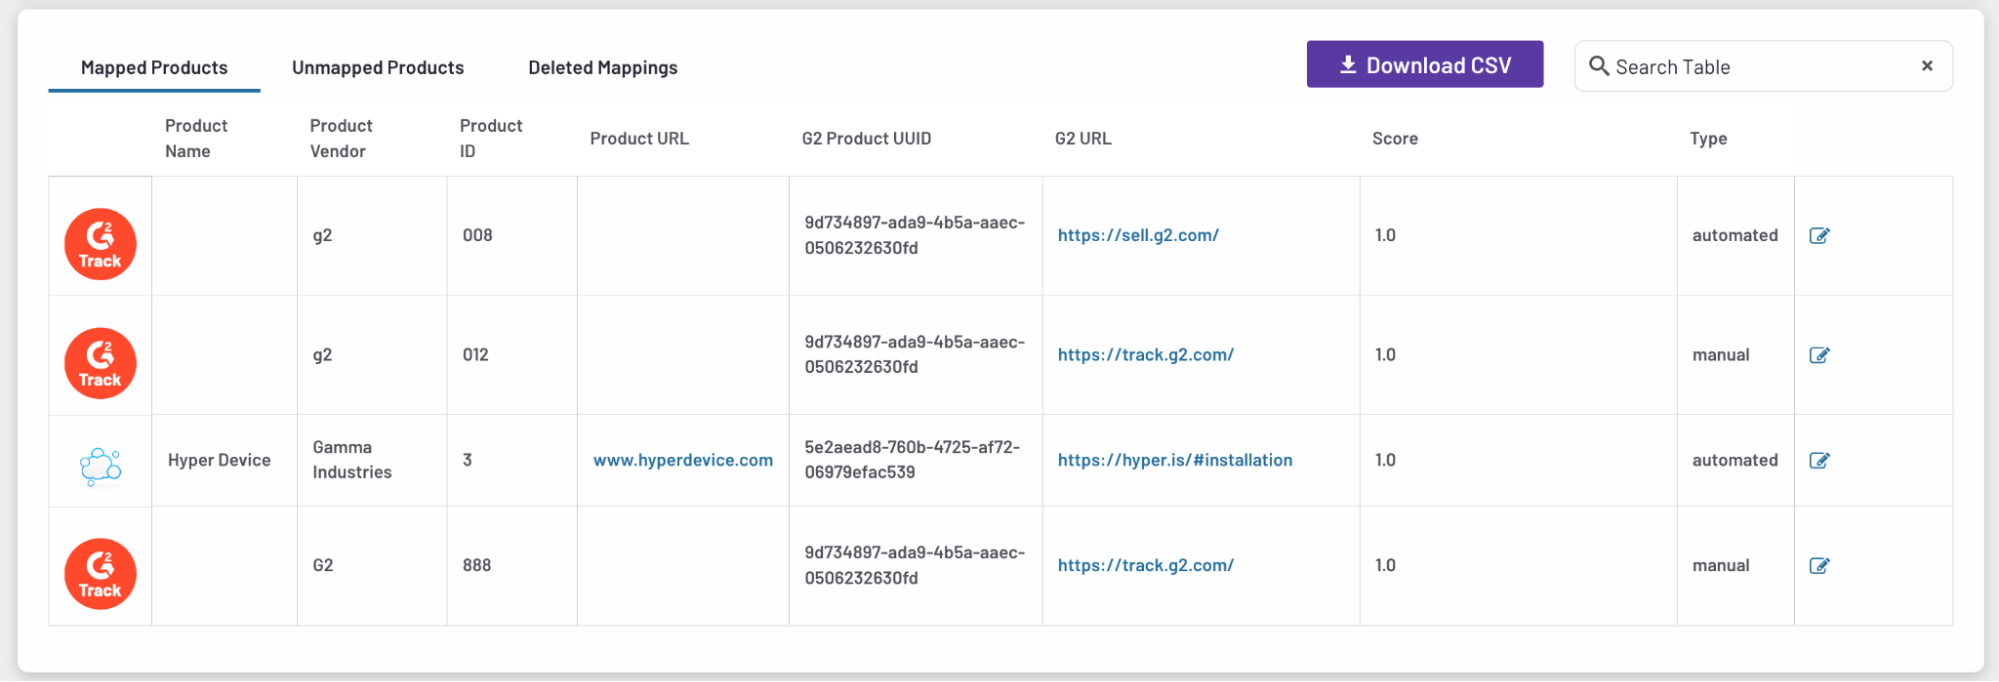
To access mapped, unmapped, and deleted product details, select the corresponding tabs.

Edit or delete a product mapping by selecting the Edit icon.
You can optionally export the full data set for each tab by selecting Download CSV.