G2 Deals enables you to advertise exclusive software deals to buyers actively researching your product or category on G2.

By leveraging G2’s platform as the world’s most trusted software marketplace, G2 Deals increases your visibility with high-intent buyers and helps you stand out from your competition.
Basics of G2 Deals
Where your Deal appears on G2
G2 promotes your Deal on your product profile, your category page, and on the G2 Deals page. G2 also advertises the G2 Deals page across G2.com and other marketing channels.
When a buyer interacts with your Deal, they are brought to a custom landing page on your website to claim your offer. For more information on the requirements for your Deal and custom landing page, refer to the Requirements for a G2 Deal section.
Product profile
G2 highlights your exclusive deal in the Pricing section of your product profile to encourage buyers to take action when their intent is high.

Category page
When buyers are browsing your product category, G2 showcases a shortened version of your deal to help your product stand out from competitors.

G2 Deals page
The G2 Deals page aggregates all offers on G2. Buyers searching for exclusive deals can browse all Deals, or find Deals by product category.
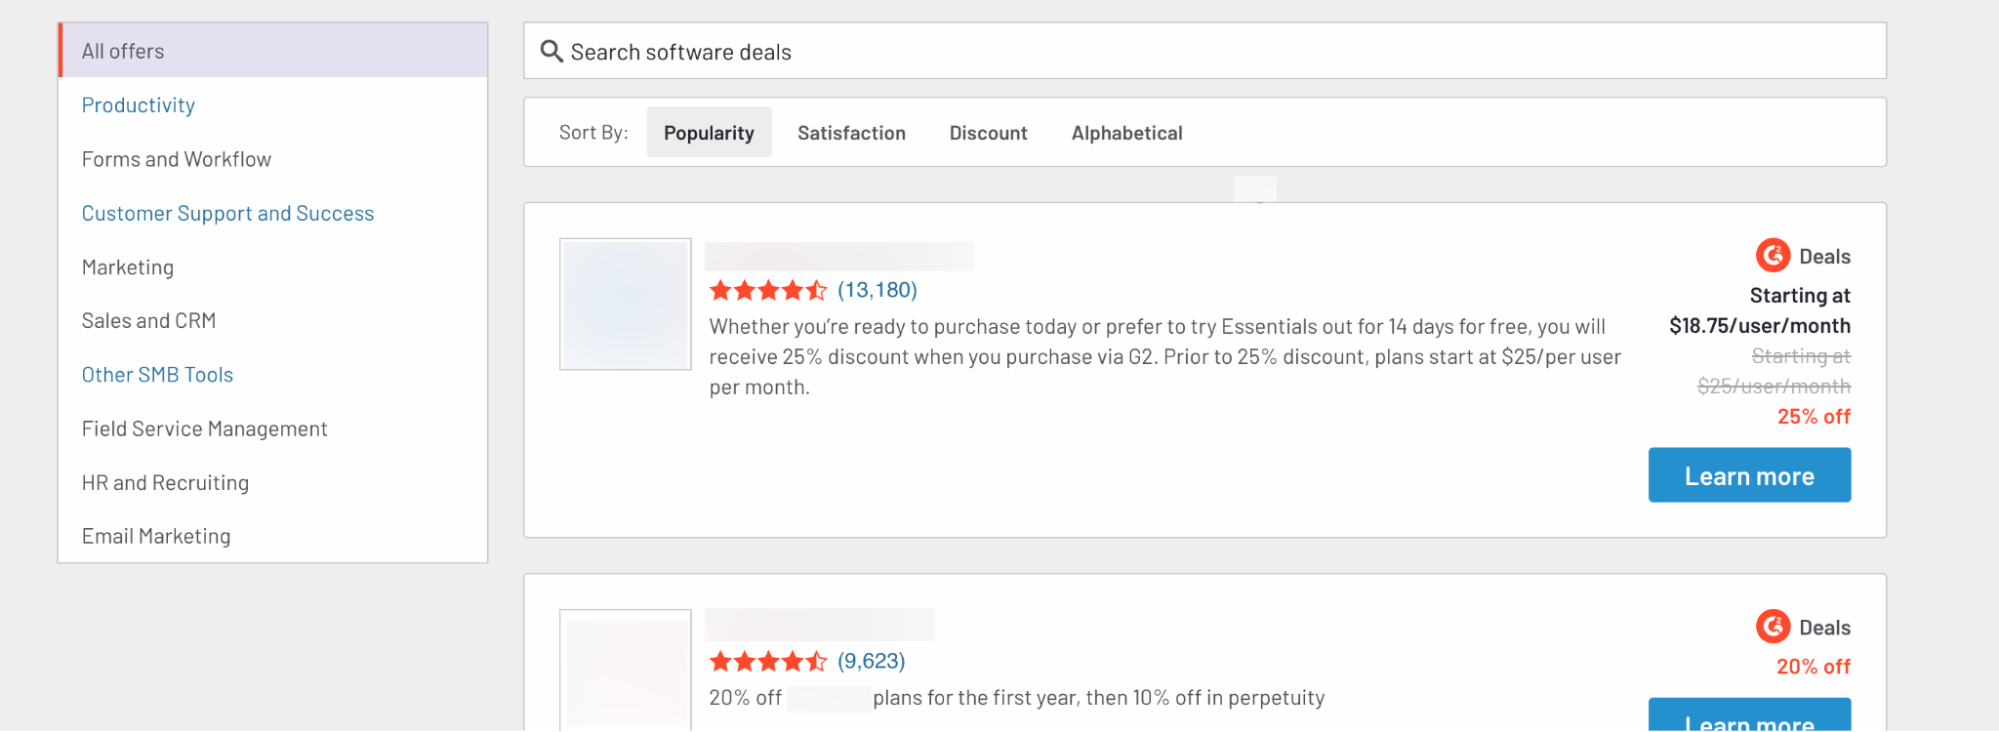
The G2 Deals page can be sorted using any of the following criteria:
- Popularity: Products with the highest number of reviews are displayed first.
- Satisfaction: Products with the highest star rating are displayed first.
- Discount: Products offering the largest percent discount are displayed first.
- Alphabetical: Products are displayed in alphabetical order.
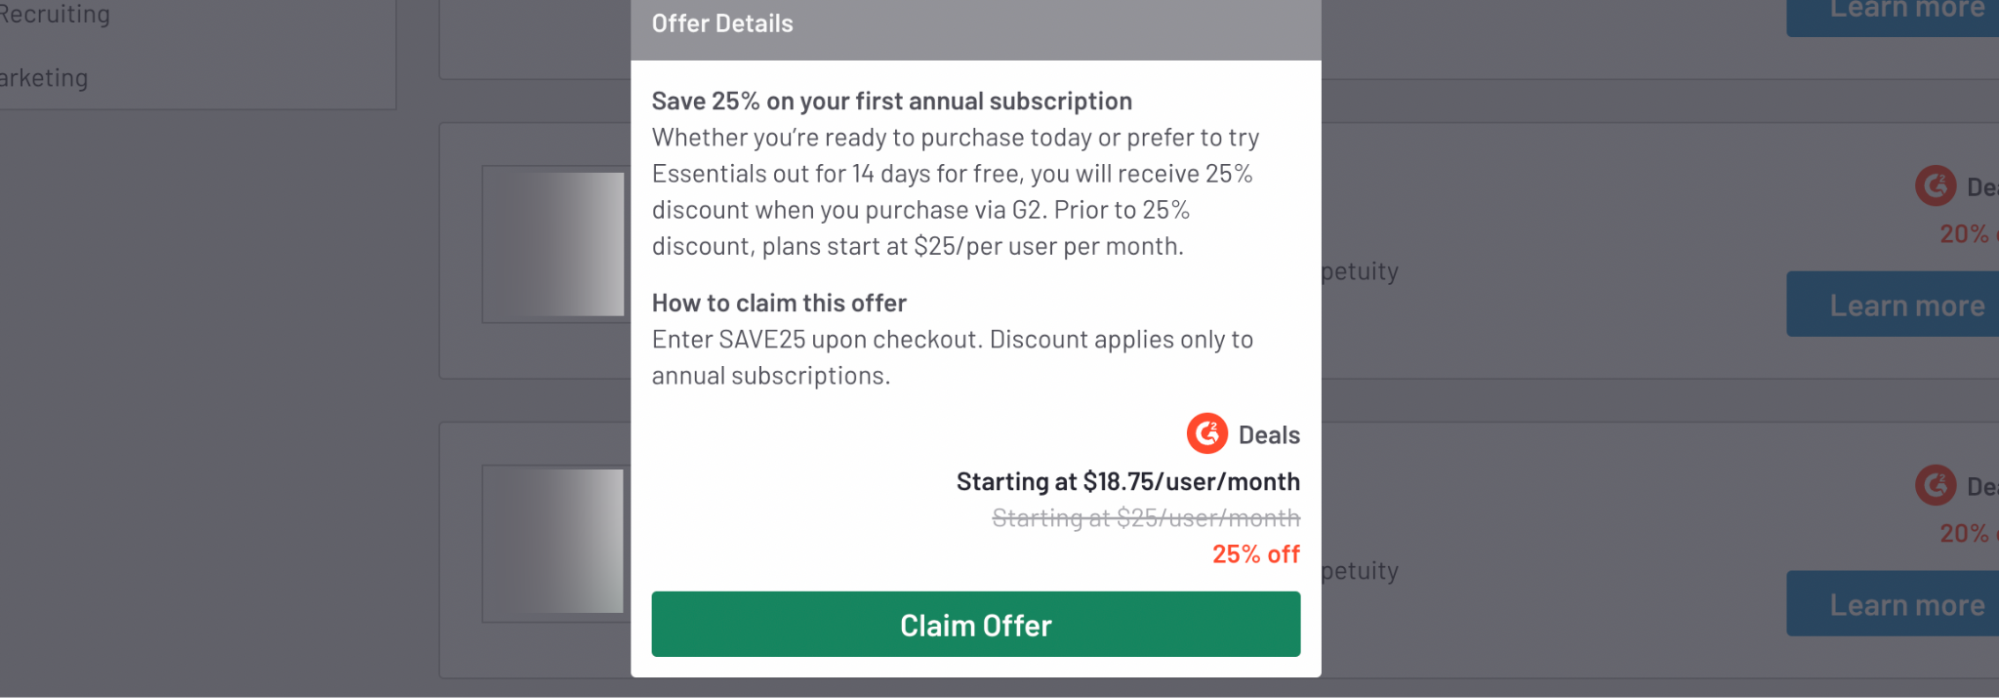
When a buyer interacts with your Deal, they are shown a popup containing the full details of your offer.
Requirements for a G2 Deal
Your Deal must meet the following criteria:
-
Your Deal provides a discount exclusive to G2 buyers.
Your offer should be unique to G2 but does not need to strictly discount a percentage off of your base rate – your Deal can include additional features for the same price.
-
Your Deal directs buyers to a custom landing page created specifically for G2 Deals.
When a buyer selects Claim Offer, they will be redirected to your custom landing page. To maximize conversion, your landing page should clearly direct buyers to your offer and include G2 branding.
-
Your Deal is self-service.
Your buyers must be able to claim your Deal directly from your landing page without interacting with a sales representative. Any transactions must be completed via credit card.
To maximize conversions, your Deal can start as a free trial that becomes a discounted paid offering after the trial period has elapsed.
-
Your landing page includes one of G2’s conversion tracking methods.
For more information, refer to the Enable analytics tracking section.
Creating a new deal
1. Determine your offer and create a custom landing page
Before getting started, make sure your offer meets the requirements for a G2 Deal and you’ve created a custom landing page.

2. Submit your deal for approval
After reviewing the requirements for a Deal and creating your landing page, you’re ready to submit your offer for approval. All Deals are manually reviewed and approved by a G2 representative within two business days.
If there are any questions related to your Deal submission, G2 will contact you directly via email.
To add a new deal:
- Go to my.G2, then navigate to Product Profile > G2 Deals.
- Select Add offer to access the New Offer editor.
- (Optional) Select the checkbox allowing G2 to activate your offer as soon as it is approved.

If you leave this checkbox unselected, you must manually activate your Deal after approval.
-
In the Offer Details section, enter the corresponding information into each field, then select Submit for Review.
Refer to the Example Deal section to visualize where each of the following fields appears on your live Deal.
Destination
Enter the URL for your custom landing page. When a buyer goes to claim your offer, they will be brought to this URL.
Title
Add a title for your deal. When a buyer interacts with your Deal on the Deals page, your title appears above the offer’s description.
Description
Describe the exclusive deal you’re offering to G2 buyers. Your description is the main text content of your Deal, and should clearly communicate the value of your offer to buyers.
Instructions
Tell your buyers how to claim your deal. Depending on how you’ve set up your landing page, you can instruct buyers to enter a discount code at checkout, or simply discount all transactions completed via your Deals landing page.
Offer value and Original value
Use these text fields to represent your offer based on how your organization typically prices your product.
In this example, we entered “Starting at $18.75/user/month” as the Offer value and “Starting at $25/user/month” as the Original value.
Offer discount
Enter the percent discount associated with your offer.
To ensure that your Deal is discoverable on the Deals page, G2 recommends including an Offer discount, even if your offer doesn’t directly discount a percentage off of your base rate. For example, if your Deal includes a free month when signing up for a one year subscription, your discount value is 1/12 , or approximately 8%.
Offers that do not include a percent discount value are automatically sorted to the bottom of the G2 Deals page.
Example Deal
Use the following image to reference where each field appears on your Deal.

3. Enable analytics tracking
Once your Deal is approved, you must choose your preferred method for tracking conversions.
To access your tracking options, go to my.G2, then navigate to Product Profile > G2 Deals. Select See details for your Deal, then scroll to the Enable Conversion Tracking section.
![]()
Your conversion tracker should only fire on the purchase confirmation page.
After implementing your tracking method, G2 recommends completing a test transaction to verify your tracker is functioning appropriately. If successful, your test transaction will appear in the Metrics section of your Deal.
Postback tracking
Postback tracking is the most reliable method of tracking Deals conversions and is commonly implemented using an affiliate marketing platform.
The steps required to set up postback tracking are specific to your affiliate marketing software. For more information on the general implementation process, refer to the Postback tracking implementation section.
If you don’t have access to an affiliate marketing platform and want to implement postback tracking, consult your web developer about sending GET requests to your postback URL to record conversions.
JavaScript tag and pixel tracking
G2 also offers two cookie-based options for conversion tracking: JavaScript or pixel tracking tags. Of these two options, the JavaScript tag is preferred.
You can implement either tag using a tag manager, such as Google Tag Manager, or by pasting the tag directly into the source code of your purchase confirmation page.
![]()
If using a tag manager, make sure to create a custom tag trigger that fires only on the purchase confirmation page.
Managing your deals
To access your Deals, go to my.G2, then Product Profile > G2 Deals. The List offers for your buyers includes both your Active and Inactive offers.
Modifying an active Deal
The Active Offer section displays your active Deal and includes a preview.

To update your Deal:
- From the Active Offer section, select See details.
- Enter your changes into the corresponding fields of the Edit Offer panel.
- Select Submit for review. Your changes will be reviewed by a G2 representative within two business days.
To deactivate your Deal, set the Active slider to OFF. Your Deal will immediately be delisted from G2.

Activating an inactive Deal
The Inactive Offers section includes your previously-active offers and any new Deals pending approval.

You can only have one active offer at a time. Reactivating a Deal from the Inactive Offers section immediately disables any offer that is currently active.
To reactivate a Deal:
- From the Inactive Offers section, select See details.
- Set the Active slider to ON. Your Deal will immediately become live on G2.
If you made any changes to your Deal before reactivating, G2 will review and approve your changes within two business days.
Analytics and reporting
To access conversion metrics for your Deal, navigate to my.G2, then Product Profile > G2 Deals. Select See details for the Deal, then scroll to the Metrics section.
G2 graphs the number of users who clicked Claim Offer and the number of users who completed the purchase.

By default, G2 reports data for the past six months. To modify this interval, select a default range, or enter a custom date range.
Postback tracking implementation
This section details the general steps required to implement postback tracking for your G2 Deal. For more information on alternative conversion tracking methods, refer to the Enable analytics tracking section.
Overview
When a buyer accesses your landing page, G2 assigns them a unique identifier called a distinctId. After the buyer completes the purchase process, your affiliate marketing software sends a request back to G2 containing this distinctId to indicate that they completed the purchase.
There are several ways to implement postback tracking depending on your specific affiliate marketing platform. The following instructions detail the general implementation process, which should be adapted to your specific platform.
1. Create an affiliate link template in your affiliate marketing software
Your affiliate link template will include the base URL for your landing page and a unique user identifier as a parameter in the URL, which is sometimes referred to as a click ID:
?unique_user_id={id}In this example, we chose unique_user_id as the unique identifier parameter. We also included {id} as the placeholder value for this parameter. G2 will insert a unique value into the {id} placeholder when a buyer interacts with your deal.
2. Update your landing page Destination URL in my.G2
After creating an affiliate link template, navigate to your Deal in my.G2 to update the Destination URL to match your template.
To update your URL:
- Go to my.G2, then navigate to Product Profile > G2 Deals.
- Select See details for your Deal.
- In the Destination field, add the unique identifier parameter that you defined in your affiliate marketing software, followed by an
=sign.
If this is the first parameter you’re adding to your URL, you must add a ? after the domain:
?unique_user_id=If you already have at least one parameter on your URL, you must add a & after the value for the previous parameter:
&unique_user_id=- Add
{{distinctId}}as the value for your parameter. You must enter{{distinctId}}as the value, regardless of the placeholder value you set in your affiliate marketing software.

When a buyer accesses your Deals landing page, G2 will replace {{distinctID}} in your Destination URL with a unique value for your user, such as:
?unique_user_id=87d32fdf-443a-49af-ad72- After updating your Destination URL, select Submit for review. Your updates will be approved within two business days.
3. Set your postback URL in your affiliate marketing software
Your affiliate marketing software will also require you to set a postback URL on your purchase confirmation page to record conversions.
To obtain your postback URL, navigate to your Deal in my.G2, then select Copy Finish URL from the Option 3: Postback Tracking section.

Your postback URL will resemble the following format:
https://tracking.g2crowd.com/funnels/87d32fdf-443a-49af-ad72?stage=finish&stype=offer?did=DISTINCT_ID
You should configure your affiliate marketing program to replace the DISTINCT_ID in your postback URL with the unique identifier that G2 inserts into your Destination URL.
For developers: Postback tracking via GET requests
This section details the general steps required to implement postback tracking via GET requests.
When a buyer navigates to your landing page, G2 appends a UUID to a query parameter in your landing page URL. After a buyer completes the transaction, you should send a GET request to your postback URL with their UUID.
1. Update your landing page URL in my.G2
Go to my.G2, then navigate to Product Profile > G2 Deals. In the Destination URL field, update your landing page URL to include the query unique_user_id={{distinctId}}.
When a buyer accesses your Deals landing page, G2 will replace {{distinctID}} in your Destination URL with a unique value for your user:
?unique_user_id=87d32fdf-443a-49af-ad722. Configure your GET request
When a buyer completes the transaction, you should send a GET request to your postback URL.
To obtain your postback URL, navigate to your Deal in my.G2, then select Copy Finish URL from the Option 3: Postback Tracking section.
Your postback URL will resemble the following format:
https://tracking.g2crowd.com/funnels/87d32fdf-443a-49af-ad72?stage=finish&stype=offer?did=DISTINCT_ID
When sending your GET request, you should replace the DISTINCT_ID in your postback URL with the UUID that G2 inserts into your Destination URL.
Your conversion tracker should only fire on the purchase confirmation page.
After implementing your tracking method, G2 recommends completing a test transaction to verify your tracker is functioning appropriately. If successful, your test transaction will appear in the Metrics section of your Deal.