G2 Developer Portal provides secure, self-serve access to API tokens, test environments, and documentation, enabling you to build and optimize with G2’s API.
Getting started
To begin using the Developer Portal, follow these steps to create an account and set up your organization:
- Navigate to G2 Developer Portal, then select Create an account.
- Verify your email.
- When prompted, enter your Organization Name and choose a unique Organization Slug.

Your organization slug becomes part of your Developer Portal URL (https://my.g2.com/developers/your-slug). If your desired slug is already taken, you will receive an error.
G2 recommends choosing a slug that closely matches your organization name or domain.
Once your organization is set up, use your organization-specific Developer Portal URL to log in at any time.
OAuth apps
The OAuth Apps tab enables you to register apps that connect to G2 and authenticate on behalf of users or organizations using a secure authorization process.
When to use an OAuth app
Use an OAuth app when your integration must access G2 data securely with user authorization.
Typical scenarios include third-party integrations, internal tools that need limited access to specific data, and authorization flows that need refresh tokens or long-lived access.
Registering an OAuth app
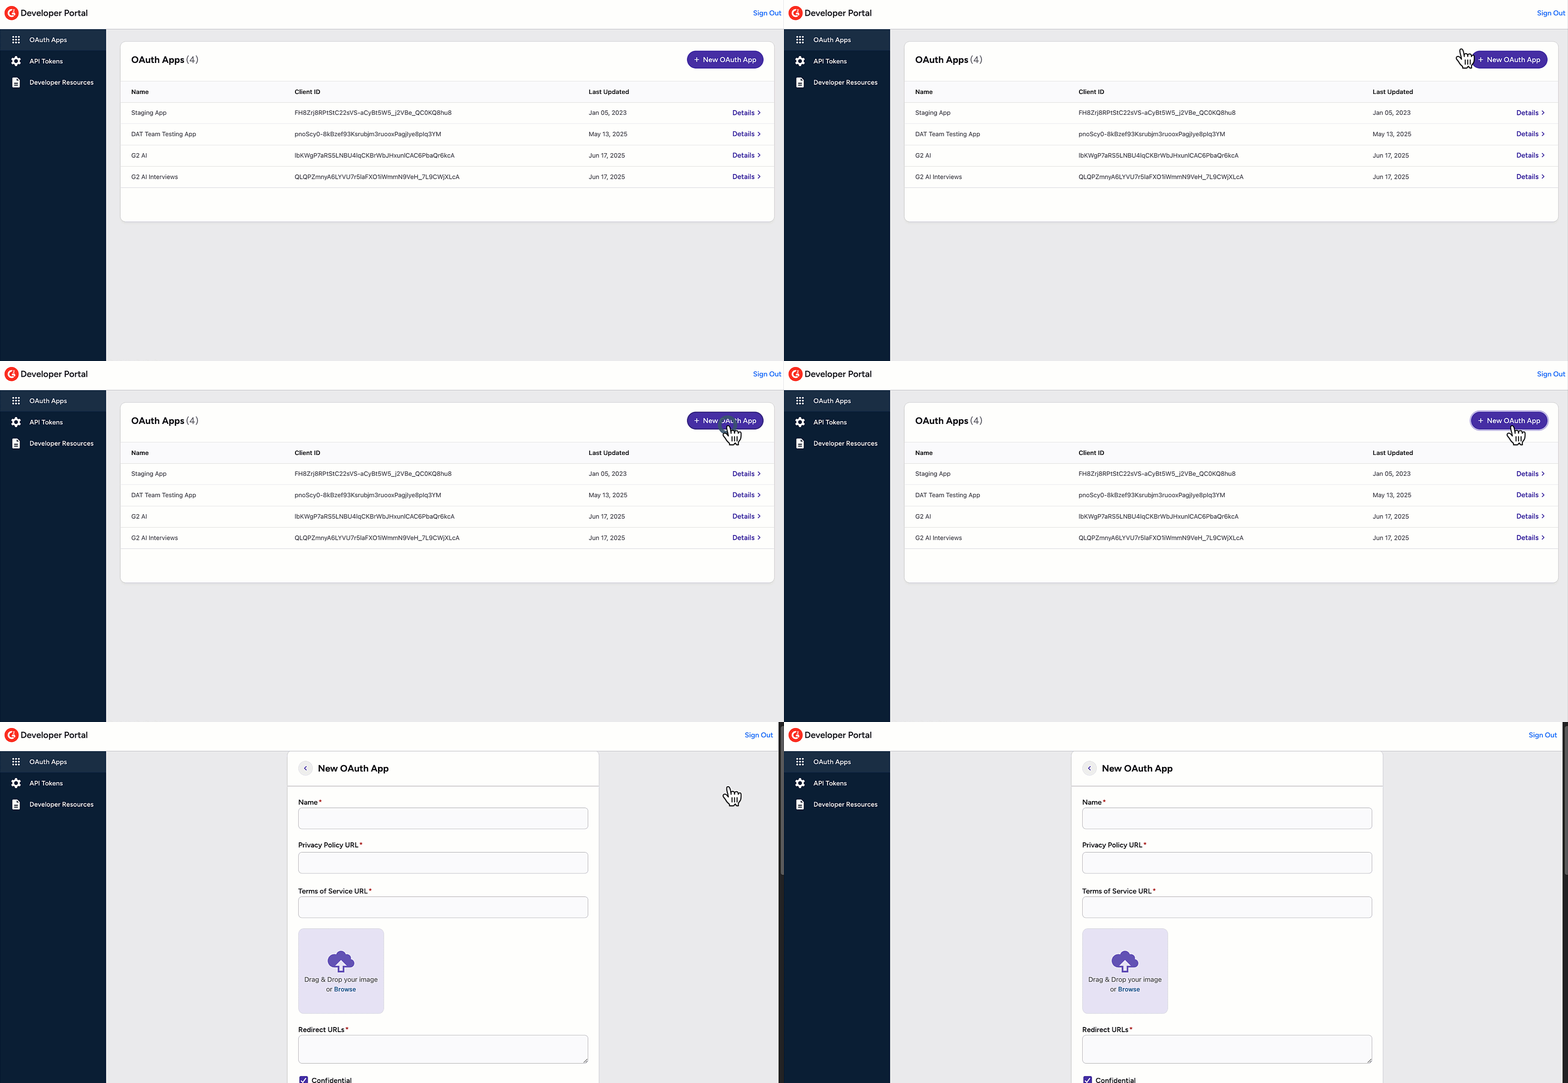
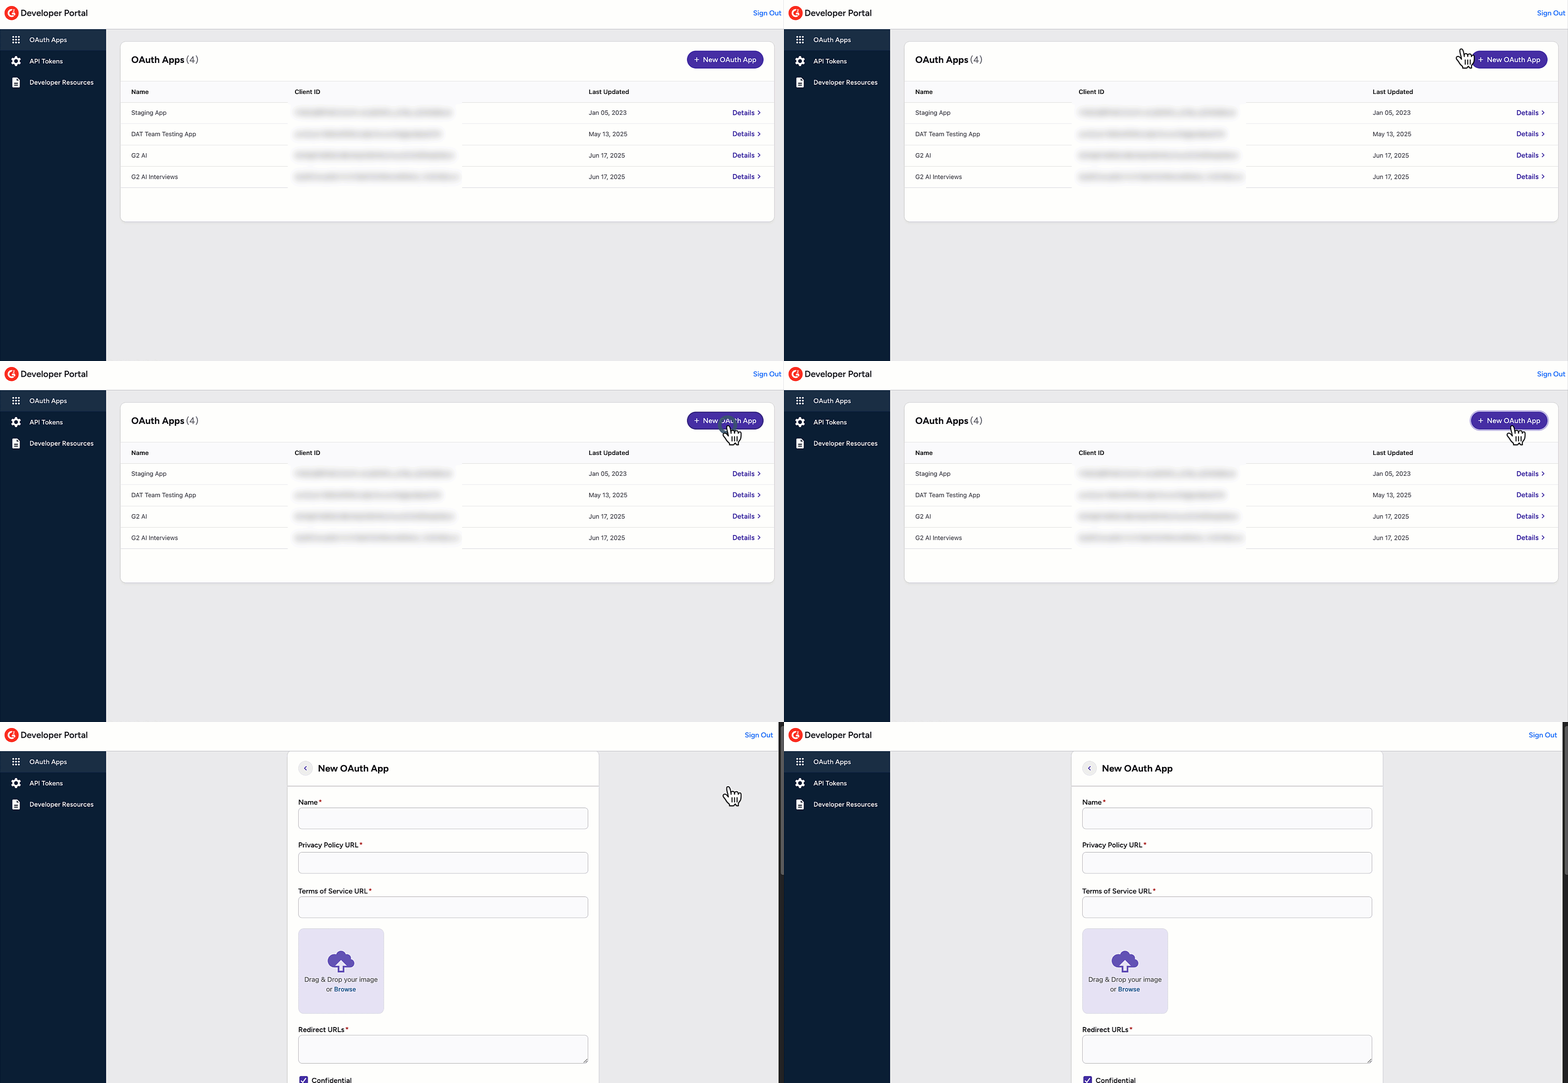
To register an OAuth app:
-
Navigate to the OAuth Apps tab, then select New OAuth App.
-
In the New OAuth App panel, enter a Name, Privacy Policy URL, Terms of Service URL, and Redirect URL for your app. Optionally, upload an image.
Your Redirect URL must exactly match the one used in your app’s OAuth flow. Minor differences will cause authorization errors.
Privacy Policy and Terms of Service URLs must be valid public links. Placeholder or broken links may prevent your app from being approved.
-
Select the Confidential checkbox if your app can securely store client secrets (such as a server-side application). Leave it unchecked for public clients like mobile or browser-based apps.
-
In the Permissions panel, select the Read checkbox next to each endpoint your app should have access to. Endpoints without a selection will not be accessible using this app’s credentials.
Each permission controls which data the OAuth app can access through the G2 API. Review the API reference documentation for details about each endpoint.
- Select Save.
Registered apps appear in the OAuth Apps panel. Select Details to access the Client ID and Secret.

Once your app is registered, use your Client ID and Secret in your app to initiate the OAuth flow and request access tokens based on the scopes selected.
For security, keep your client secret private. Never expose it in public repositories or frontend code.
Retrieving an access token with Postman
To test the OAuth flow, first register a new OAuth app for Postman. After the app is registered, you can use Postman to run the authorization flow and retrieve an access token.
Steps in the G2 Developer Portal:
-
Navigate to the OAuth Apps tab, then select New OAuth App.
-
In the New OAuth App panel, enter a Name, Privacy Policy URL, Terms of Service URL, and enter the Redirect URL as Postman’s callback URL:
https://oauth.pstmn.io/v1/browser-callback -
In the Permissions panel, select the Read checkbox next to each endpoint your app needs to access.
Steps in Postman:
-
Open Postman, and create a new request.
-
In the Authorization tab, select OAuth 2.0 from the Auth Type dropdown.
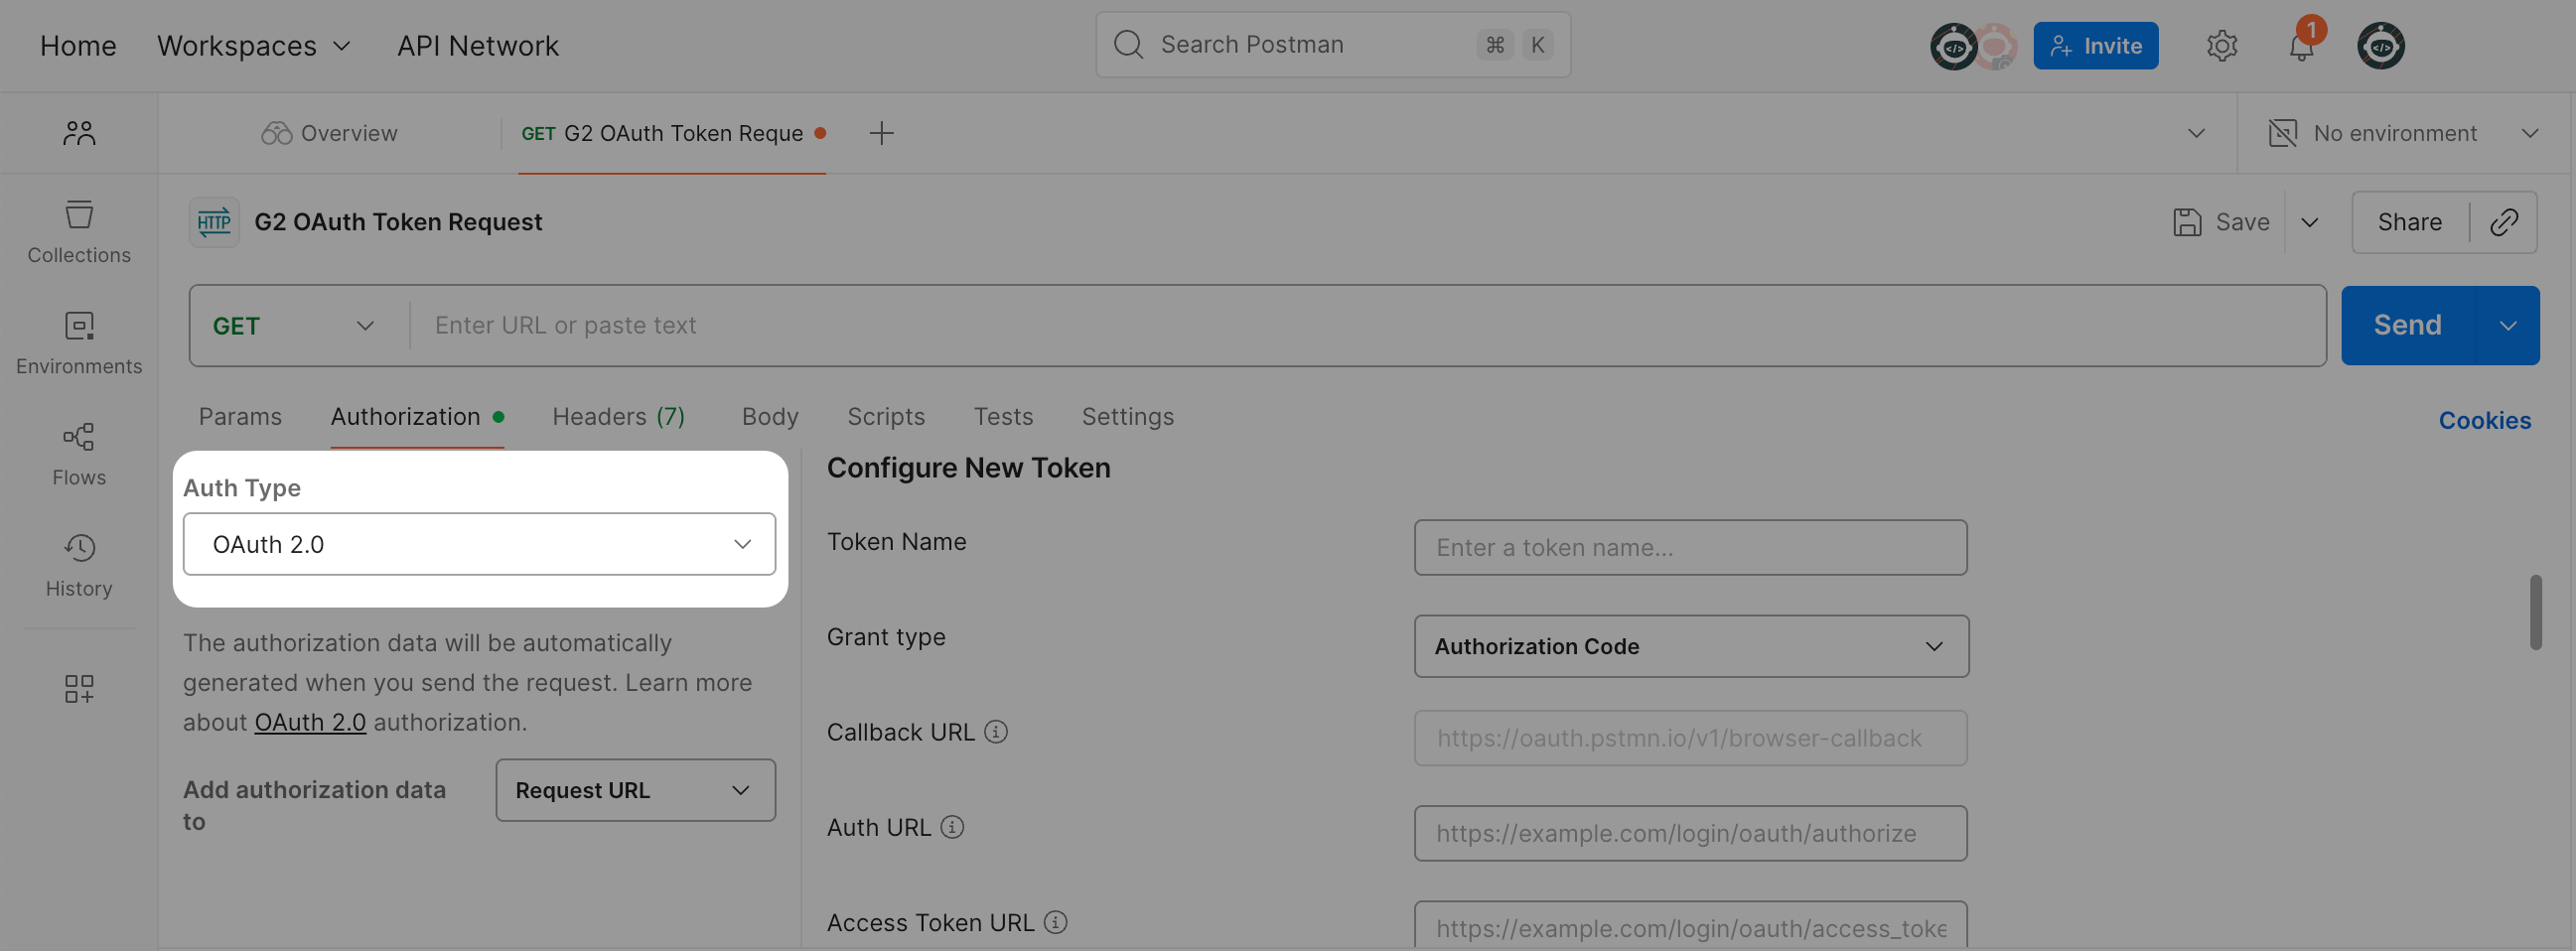
- In the Configure New Token panel, enter the Auth URL, Access Token URL, Client ID, and Client Secret exactly as they appear in the OpenID Connect Details panel of your registered OAuth app.
The OpenID Connect Details panel is in the OAuth app details screen in the G2 Developer Portal. Copy each value directly to avoid typos.

- In the Scope field, enter only the scopes that correspond to the Permissions you enabled for this app. Example:
openid profile products.read products.reviews.read
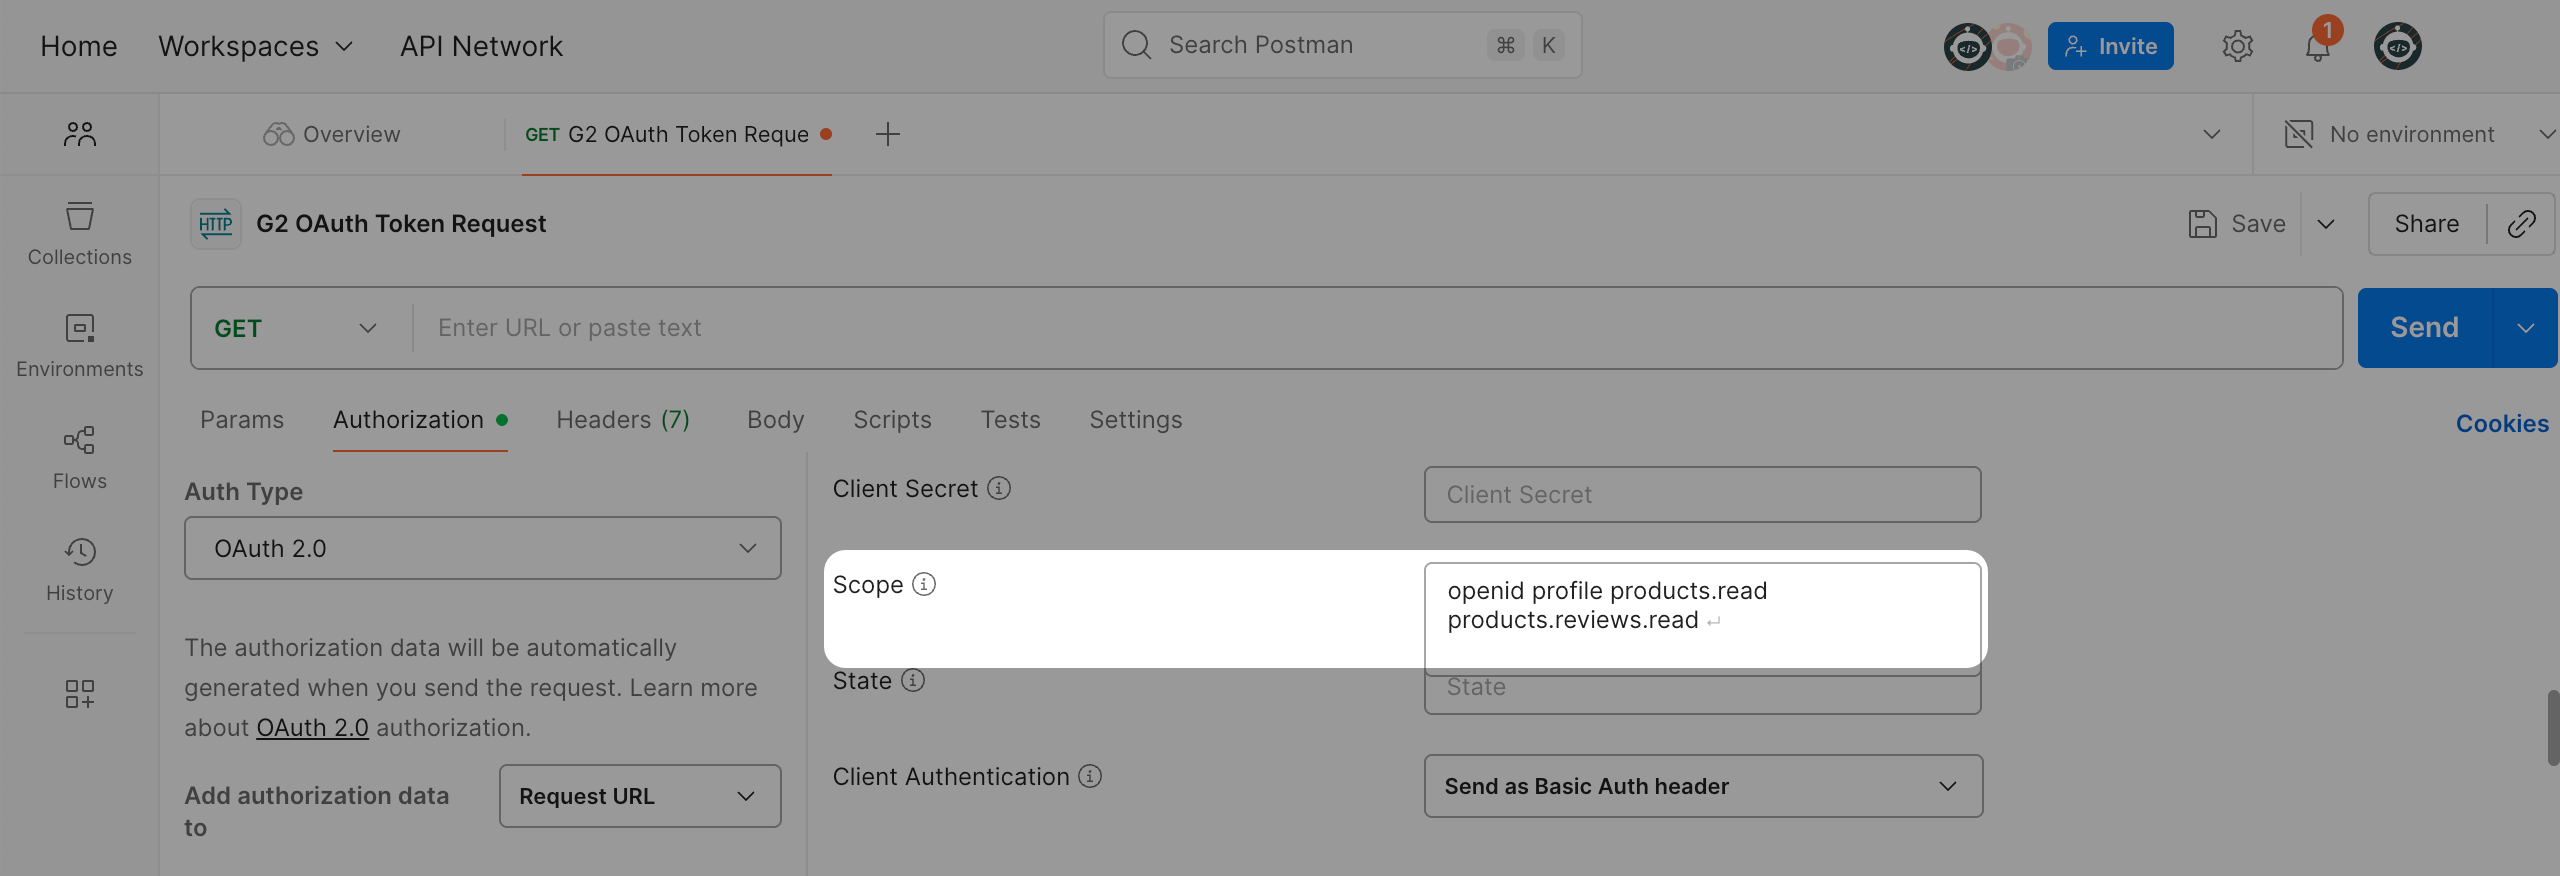
The scopes you enter in Postman must align with the Permissions you selected when registering your OAuth app. For example, if you enabled Read access to Products and Reviews, request the scopes products.read products.reviews.read in Postman.
If you encounter the error requested scope is invalid, unknown, or malformed:
- Verify the exact scope names in the App Details panel in your OAuth app.

- Remove any scope that does not have a matching Read Permission enabled in your OAuth app.
- Add scopes back one at a time until the request succeeds.
- Select Get New Access Token.
- Complete the authorization flow. A new access token appears in Postman.
You can select Use Token to attach it to your request, then send the request to a G2 API endpoint.
For a quick test, call the /api/v2/products endpoint. If your setup is correct, the request returns product data from G2.
Personal Access Tokens
The Personal Access Tokens tab enables you to generate new tokens and manage the endpoint permissions associated with each token. Personal access tokens are used to authenticate requests for G2 content.

For a full list of available endpoints, refer to G2's partner API reference documentation.
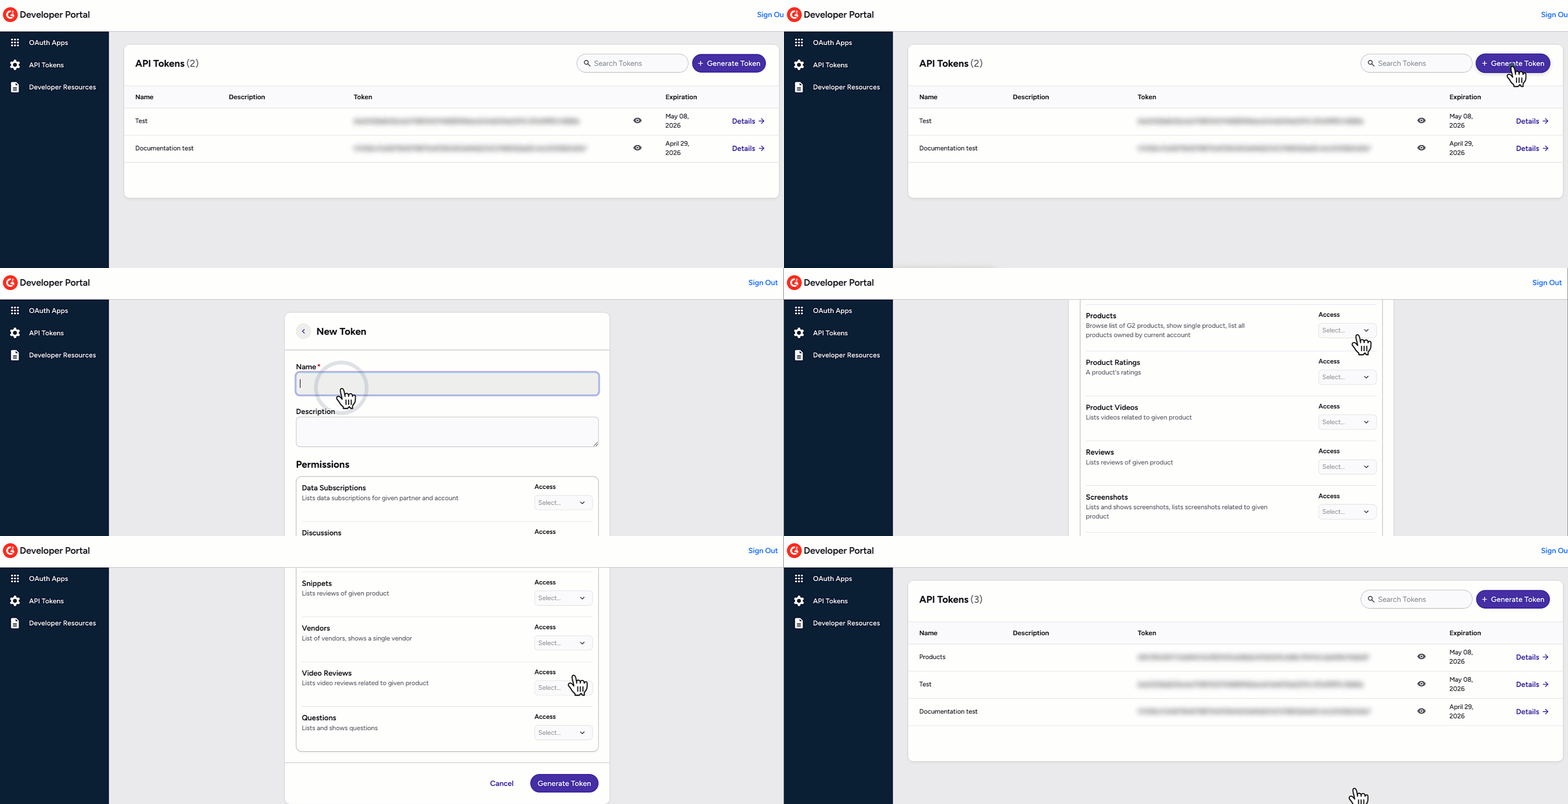
To create a new personal access token:
- Navigate to the Personal Access Tokens tab, then select Generate Token.
- Enter a Name and optionally enter a Description for the API token.
- In the Permissions panel, use the Access dropdown for each endpoint to select the access level. Endpoints without a selection won’t be accessible with the token.
- Select Generate Token. G2 adds your token to the API Tokens panel.
- Select the Eye to reveal the token.
![]()
Personal access tokens expire one year after creation and must be regenerated for continued access.
Select Details to view the permissions assigned to the token.

To use your token with G2's syndication APIs, refer to the Get started with G2 review syndication and Get started with G2 taxonomy syndication documentation.
Testing your personal access token
After generating a personal access token, you can test it using G2's API reference documentation. This interactive documentation enables you to authenticate with your token and make API calls directly in the browser.
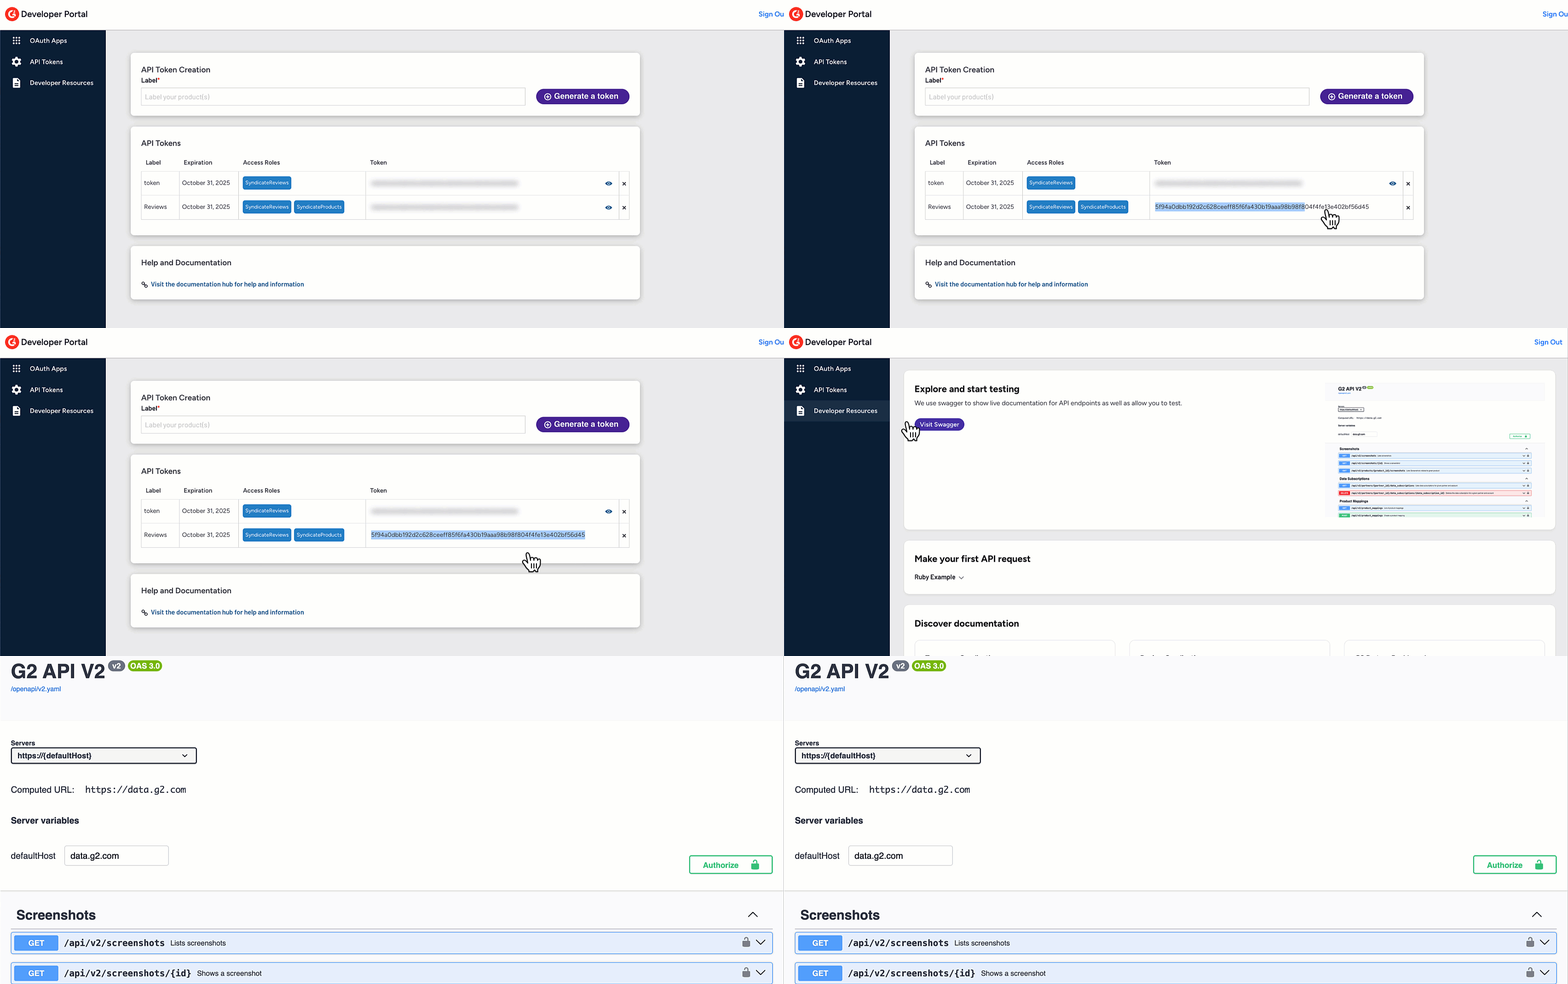
To test your token:
- In the Personal Access Tokens panel, select the Eye to reveal the token and then copy it.
- Navigate to the Developer Resources tab, then select Visit Documentation.
- Select Authorize, then paste your API token in the Value field and select Authorize.
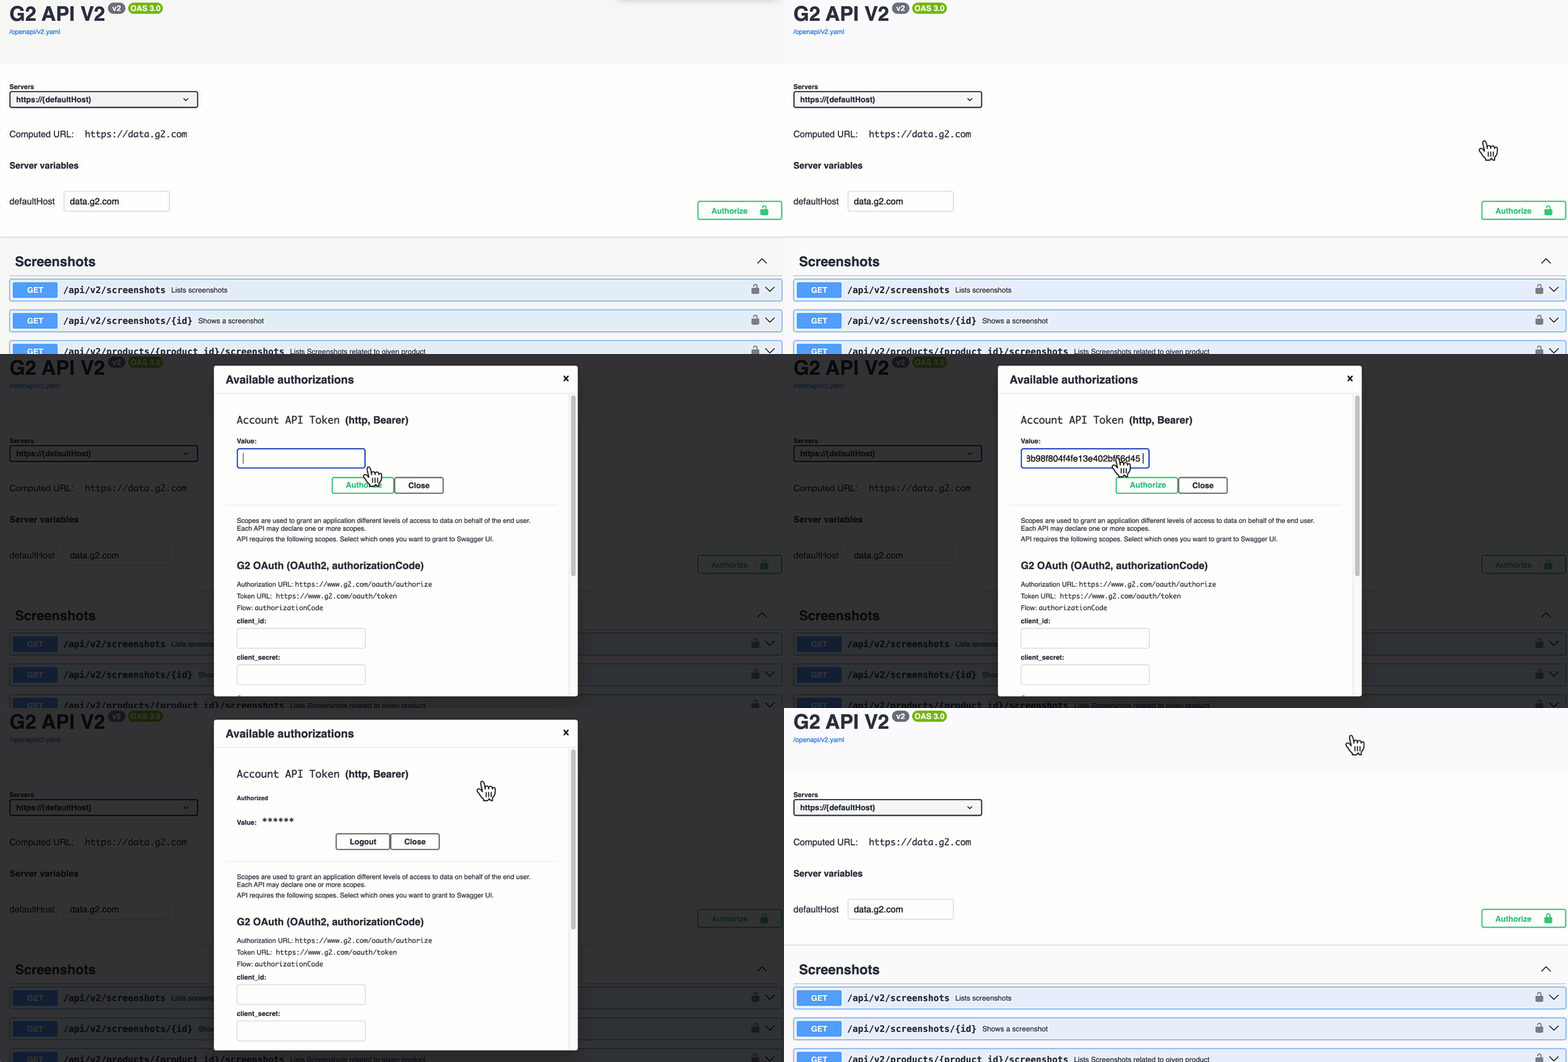
- Select the endpoint, then select Try it out.

- Enter any required or optional parameters, then select Execute.
Sample response
{
  "data": [
    {
      "id": "aaaaaaaa-bbbb-4ccc-8ddd-000000000028",
      "type": "products",
      "attributes": {
        "detail_description": "Description",
        "domain": "example.com",
        "g2_url": "http://www.lvh.me:63479/products/product-one/reviews",
        "image_url": null,
        "name": "Product One",
        "public_detail_url": "https://www.example.com",
        "review_count": 0,
        "slug": "product-one",
        "star_rating": 2.5,
        "write_review_url": "http://www.lvh.me:63479/products/product-one/take_survey"
      },
      "relationships": {
        "categories": {
          "data": [
            {
              "id": "aaaaaaaa-bbbb-4ccc-8ddd-000000000025",
              "type": "product_categories"
            }
          ]
        },
        "discussions": {
          "data": [
            {
              "id": "aaaaaaaa-bbbb-4ccc-8ddd-000000000011",
              "type": "discussions"
            }
          ]
        },
        "vendor": {
          "data": {
            "id": "aaaaaaaa-bbbb-4ccc-8ddd-000000000021",
            "type": "vendors"
          }
        }
      }
    }
  ],
  "included": [
    {
      "id": "aaaaaaaa-bbbb-4ccc-8ddd-000000000025",
      "type": "product_categories",
      "attributes": {
        "name": "test"
      }
    },
    {
      "id": "aaaaaaaa-bbbb-4ccc-8ddd-000000000011",
      "type": "discussions",
      "attributes": {
        "attribution": {
          "text": "Verified by G2",
          "url": "http://www.lvh.me:63479/products/product-one/reviews",
          "logo": "http://www.lvh.me:63479/assets/g2-logo-rorange.svg"
        },
        "comments_count": 0,
        "comments_present": false,
        "content": "Some discussion stuff...",
        "created_at": "2022-01-01T00:00:00.000-06:00",
        "is_public": true,
        "official_response_present": false,
        "product_id": "aaaaaaaa-bbbb-4ccc-8ddd-000000000028",
        "product_name": "Product One",
        "report_url": "http://www.lvh.me:63479/discussions/a-discussion/concerns/new",
        "seeded": false,
        "slug": "a-discussion",
        "title": "A Discussion",
        "type": "product_question",
        "url": "http://www.lvh.me:63479/discussions/a-discussion",
        "vendor_question": false,
        "verified_current_user": true,
        "votes_down": 0,
        "votes_up": 1,
        "votes_total": 1
      },
      "relationships": {
        "user": {
          "data": {
            "id": "aaaaaaaa-bbbb-4ccc-8ddd-000000000008",
            "type": "users"
          }
        },
        "comments": {
          "data": []
        }
      }
    },
    {
      "id": "aaaaaaaa-bbbb-4ccc-8ddd-000000000021",
      "type": "vendors",