Self-Serve Events let you collect G2 reviews at live events such as conferences, trade shows, and user groups by displaying a QR code attendees scan to leave a review on the spot.
Basics of Self-Serve Events
Each self-serve event campaign generates a branded landing page and a QR code. Attendees scan the QR code at your event and submit a review. With delayed login, they don't need a G2 account to start.
You need Review Collection included in your G2 package to create a self-serve event campaign. Contact your G2 representative if you're unsure whether your account includes this feature.
Delayed login
With delayed login, attendees can submit a review without a G2 account. They provide their email address and marketing consent, then receive an email with options to verify their identity through LinkedIn, Google, or a G2 account.
Reviewers have 30 days to complete verification. Reviews and incentives are contingent on verification and passing G2's standard review moderation process. The incentive expires if the reviewer doesn't verify their identity within 30 days.
Delayed login is automatically disabled when you select swag as your only incentive.
QR code and landing page
Your landing page goes live at midnight on your event's start date, in your event's timezone. Before activation, anyone who scans the QR sees a countdown page that changes automatically to your live landing page when the event begins.

After your event ends, the landing page deactivates and displays an "event has ended" page.

You can download the QR code as a PNG or SVG when you schedule your campaign. To download it later, go to my.G2, then select Reviews > Campaigns, and select Edit for the campaign.
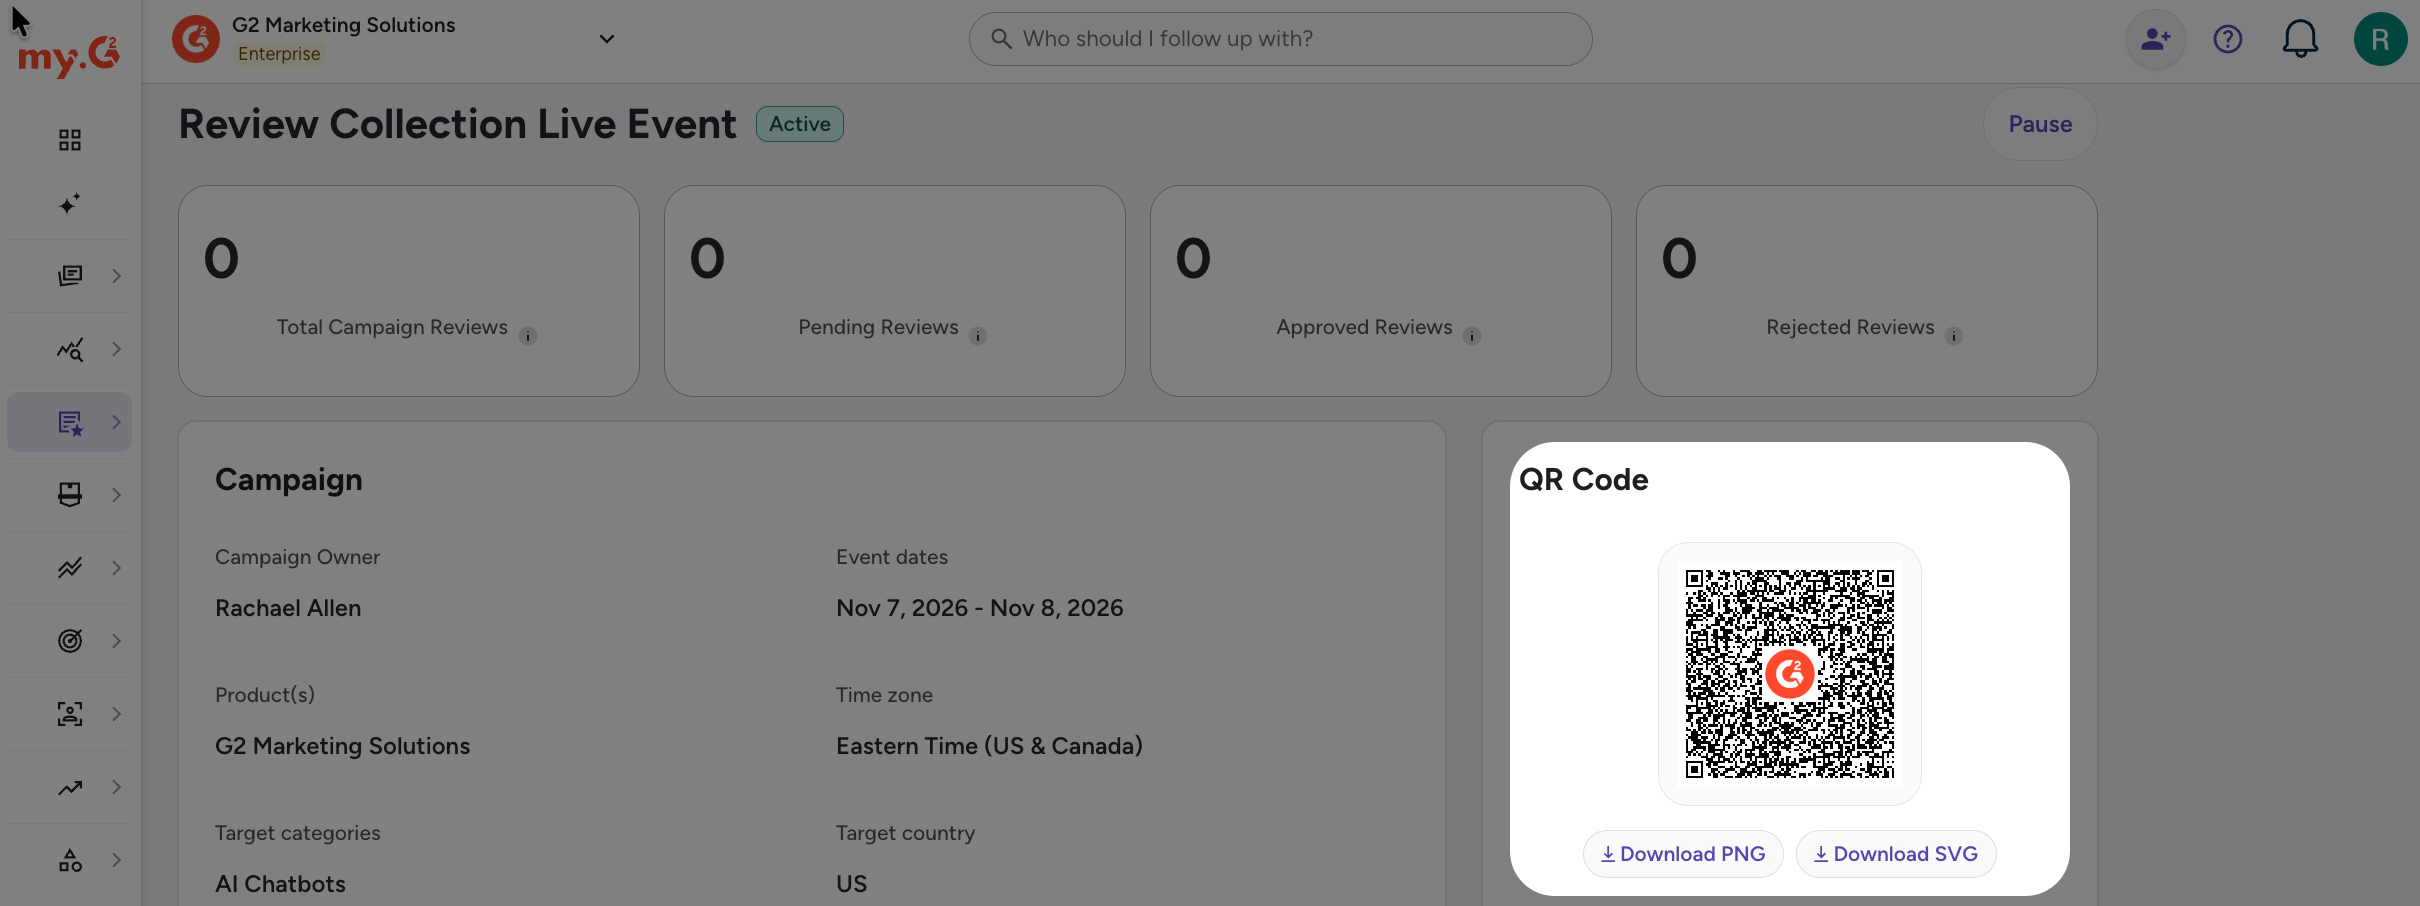
You can also use the QR code included in your confirmation email.
Creating a campaign
To create a self-serve event campaign:
Entering campaign details
-
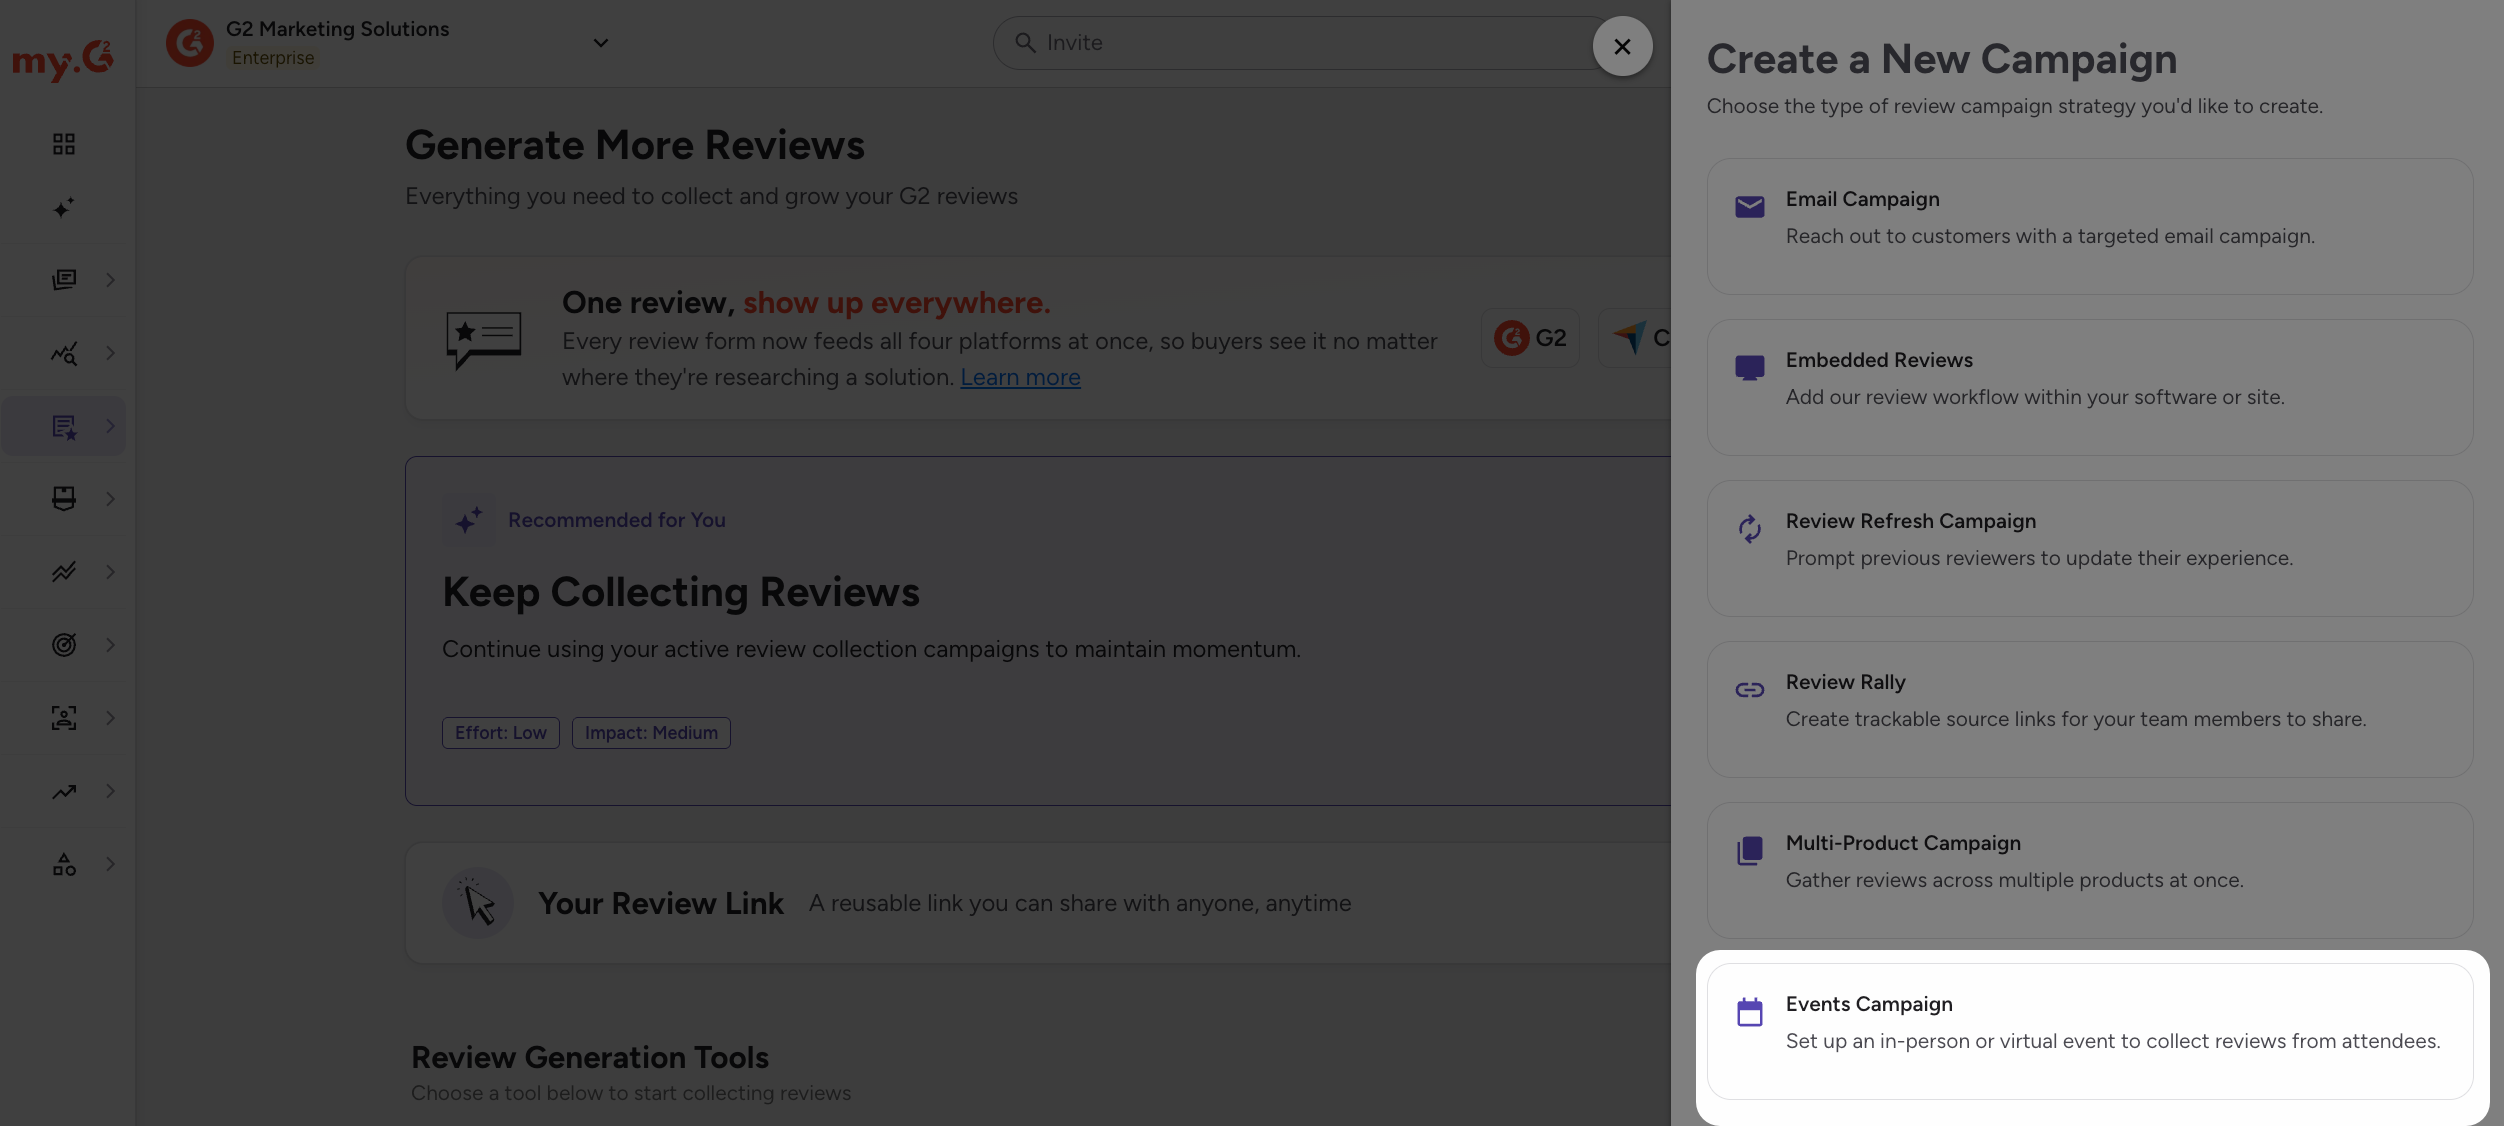
Go to my.G2, then select Reviews > Collect Reviews > Create Campaign > Events Campaign. The Self-Serve Event Campaign Builder opens.
-
In the Campaign setup step, confirm your name and email in Your details.
-
Enter a Campaign title. This title is for internal reference and isn't shown to reviewers.
-
Under Number of Products, select Single or Multiple. Under Product, select the product or products your campaign covers. The order you choose determines the order reviewers see when they write a review.
-
Enter the number of reviews you want to collect in About how many reviews are you aiming to collect? This number tracks progress on the landing page and doesn't affect cost. Use the Budget cap to control spend.
-
Under Select (up to 3) target categories, select the categories you want reviewers to see.
-
Under Event, set a Start date, End date, Time zone, and Target country.
-
Select Next. To finish later, select Save as Draft.
Configuring login and incentives
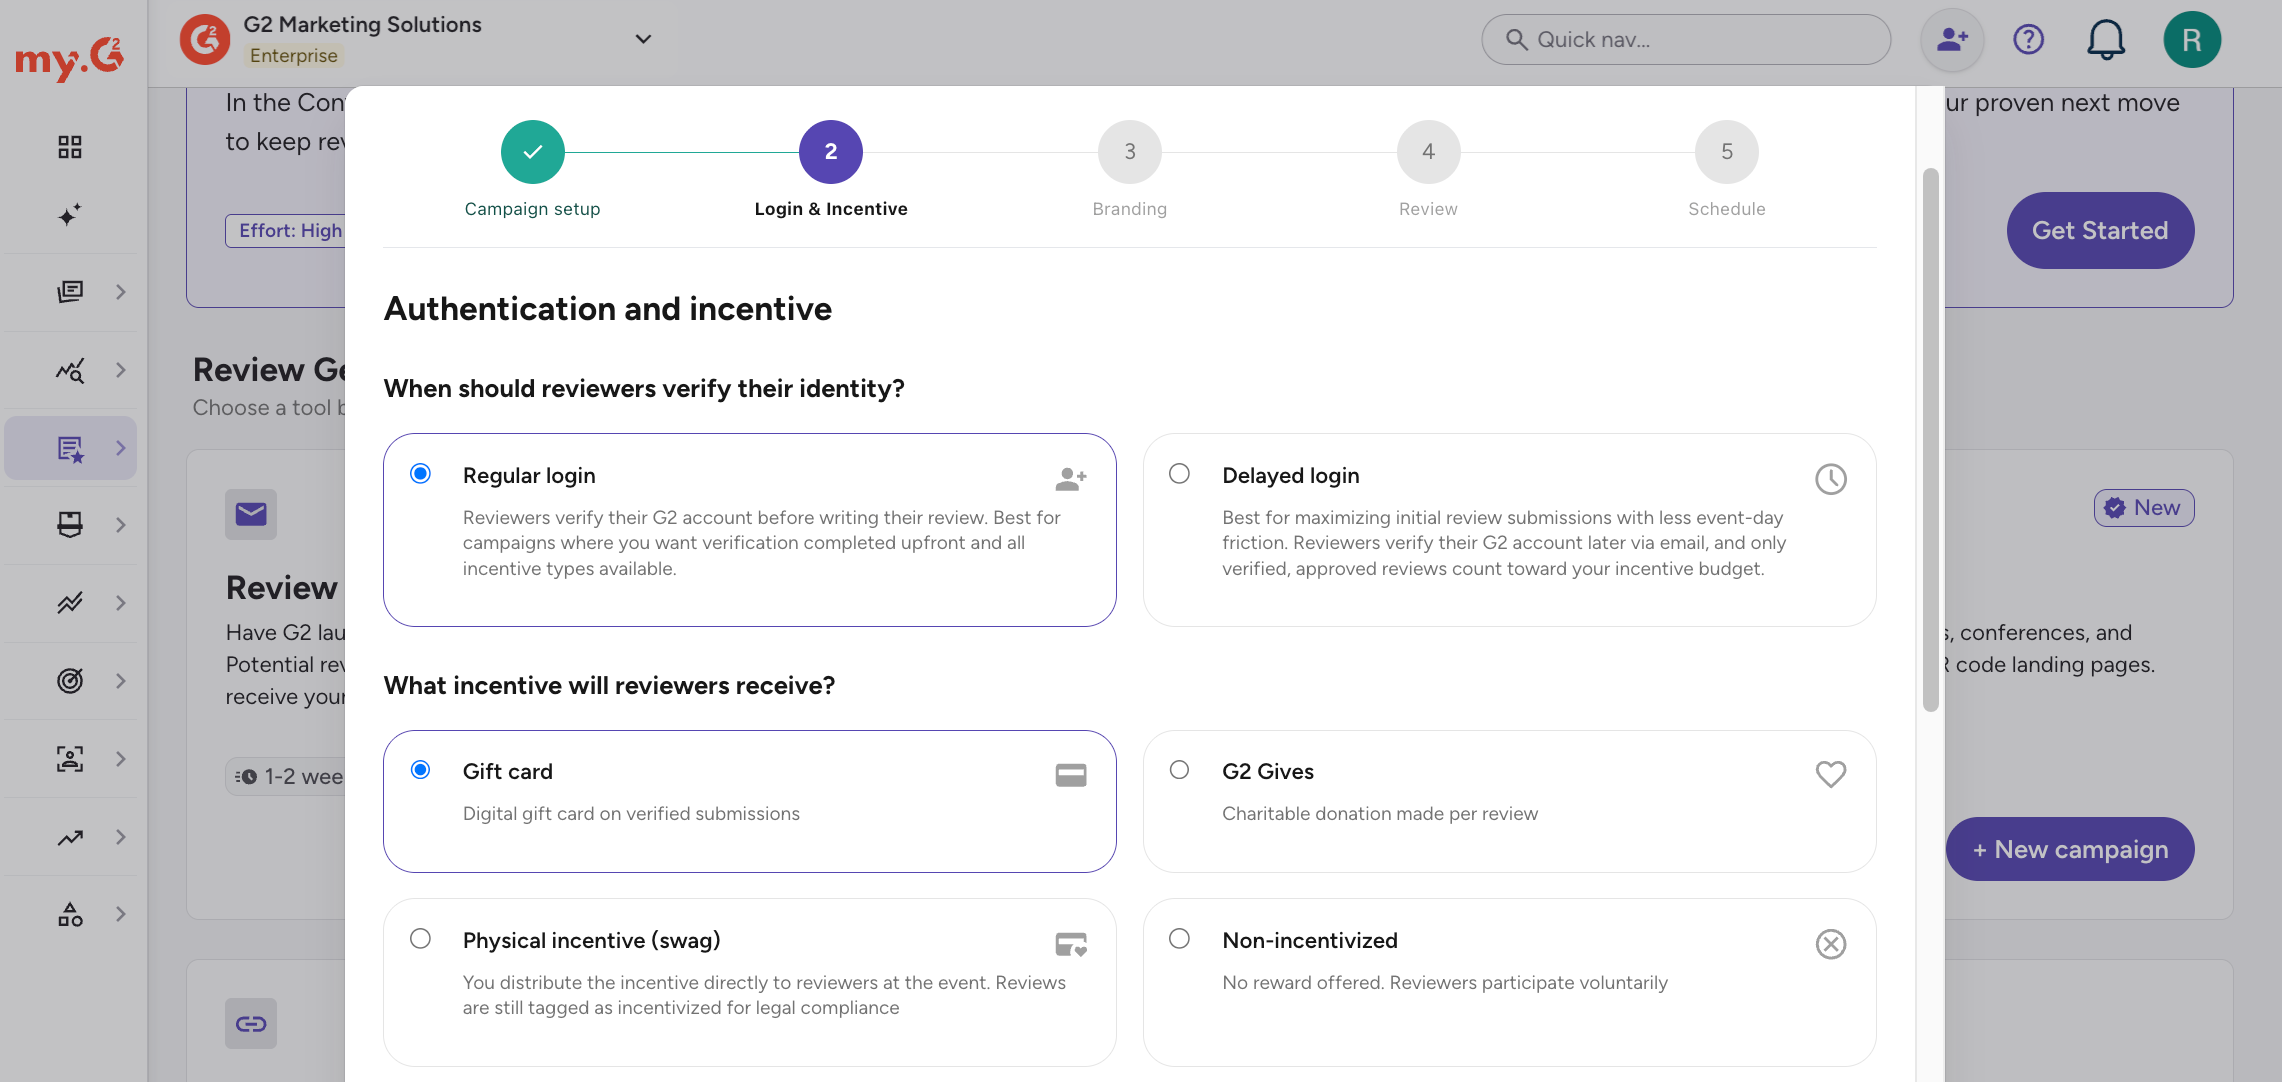
In the Login & Incentive step:
-
Under When should reviewers verify their identity?, select an option:
- Regular login: reviewers verify their identity before writing a review.
- Delayed login: reviewers can write a review before verifying their identity and verify later by email. See Delayed login for details about verification and incentives.
-
Under What incentive will reviewers receive?, select an option:
- Gift card: a digital gift card issued for verified submissions.
- G2 Gives: a charitable donation made per review.
- Physical incentive (swag): an incentive you distribute directly to reviewers at the event.
- Non-incentivized: no reward is offered.
-
If you select Gift card, select a Gift card type, set the Amount per review, and optionally set a Budget cap. The budget cap defaults to Unlimited. Only verified, approved reviews count toward the budget, so if you set a cap, set it higher than your expected spend.
-
Select Next.
Customizing your landing page
In the Branding step:
-
Enter a Headline for the landing page, or leave it blank to use the default.
-
Under Hero image, select Replace image to upload your own image, or use the default image.
-
Review the Mandatory description. This text appears on the landing page and can't be changed.
-
Optionally, enter additional text in Add more.
-
Review the Live preview as you customize the page.
-
Optionally, select Show review progress bar to show how close you are to your review goal. Everyone who visits your landing page, including reviewers, sees the progress bar.
-
Select Next.
Reviewing your campaign
In the Review step, check your campaign details and reviewer experience.
The review screen shows your campaign title, owner, products, target categories, event dates, time zone, target country, incentive, login flow, and review target.
Select Open preview to view the landing page reviewers will see, then select Next.
Scheduling your campaign
In the Schedule step:
-
Under Payment method, select Invoice Me or a saved card.
-
Select Schedule campaign.
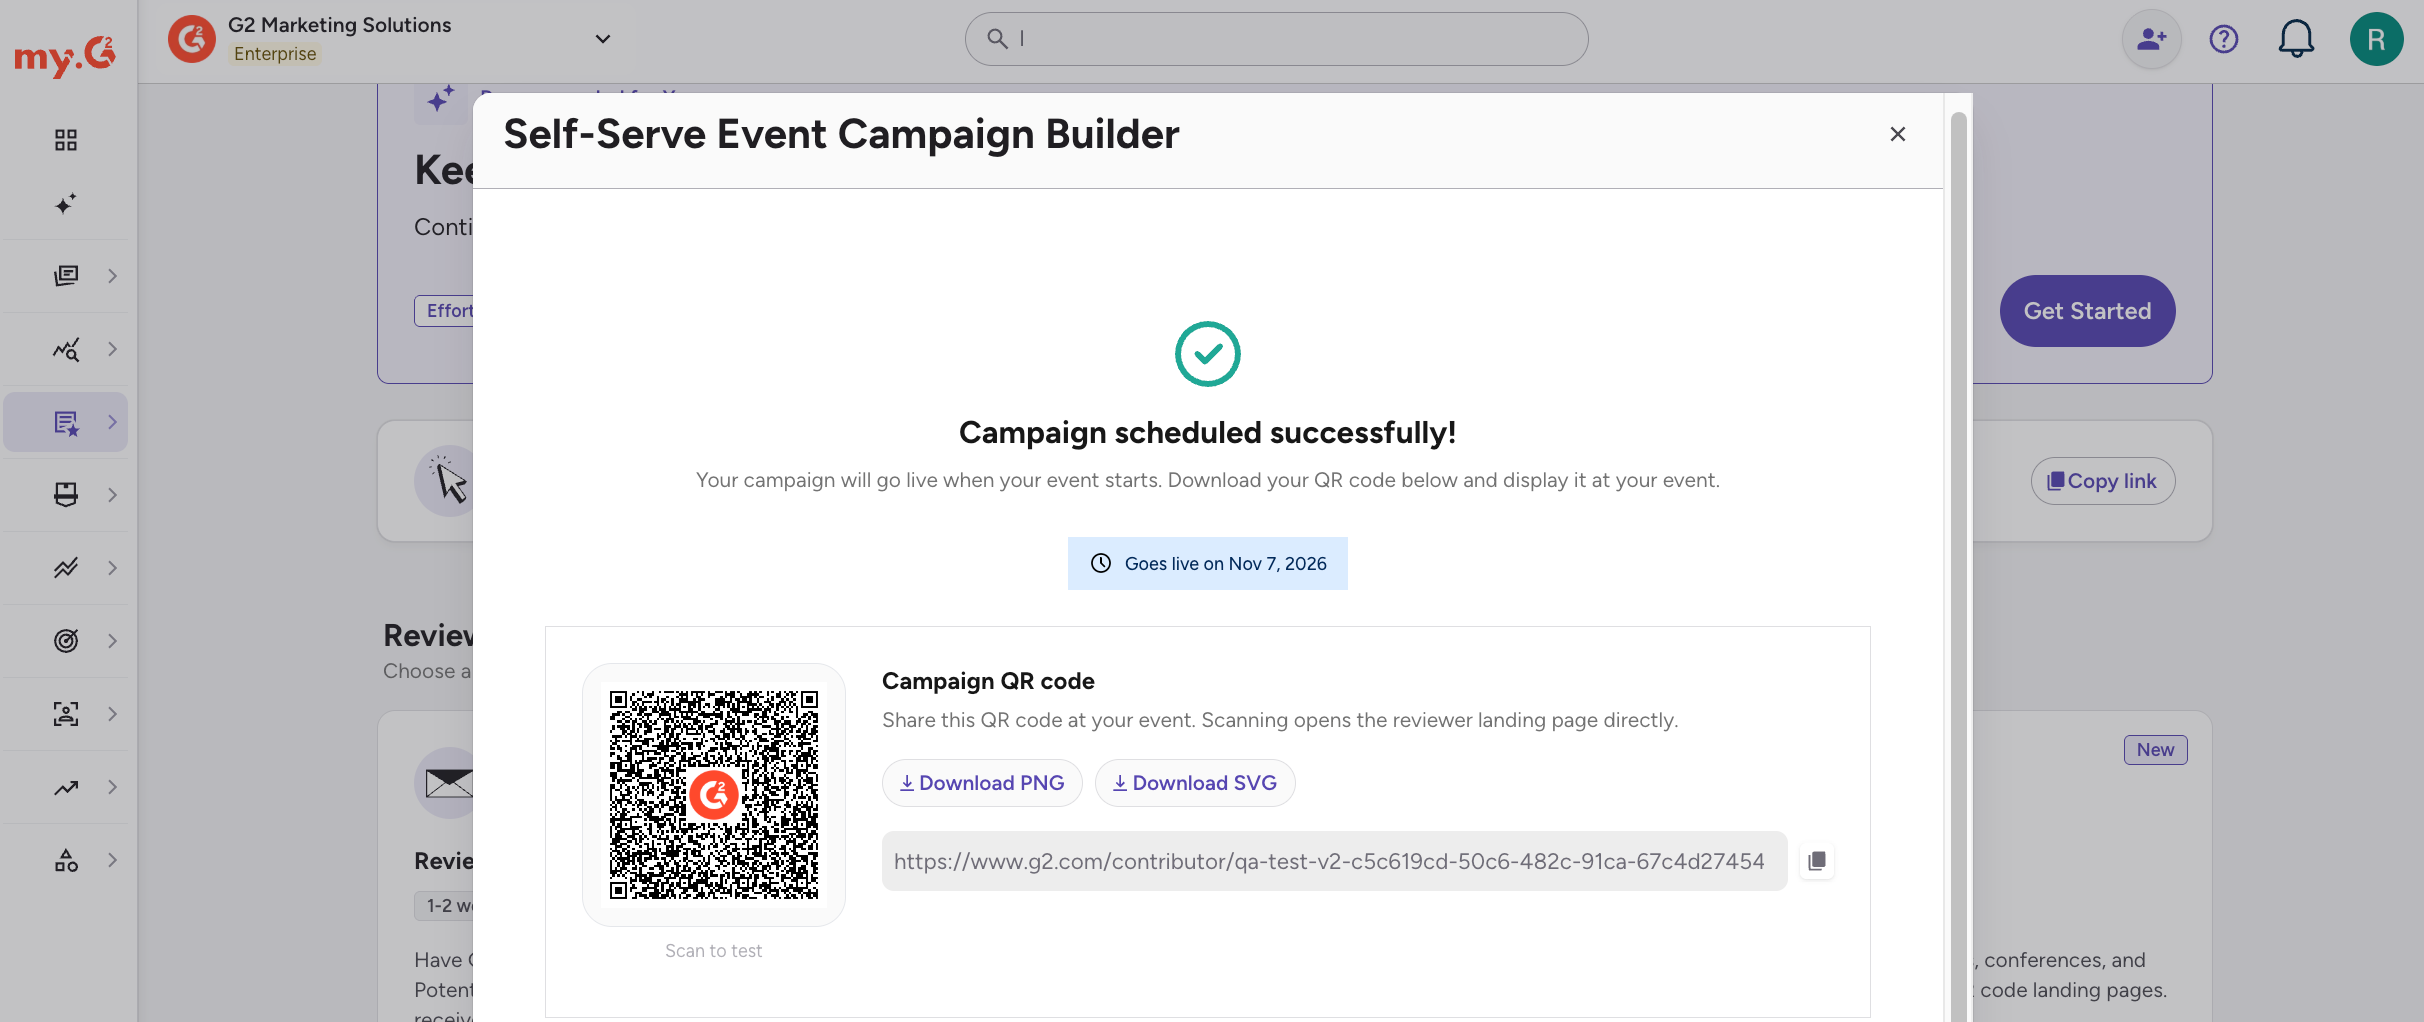
After scheduling, a confirmation screen shows the date your campaign goes live, your QR code with Download PNG and Download SVG options, and your landing page URL. G2 generates the QR code and vanity URL for your event and sends a confirmation email with your QR code, landing page URL, and preview link. The confirmation email includes the QR code as a PNG and provides a downloadable PDF version.
Add your credit card before you start setup, then return to complete the form.
You can add a new credit card by going to my.G2, then selecting your avatar in the upper-right corner > Payments & Billing History.
Best practices
- Promote your event: Make the QR code easy to find. Place it on booth signage, table tents, badge inserts, session slides, demo stations, and other high-traffic areas. Share the landing page URL through digital event touchpoints, including your event app, agenda page, and attendee emails.
- Engage attendees: Brief booth staff and event ambassadors to actively invite attendees to review. Make sure they can explain the incentive and that attendees can submit a review without logging in. Ask for a review after a demo, session, or good conversation while the experience is fresh. Queues, lunch areas, and charging stations can also be good opportunities.
- Encourage verification: Encourage reviewers to verify their identity before they leave the event. Reviewers have 30 days to complete verification, and only verified reviews that pass G2's standard moderation process can be published and rewarded.
- Manage your budget: Budget roughly 30% above your expected spend to reduce the chance that your incentive runs out during the event. When the budget is exhausted, the landing page switches to a non-incentivized experience for new submissions. G2 Gives pages don't switch to a non-incentivized experience.
- Get value from event reviews: Use event reviews to collect recent feedback from real users. Reviews can provide product and customer experience insight and contribute to your G2 profile, including ratings, badges, and category placement.
Editing or disabling a campaign
To edit a campaign, go to my.G2, then select Reviews > Campaigns. In the Actions column, select Edit for the campaign.
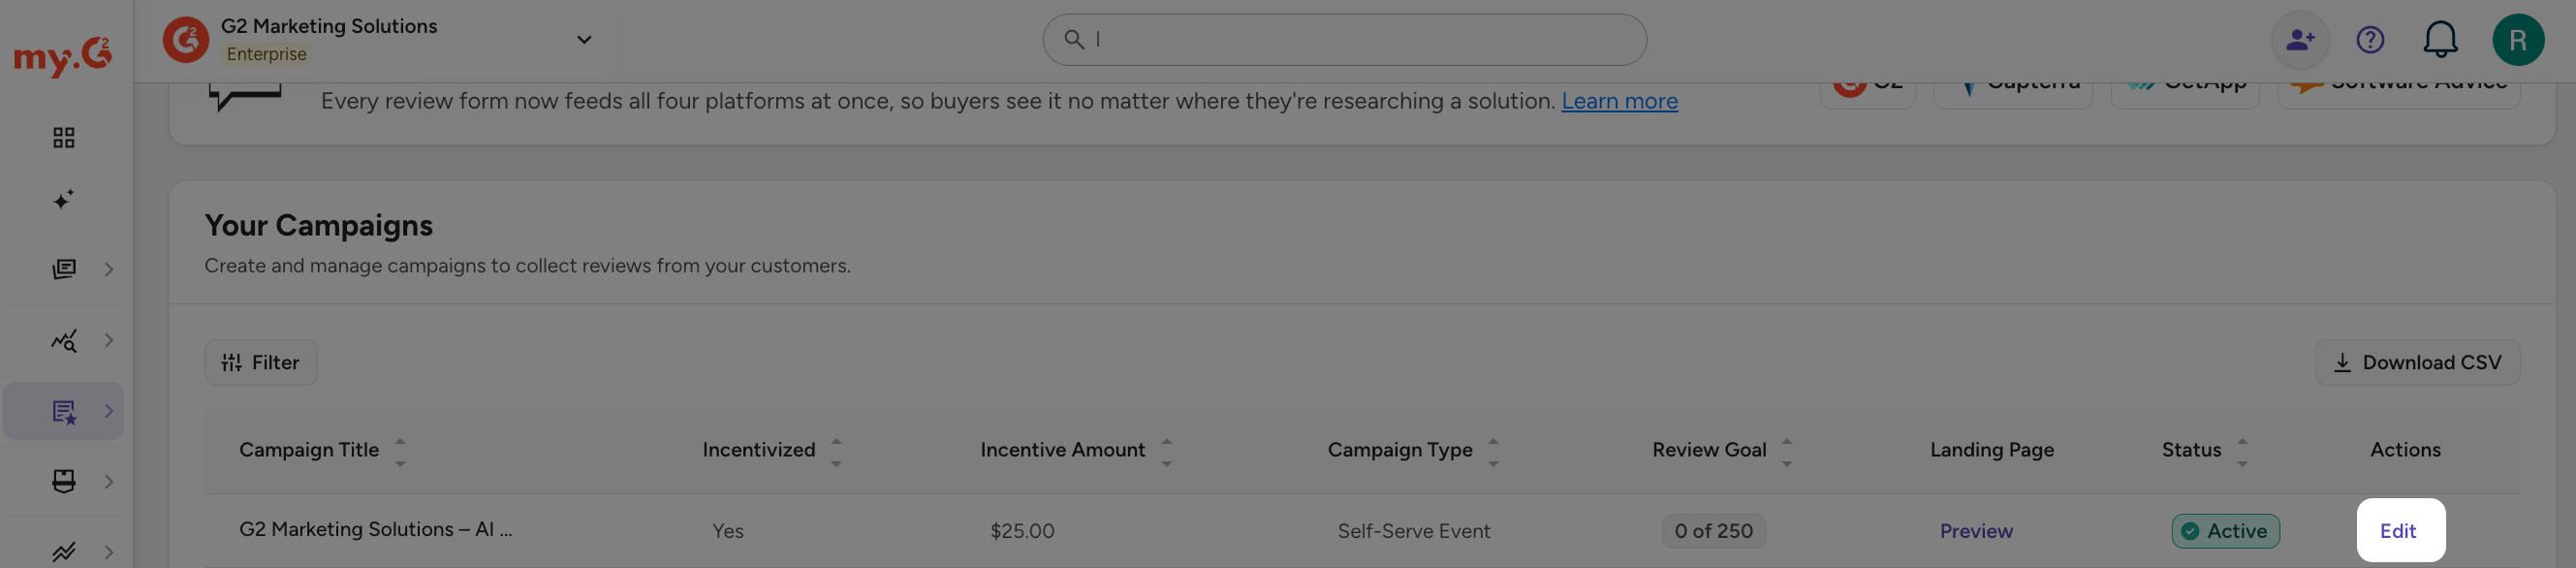
You can edit all campaign fields until the event activates at midnight on its start date, in the event's timezone. After the event begins, you can only raise the Budget cap.
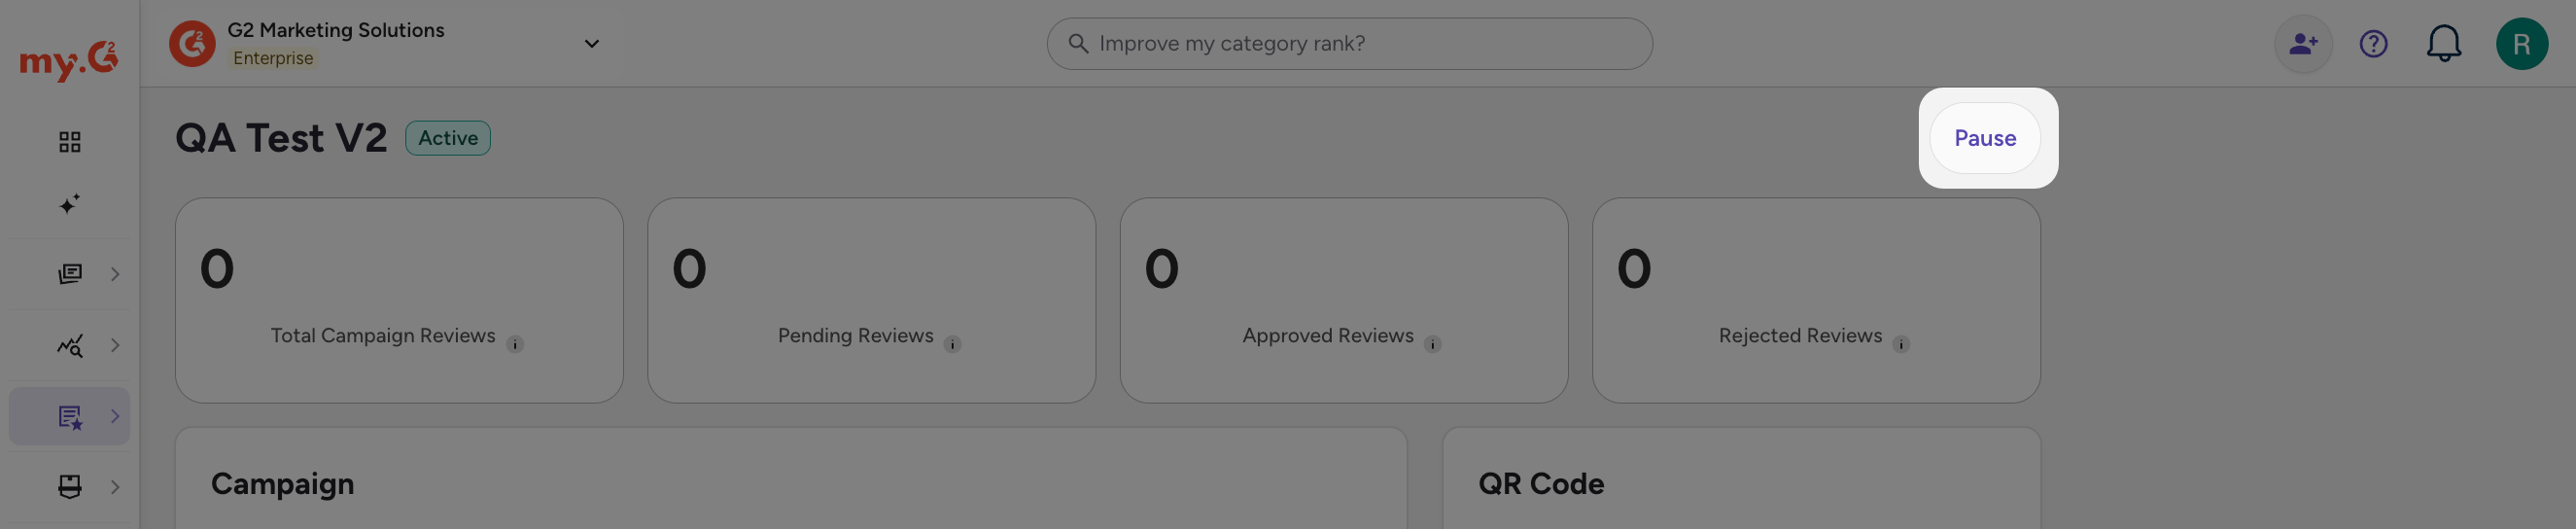
You can pause a scheduled or active event at any time from the campaign page in my.G2.
Monitoring campaign performance
Campaigns appear in the Review Campaign Dashboard in the Your Campaigns panel. Self-serve event campaigns show Self-Serve Event in the Campaign Type column.
The table also shows each campaign's title, whether it's incentivized, the incentive amount, review goal, landing page Preview link, status, and actions.
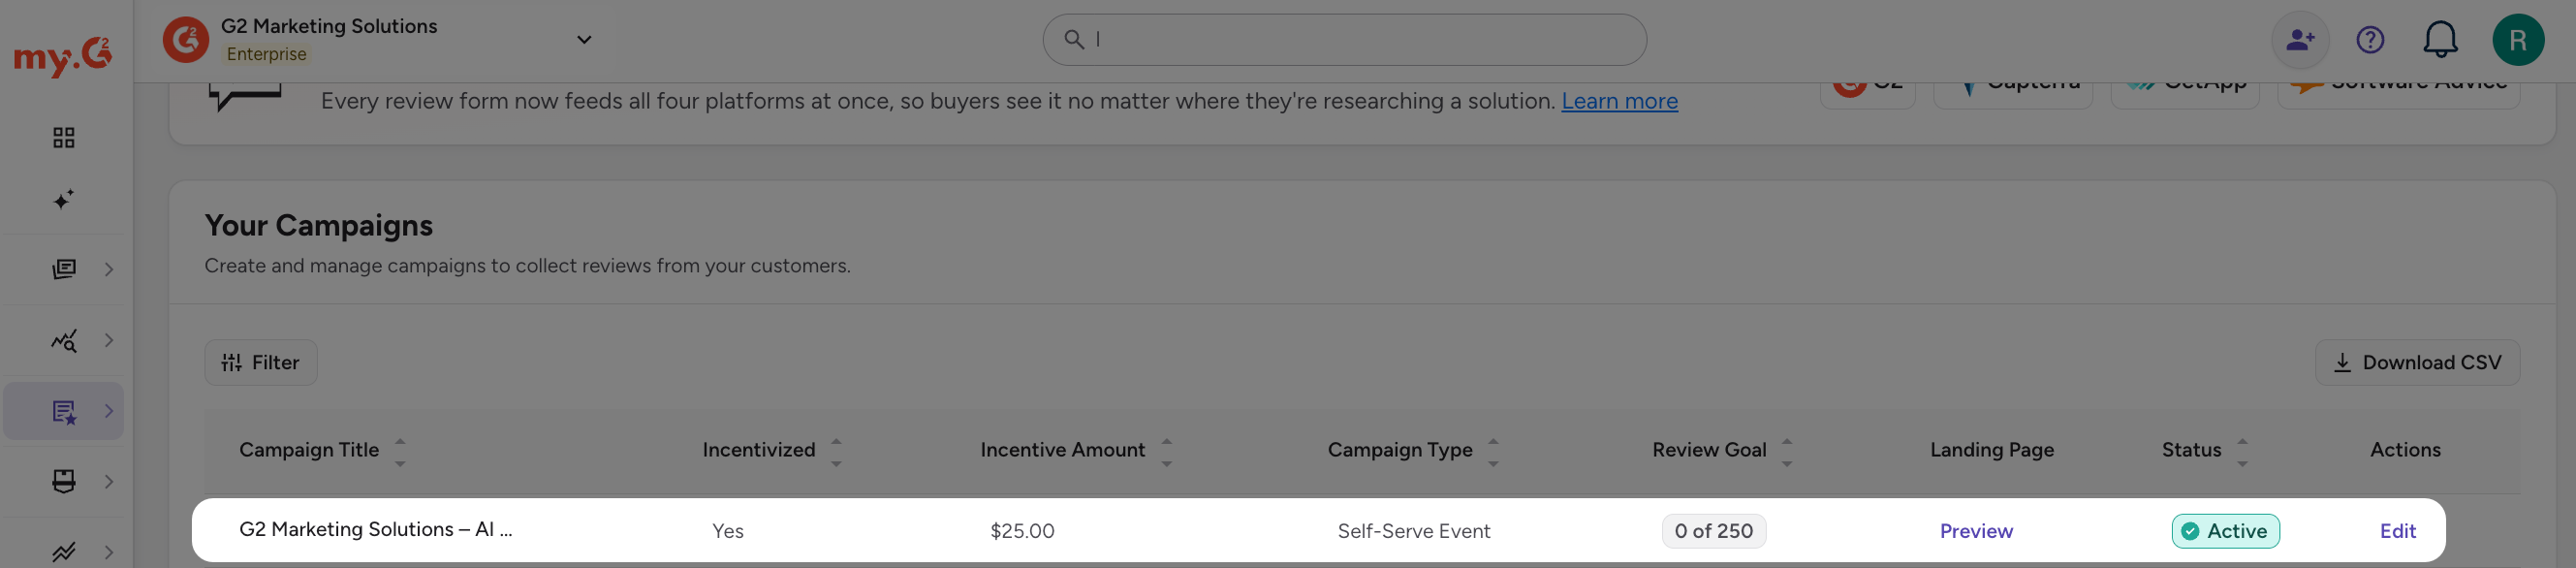
From the campaign dashboard, you can view the campaign status, open the landing page preview, and select Edit to open the campaign.
The campaign page shows total, pending, approved, and rejected review counts for each product. It also shows the campaign details, your QR code, landing page URL, and your login, incentive, and branding settings. It tracks verification status, incentives issued, and budget remaining. For G2 Gives events, the dashboard also shows dollars raised.
For more information on managing campaigns and viewing analytics, refer to the Campaign Dashboard documentation.