This page details every step you need to take to implement the G2 + Marketo integration.
Video documentation

Before getting started
You must repeat the implementation steps for each of your G2-listed products. If your my.G2 user account cannot access all of your organization’s products that receive Buyer Intent, please use a different account, or ask a user in your organization with access to the missing product to invite you.
To verify the products you can access:
- Go to my.G2.
- Open the product dropdown at the top of the page to reveal your my.G2 product access.

- Confirm that your user account can access the necessary G2-listed products. To access products that are not listed in the dropdown, please ask a user in your organization with access to the missing product to invite you, or contact your G2 representative.
1. Create Marketo custom fields for G2 Buyer Intent data
You must create eleven custom fields in Marketo to receive Buyer Intent data in your Marketo instance.
For more information on creating custom fields, refer to Marketo’s Create a Custom Field documentation.
To create custom fields:
- Go to Marketo, then Admin > Database Management > Field Management.
- Select New Custom Field, then select Person from the Object dropdown.
- Fill in the remaining parameters according to the first row in the following table, then select Create. Repeat steps 2 and 3 for each of the remaining rows in the following table until all eleven custom fields have been created.
The API Name auto-populates based on your Name entry. You must overwrite the auto-populated API Name to match the API Name value in the following table.
| Type | Name | API name |
|---|---|---|
| Integer | G2 Category Pageviews | g2_category_pageviews |
| String | G2 Company Name | g2_company_name |
| Integer | G2 Comparison Pageviews | g2_comparison_pageviews |
| String | G2 Domain | g2_domain |
| Integer | G2 Market Score | g2_market_score |
| Text area | G2 Pages Viewed | g2_pages_viewed |
| Integer | G2 Product Profile Pageviews | g2_product_profile_pageviews |
| Integer | G2 Sponsored Content Pageviews | g2_sponsored_content_pageviews |
| Integer | G2 Total Pageviews | g2_total_pageviews |
| String | G2 Buying Stage | g2_buying_stage |
| String | G2 Activity Level | g2_activity_level |

You must create all 11 G2 custom fields to receive Buyer Intent data in Marketo, even if you do not subscribe to certain Buyer Intent signals with your current G2 plan. For more information on which Buyer Intent signals are included in your subscription, refer to G2’s Seller Solutions Plans.
2. Populate the G2 Domain field
G2 Buyer Intent signals are automatically mapped (auto-mapped) to Marketo by matching the organization’s Buyer Intent website domain with the website domain in the custom G2 Domain Marketo field for each Marketo person. For this reason, you must create a Smart Campaign to populate the G2 Domain field with the company website information associated with each Marketo person.
To populate the G2 Domain field for your Marketo people:
- Go to Marketo, then Marketing Activities > New Smart Campaign.
- From the Campaign Folder dropdown, select the folder containing the Marketo people you want to populate with Buyer Intent data. Enter a descriptive Campaign Name for the smart campaign, such as Populate G2 Domain, then select Create.
- Select the Smart List tab.
- Search for the G2 Domain filter using the right sidebar. Select and drag the filter to the smart list canvas, then choose is empty in the G2 Domain dropdown.

- Select the Flow tab.
- Search for the Change Data Value action using the right sidebar. Select and drag the action to the flow canvas.
- Choose G2 Domain from the Attribute dropdown, then search for and select
{{company.Website}}in the New Value dropdown.

- Select the Schedule tab and choose how often this smart campaign should run.
Because the first smart campaign run populates the G2 domain field for all of your Marketo people, G2 recommends scheduling the first run during a weekend time slot to avoid performance impacts to your Marketo instance during work hours. Subsequent runs should be scheduled multiple times per week to help ensure that new Marketo people receive G2 Buyer Intent signals.
3. Generate authentication credentials
You must create access credentials for G2 to send data to your Marketo environment.
Create a Marketo Client ID and Client Secret
To create access credentials for G2:
- Go to Marketo, then Admin > LaunchPoint.
- Select New Service, then enter a Display Name, such as "G2 Access Token".
- Set the Service dropdown to Custom, then enter a description for your new service.
- Select an API Only User from the dropdown.
If you don't have any API-only users, refer to Marketo's Create an API Only User Role documentation.
- Select Create to generate your access credentials.
- Select View Details for the service you just created to access your Client ID and Client Secret. You will use these credentials to activate the integration.

Obtain your Marketo Endpoint and Identity URLs
To find your REST Endpoint and Identity URLs:
- Go to Marketo, then Admin > Web Services.
- Copy the Endpoint and Identity URLs from the REST API section.
Do not use the information in the SOAP API section.

4. Activate the integration
After preparing your Marketo environment to accept G2 data, you are to ready activate the integration using the credentials you obtained in the Generate authentication credentials section.
To authenticate your product:
- Go to my.G2, then Integrations > Integration Hub.
- Select the Adobe Marketo Engage tile.
- Enter your Client ID, Client Secret, Endpoint URL and Identity URL into the corresponding fields.

- Select Save.
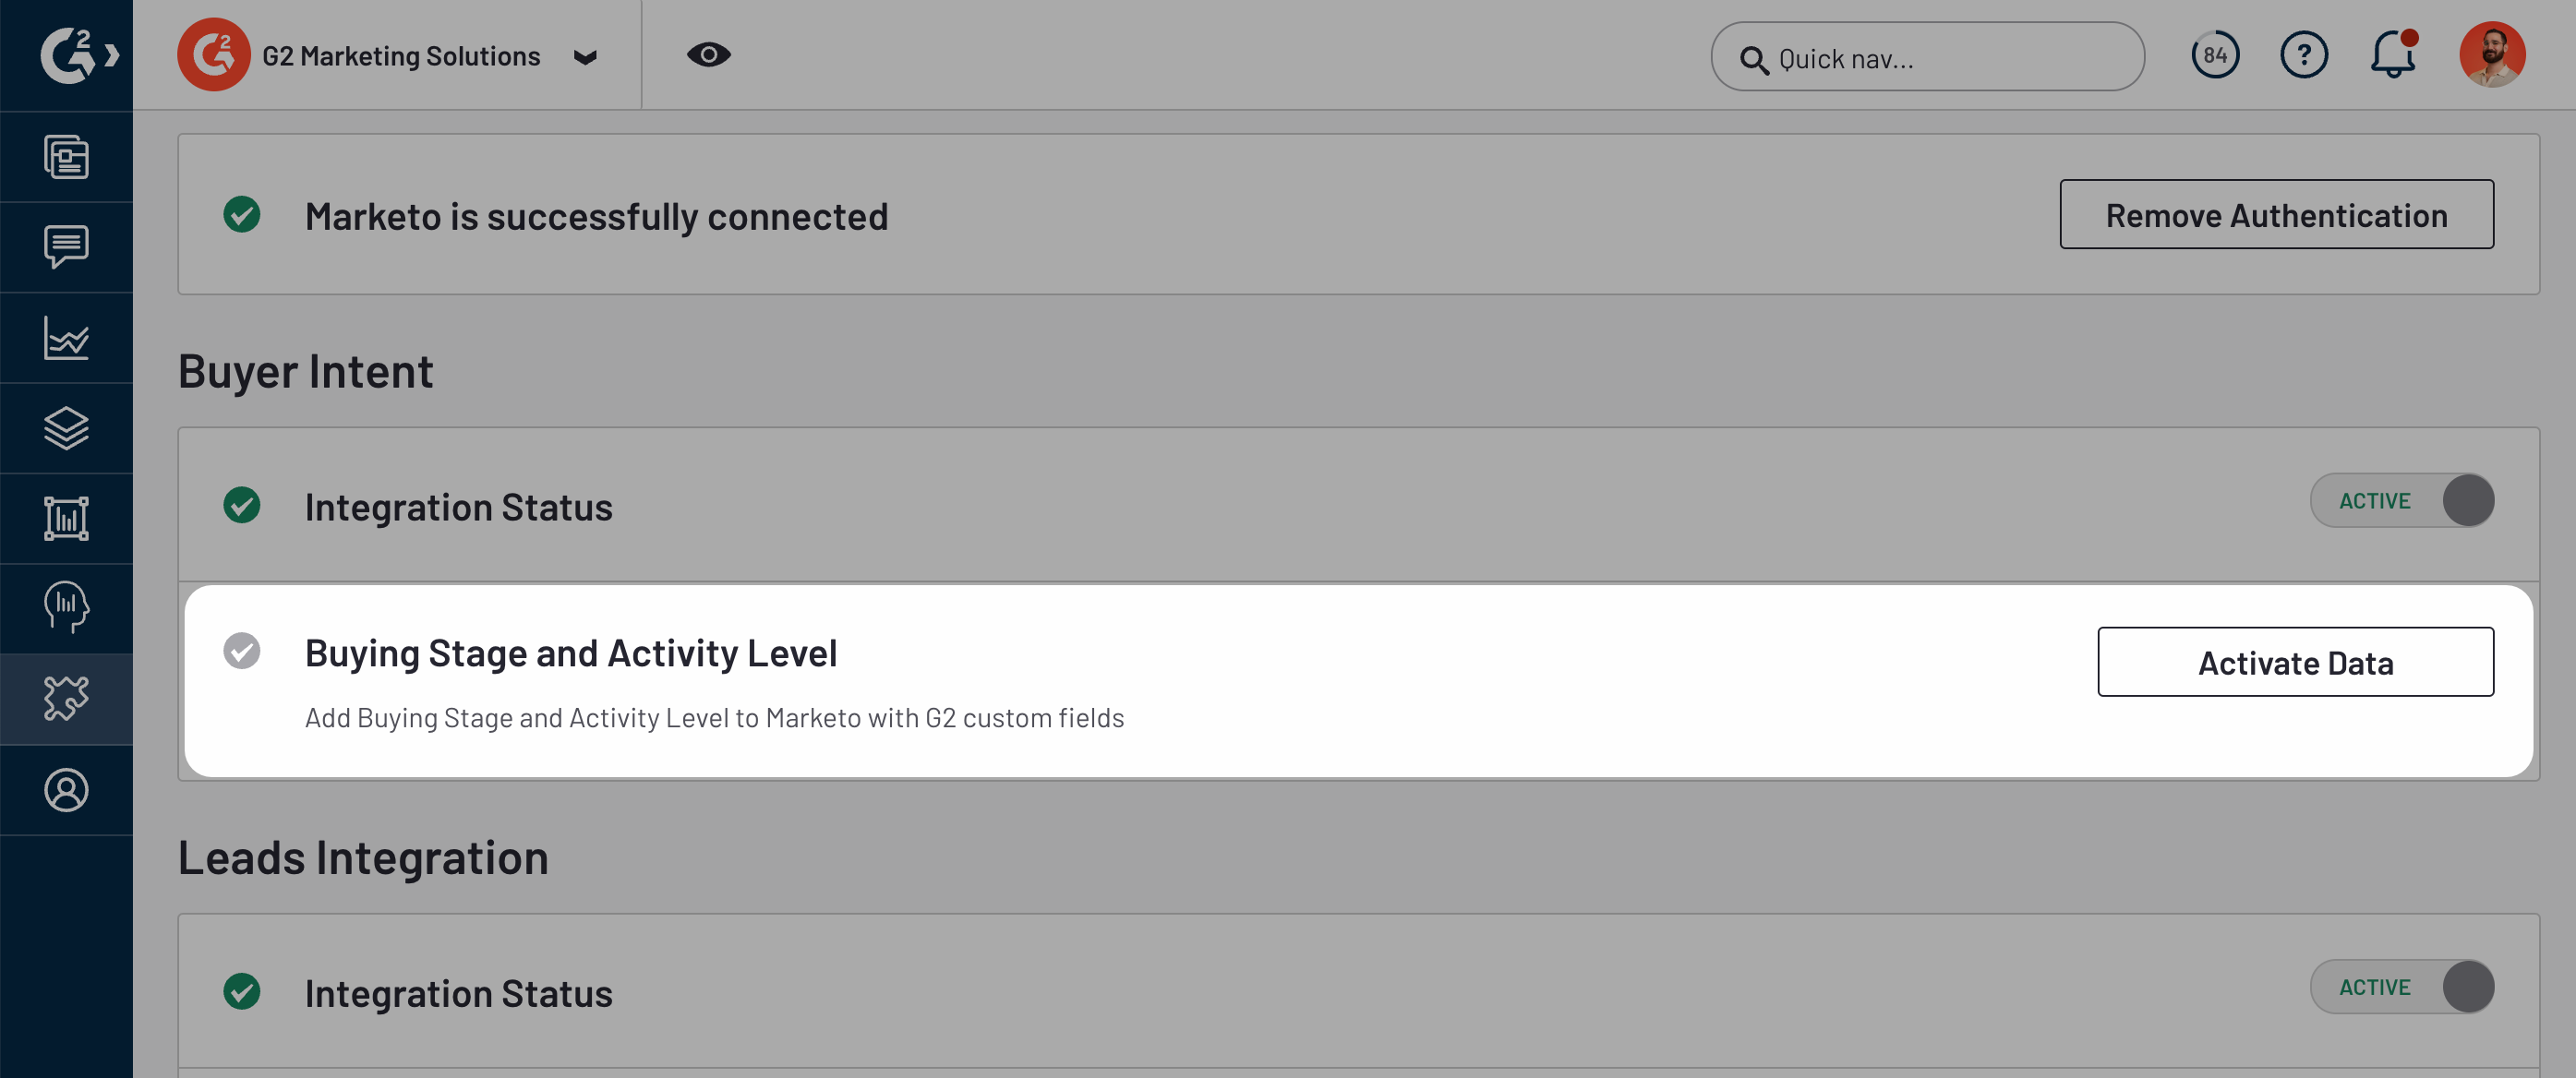
- Set the Buyer Intent Integration Status slider to Active.

- To send Buying Stage and Activity Level data to Marketo, select Activate Data, then set the Buying Stage and Activity Level slider to Active.
For more information on Buying Stage and Activity Level, refer to the Buyer Intent documentation.
Buyer Intent data will begin flowing to Marketo within 24-48 hours of activation.
Once data is flowing into your Marketo environment, G2 recommends building a list with Buyer Intent data to get a better understanding of how you can leverage this integration to segment Marketo people.
5. (Optional) Enable leads data
G2 leads are generated when buyers commit certain actions on your G2 product profile page, including watching videos, downloading your content, and requesting custom quotes.
To view all leads generated from your G2 product profile, log in to my.G2, then go to Buyer Activity > Leads > Leads Activity.
To send leads data to Marketo:
- Go to my.G2, then Integrations > Integration Hub.
- Select the Marketo Engage tile.
- In the Leads Integration section, set the Integration Status slider to Active.
- In the Configure Leads field, select Edit Configuration.
- Select Add a Field to add rows. Use the dropdowns in the G2 field and Marketo field columns to map the G2 leads data to your Marketo fields.
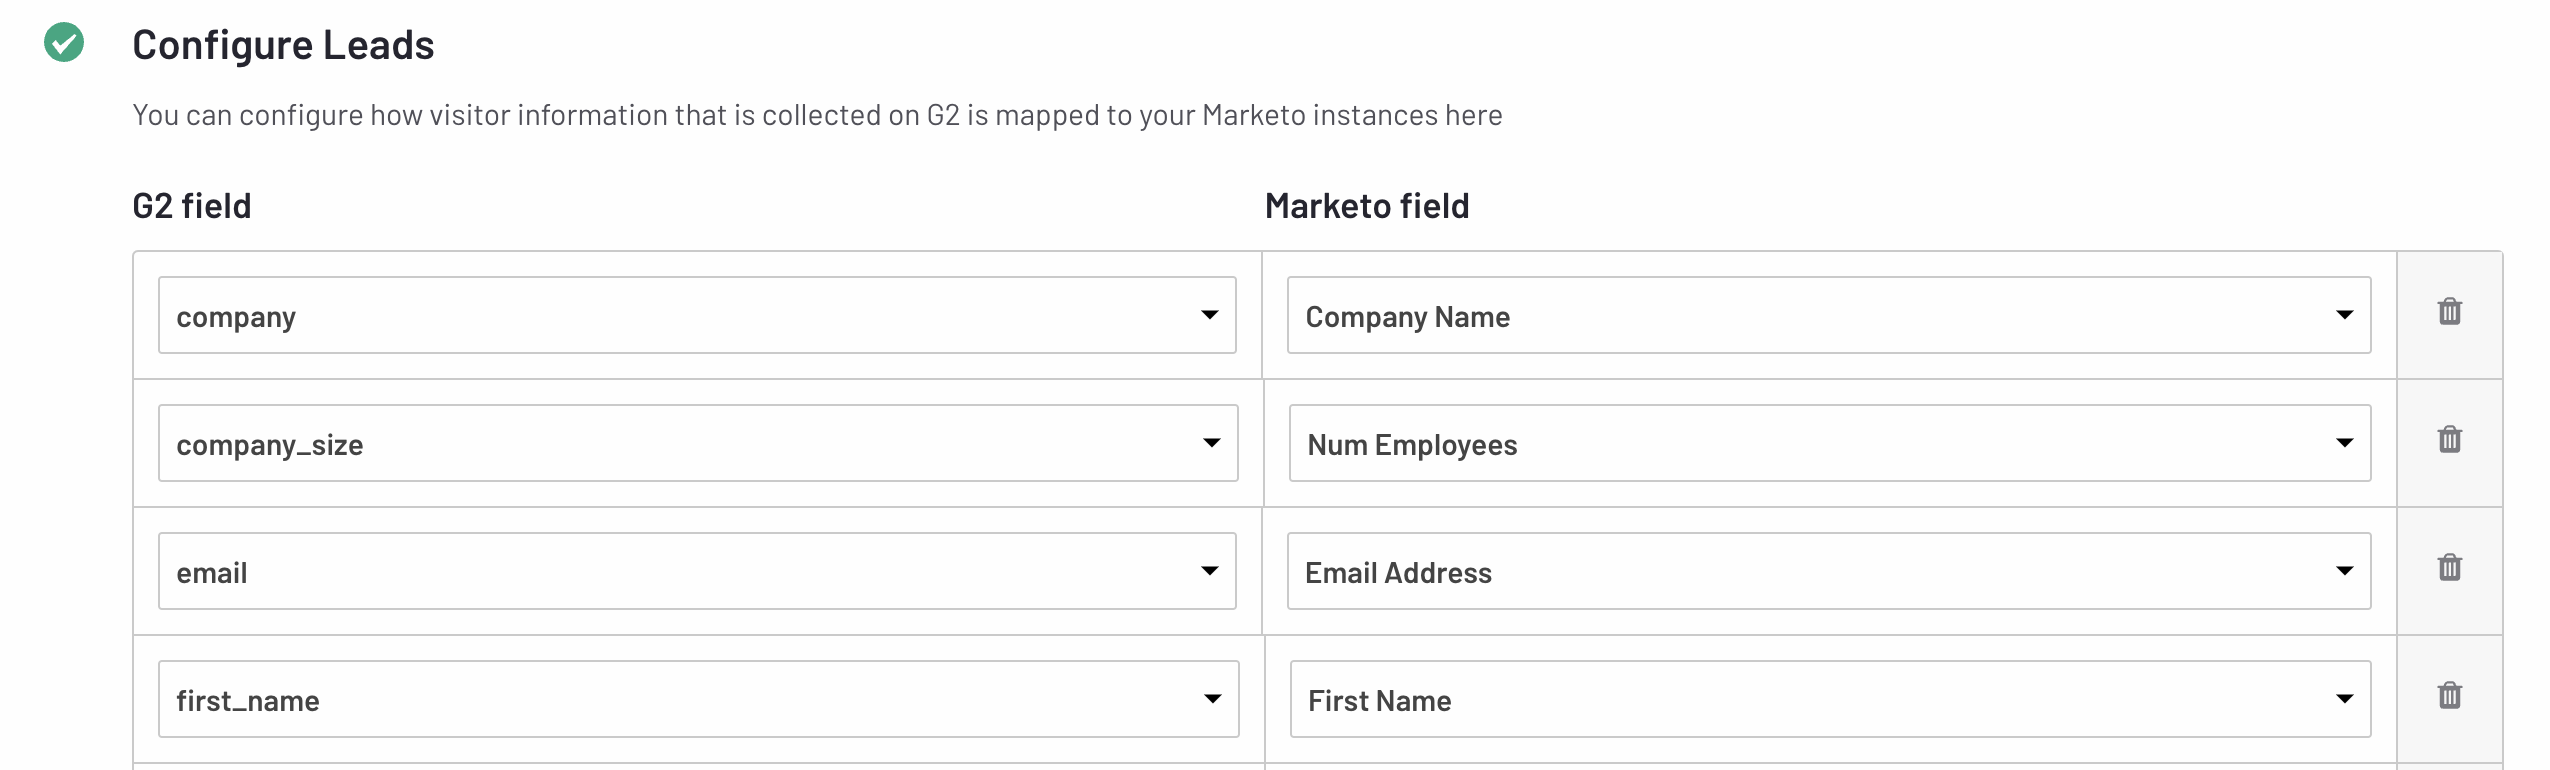
For more information on choosing lead form fields, refer to the Tagging leads with additional data section.
- When finished mapping, select Save. G2 leads will begin flowing to Marketo within 24-48 hours.
If a lead generated from your G2 product profile already exists as a Marketo person, G2 overwrites the lead’s information in Marketo with the most recent data.
Tagging leads with additional data
Any field on your G2 lead form can be mapped to Marketo, including custom and hidden fields. To view all form fields available for mapping, select Add a Field, then scroll through the options in the G2 field dropdown.

G2 collects robust interaction data when buyers submit your lead form, which you can also map to fields in Marketo. For example, use the user_action or action_id fields to include the specific action that triggered the lead form submission.
The user_action field provides a short, human-readable version of the interaction, such as Downloaded a document.
The action_id field provides full details for the interaction. If the lead was generated by a document being downloaded, the name of the document is also included, such as document_download: Pricing List.
If you want to tag your leads with data that G2 does not capture by default, refer to the Leads documentation for more information on adding custom fields to your lead form.
For example, if you have multiple products listed on G2, you might want to tag leads with the name of the specific product profile that captured the lead. To accomplish this, you can create a hidden product name field on the lead form for each of your products, which can then be mapped to Marketo.

company_size field mapping
To make creating workflows using company size data easier, G2 converts company size ranges into a single integer before sending to Marketo.
The following table shows the possible selections for the Company Size field on the G2 lead form and the corresponding number sent to Marketo.
| G2 Lead form option | Number sent to Marketo |
| Myself Only |
|
| 2-10 employees |
|
| 11-50 employees |
|
| 51-200 employees |
|
| 201-500 employees |
|
| 501-1000 employees |
|
| 1001-5000 employees |
|
| 5001-10000 employees |
|
| 10001+ employees |
|
Confirming leads activity
After enabling leads data, confirm that leads are flowing to your Marketo instance by reviewing the Leads Activity section in the my.G2 Marketo Engage tile, which contains all leads sent to Marketo.
A green checkmark in the Status column indicates that the lead was successfully created in Marketo, while a red X indicates that lead data could not be synced.
To determine why a lead did not sync, select the dropdown arrow, then review the Response message at the bottom of the sync data.
