Manage Listings enables you to showcase your brand and manage information about your product across G2 marketplaces: G2, Capterra, Software Advice, and GetApp.
Basics of Product Information
Marketplaces
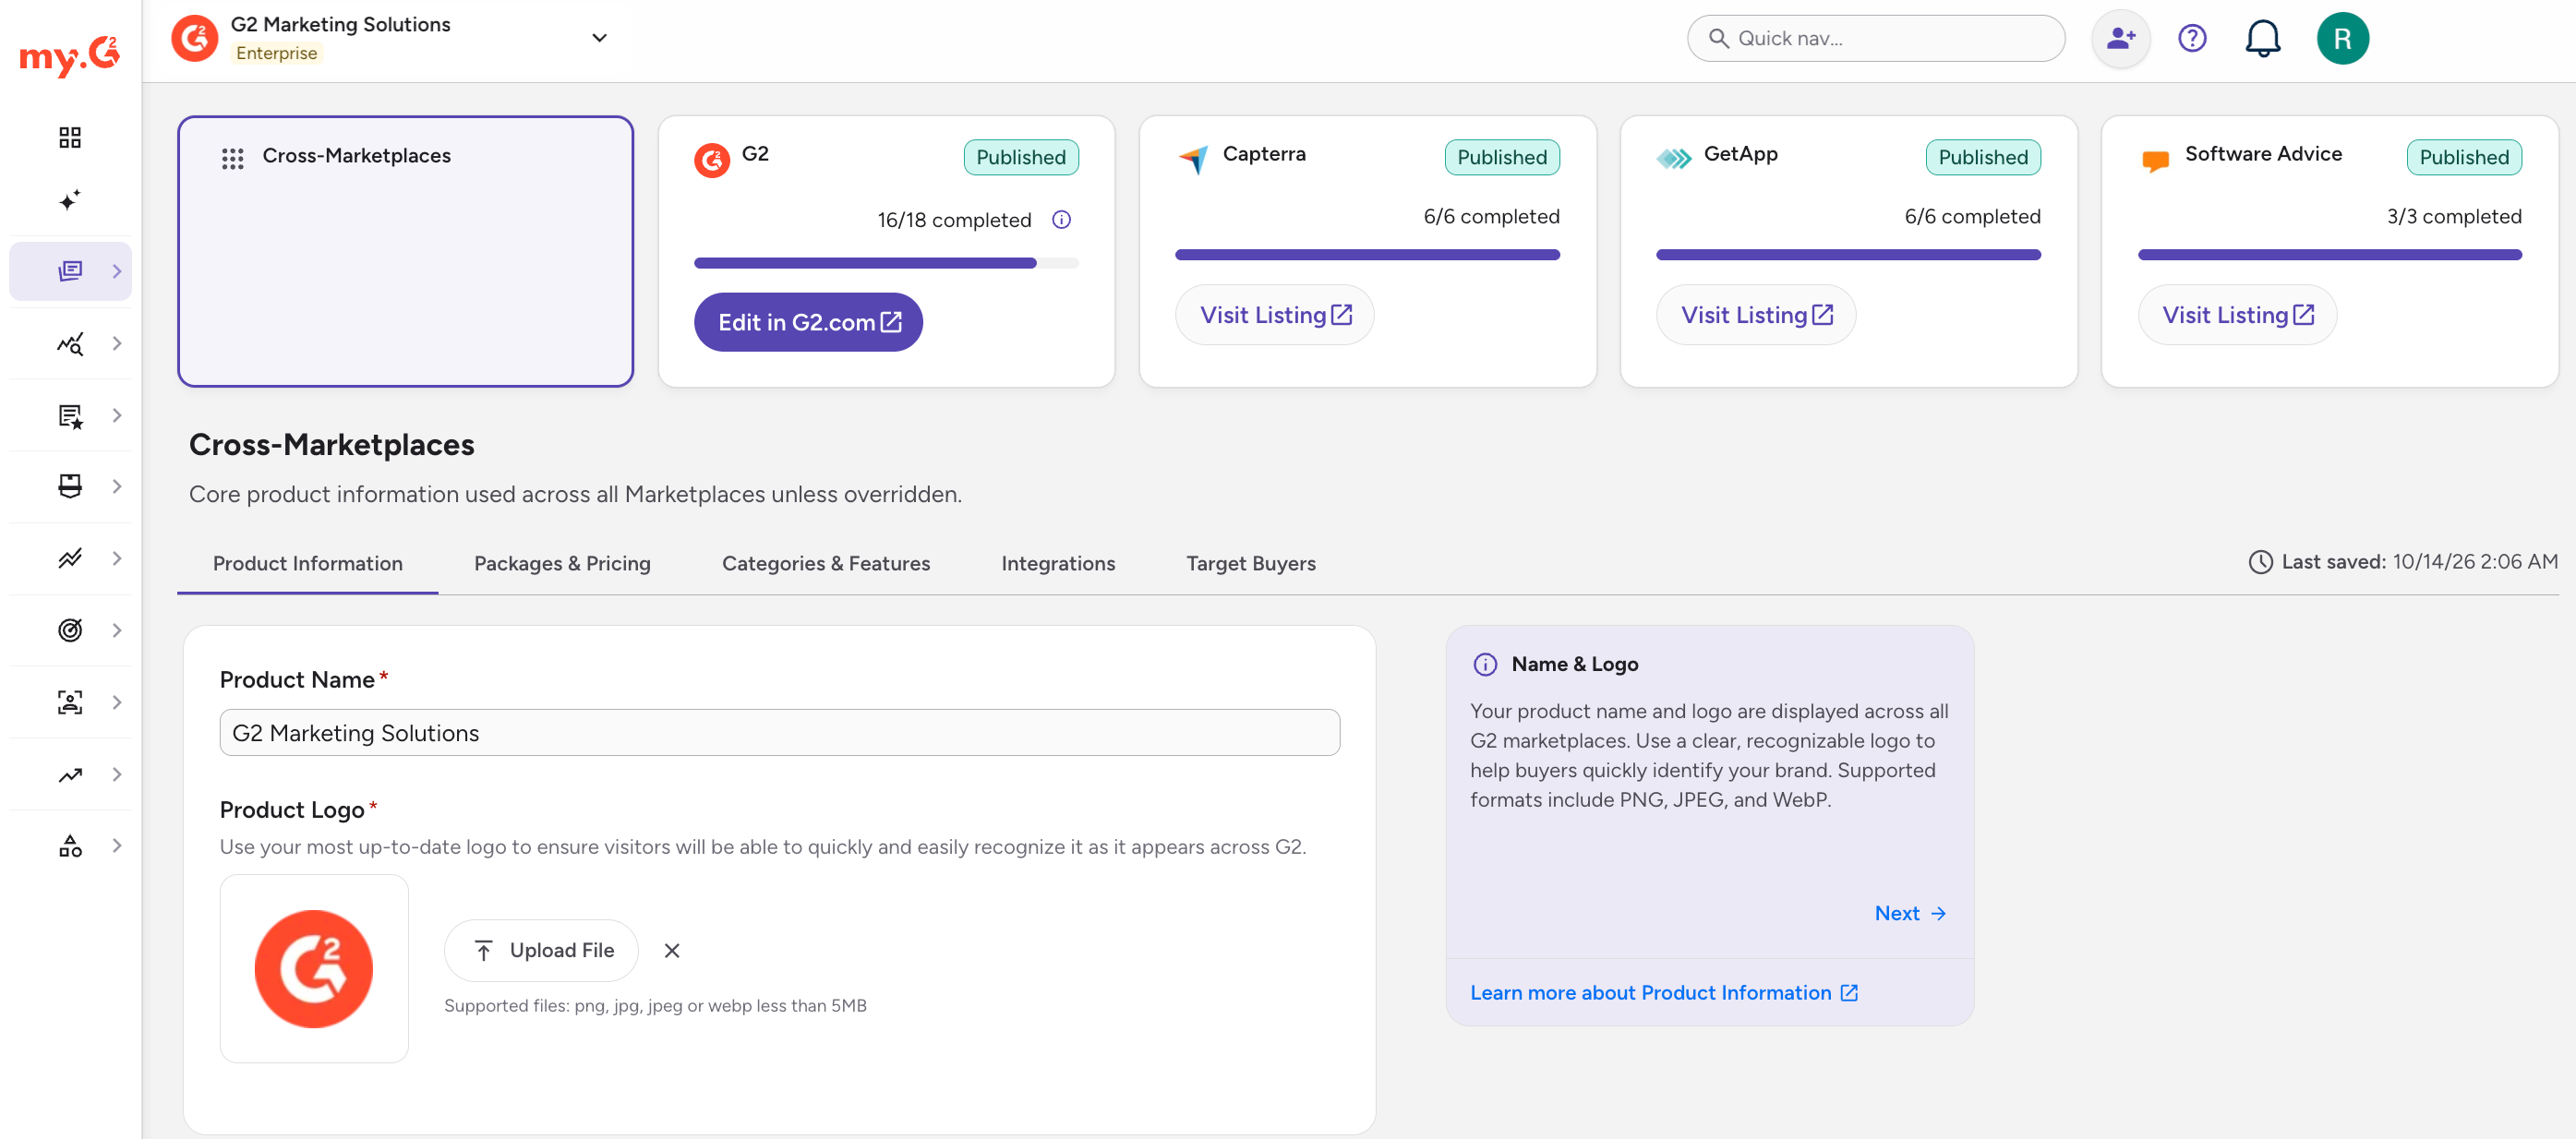
You can manage your product listing across all G2 marketplaces (G2, Capterra, Software Advice, and GetApp) from one place in my.G2. Each marketplace reaches a different kind of buyer, so you can tailor your listing where it matters.
- Enter your information once. The core product information in the Cross-Marketplaces panel applies to every marketplace unless a marketplace overrides it.
- Track your progress. Each marketplace shows whether your listing is published and how many fields you've completed.
- See your listing live. Select Visit Listing next to a marketplace to view your listing.
Here's what you can customize:
| Marketplace | What you can customize |
|---|---|
| Cross-Marketplaces | Product Information, Packages & Pricing, Categories & Features, Integrations, and Target Buyers |
| G2 | Profile Assets, CTA Settings, Downloads, Interactive Demo, Lead Form, Featured Companies, AI Sales Agent, and G2 Deals |
| Capterra, Software Advice, and GetApp | Descriptions, Screenshots, Videos, and International Markets |
Write a unique description for each marketplace to explain what problem your product solves, what it does, and how businesses use it. Content for each marketplace must be in English.
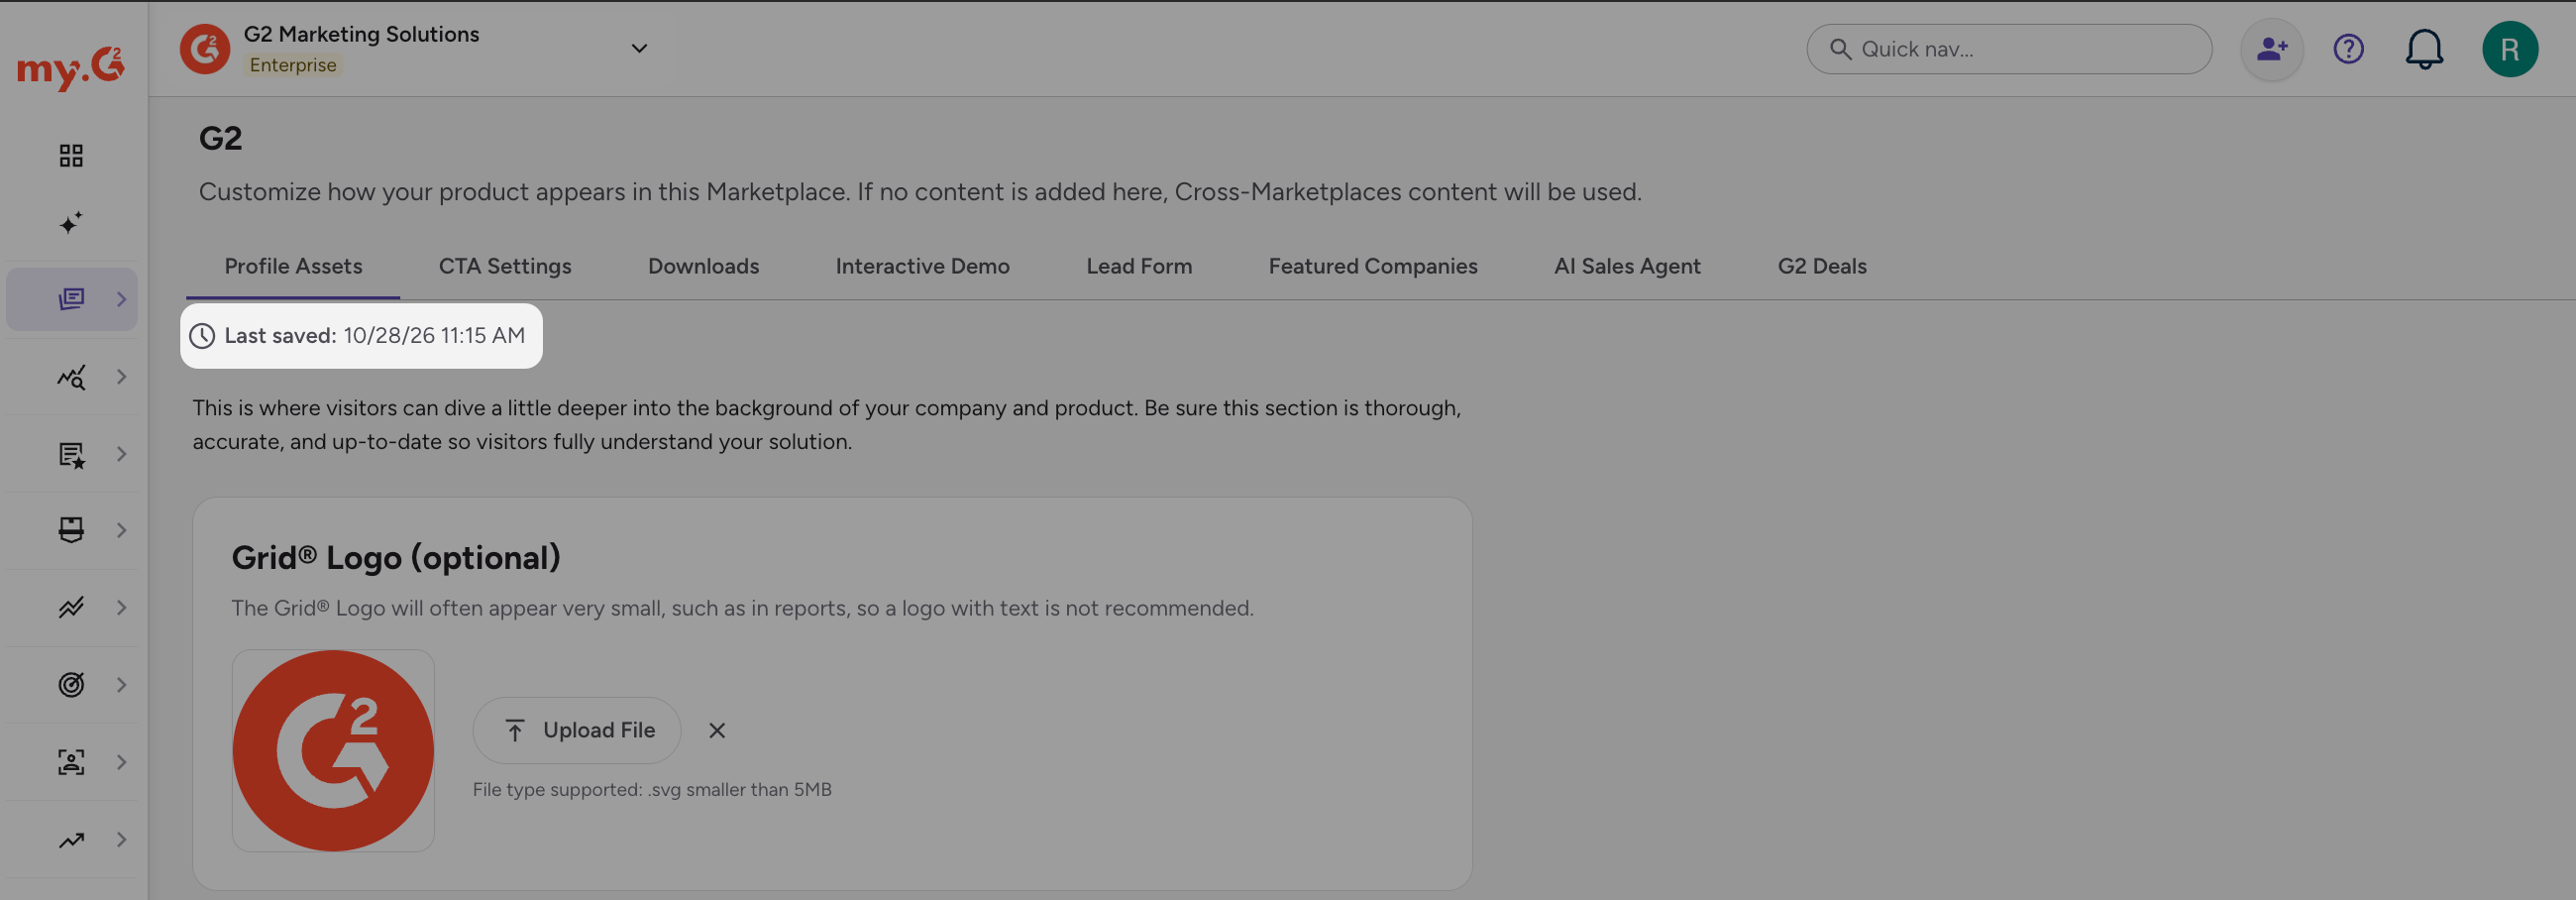
The date and time you last saved appears on each marketplace's page.
Manage your listings in my.G2
To manage your listings, go to my.G2, then select Listings > Manage Listings.
Cross-Marketplaces
Use the Cross-Marketplaces panel to manage the core information that applies to each marketplace.
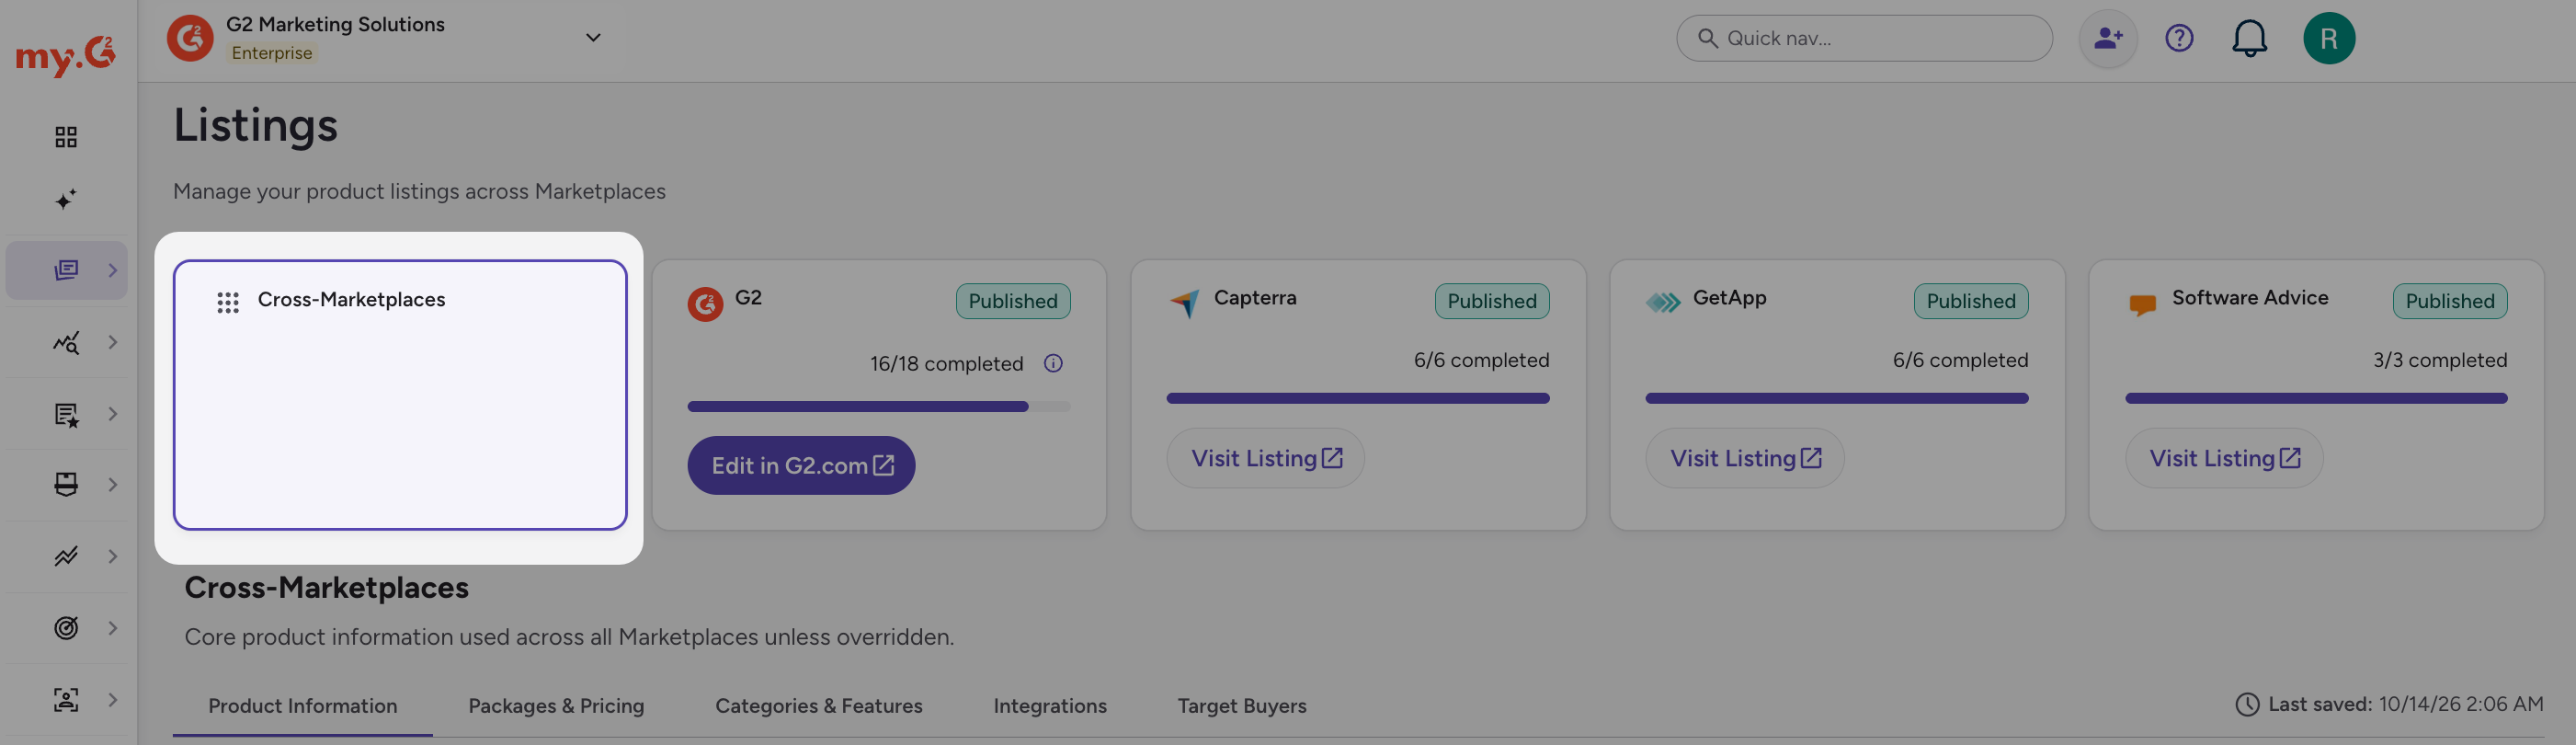
| Tab | What you manage |
|---|---|
| Product Information | Core details about your product and company. This article covers these details. |
| Packages & Pricing | Your pricing packages and pricing details. Refer to Packages & Pricing. |
| Categories & Features | Your categories and the features of your product. Refer to Product categories and features in this article and Features. |
| Integrations | Your integrations and whether you offer an open API. Refer to Integrations. |
| Target Buyers | The company sizes, number of users, industries, and countries you want to target. |
Managing your product information in my.G2
You can customize your product’s profile assets by going to my.G2, then select Listings > Manage Listings > Product Information.
| Section | Details |
|---|---|
| Product Name | Enter the name of your product. Refer to Updating your product or vendor name for naming guidelines. |
| Product Logo | Select Upload File and choose an image from your local machine. G2 displays your product name and logo across all marketplaces, so use a clear, recognizable logo. Your logo must be a PNG, JPG, JPEG, or WebP file smaller than 5 MB. |
| Languages | Select the languages your product supports. |
| Software Type | Tell buyers how your product is deployed. Select Yes or No for Hosted Deployment (cloud, SaaS, or web-based) and for On-Premise Deployment. |
| Licensing Models | Select Proprietary or Open Source. |
| Support & Training | Select the support and training options you offer. |
| Compliance & Security Certifications | Select the compliance and security certifications your product holds. |
| Seller Information | Review the public details about your company and product. Refer to Seller Information. |
The Languages field might not be used by all four marketplaces, and it doesn't impact Verified Leads.
Seller Information
These profile details represent public information about your company and product. G2 moderates this information to ensure compliance with marketplace requirements.
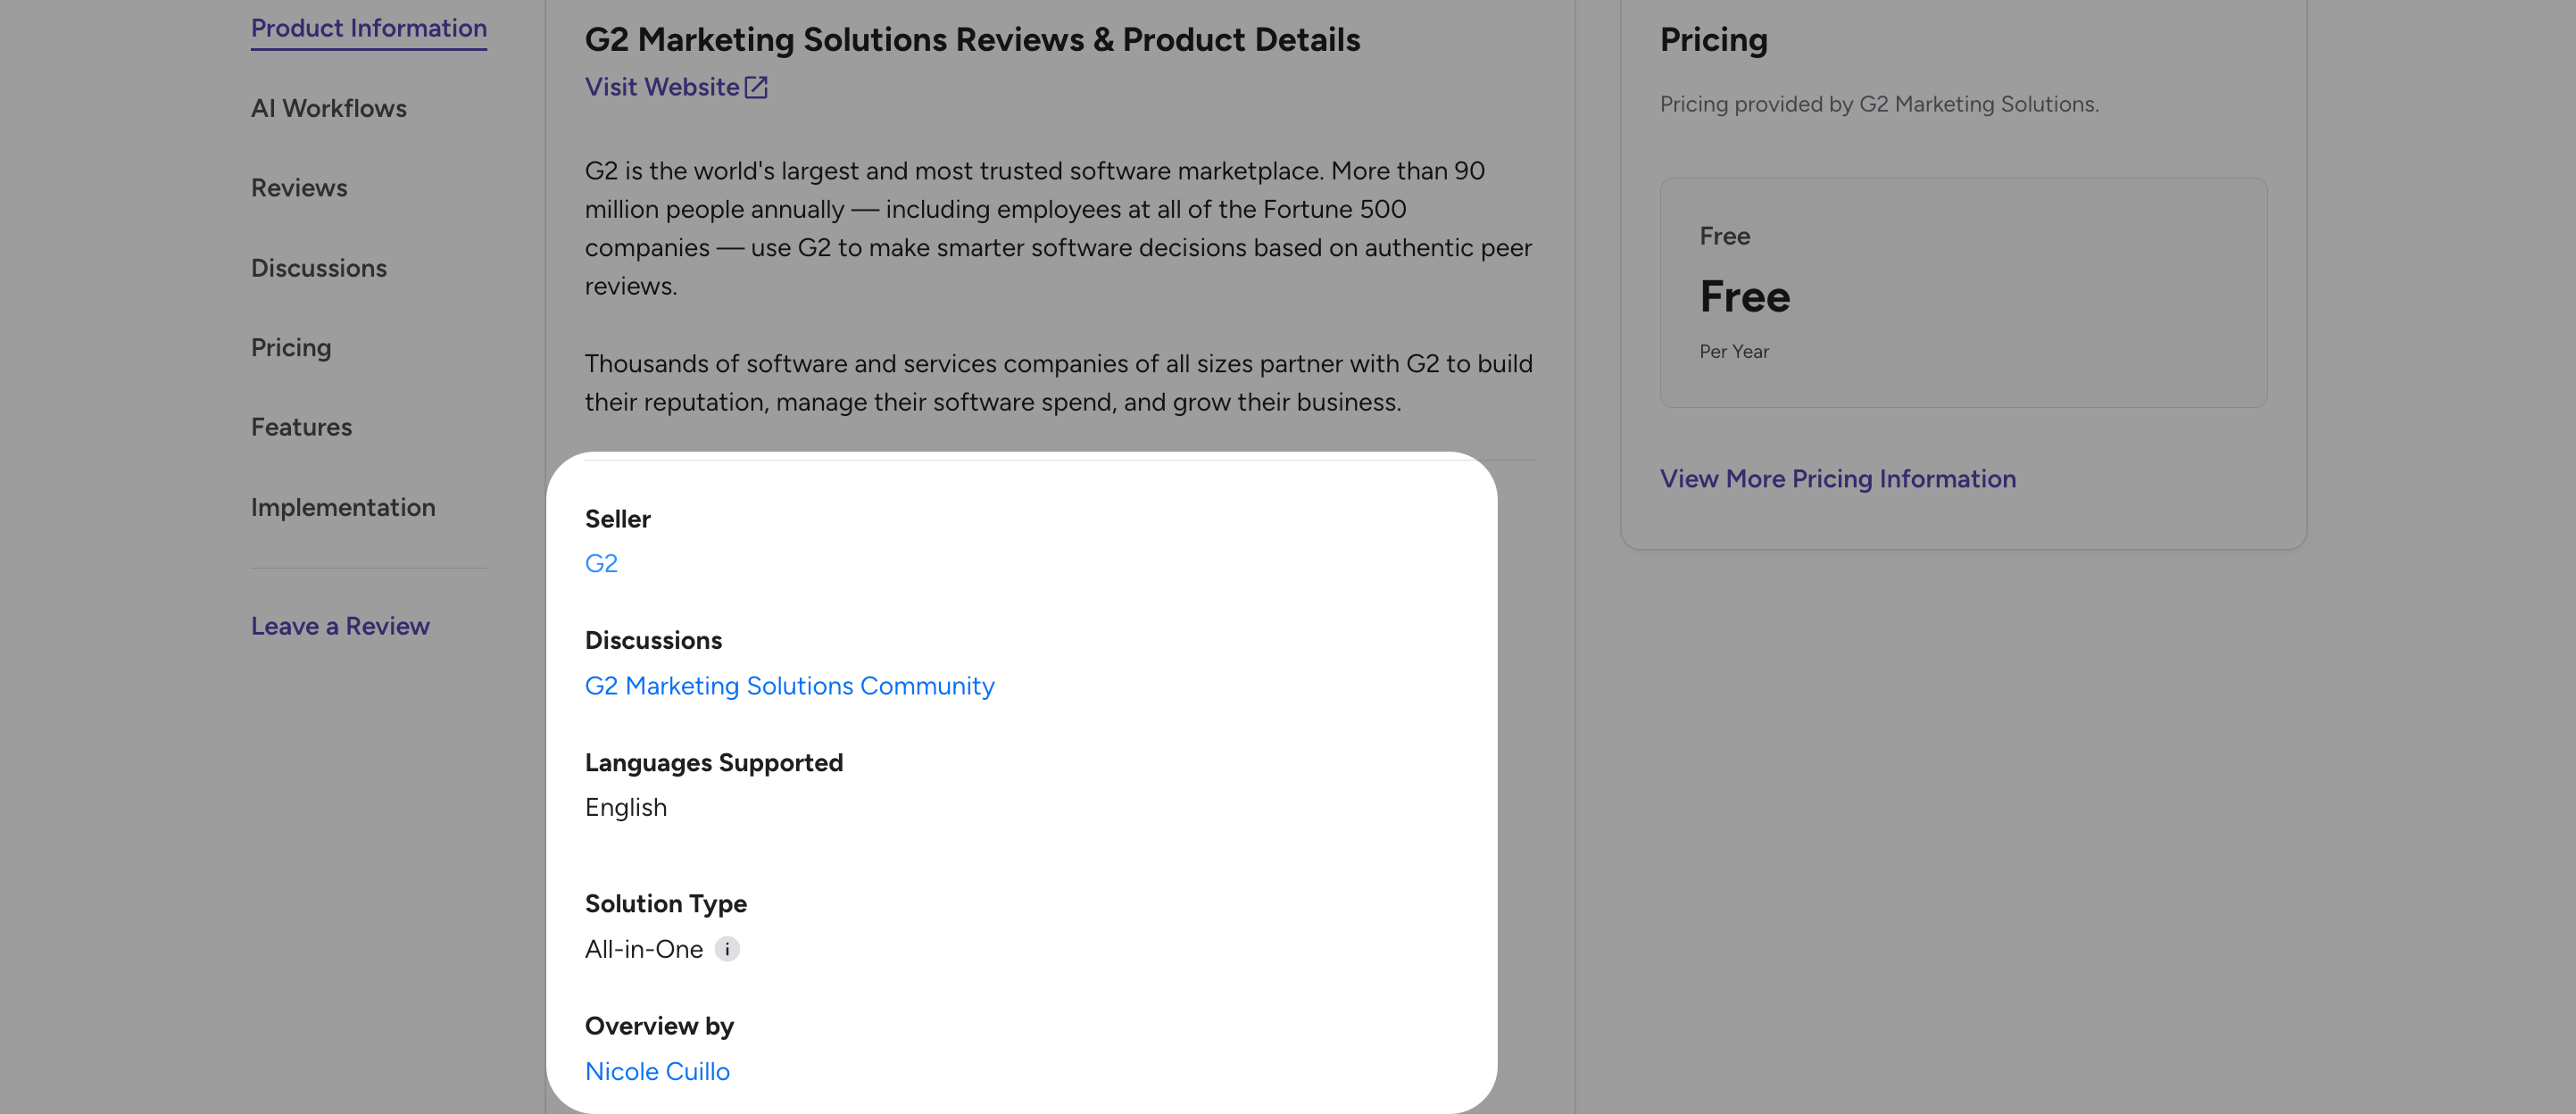
You can update these fields directly in my.G2: Product Name, Seller Domain, Year Founded, HQ Location, Company Size, X (Twitter) handle, and Seller Description.
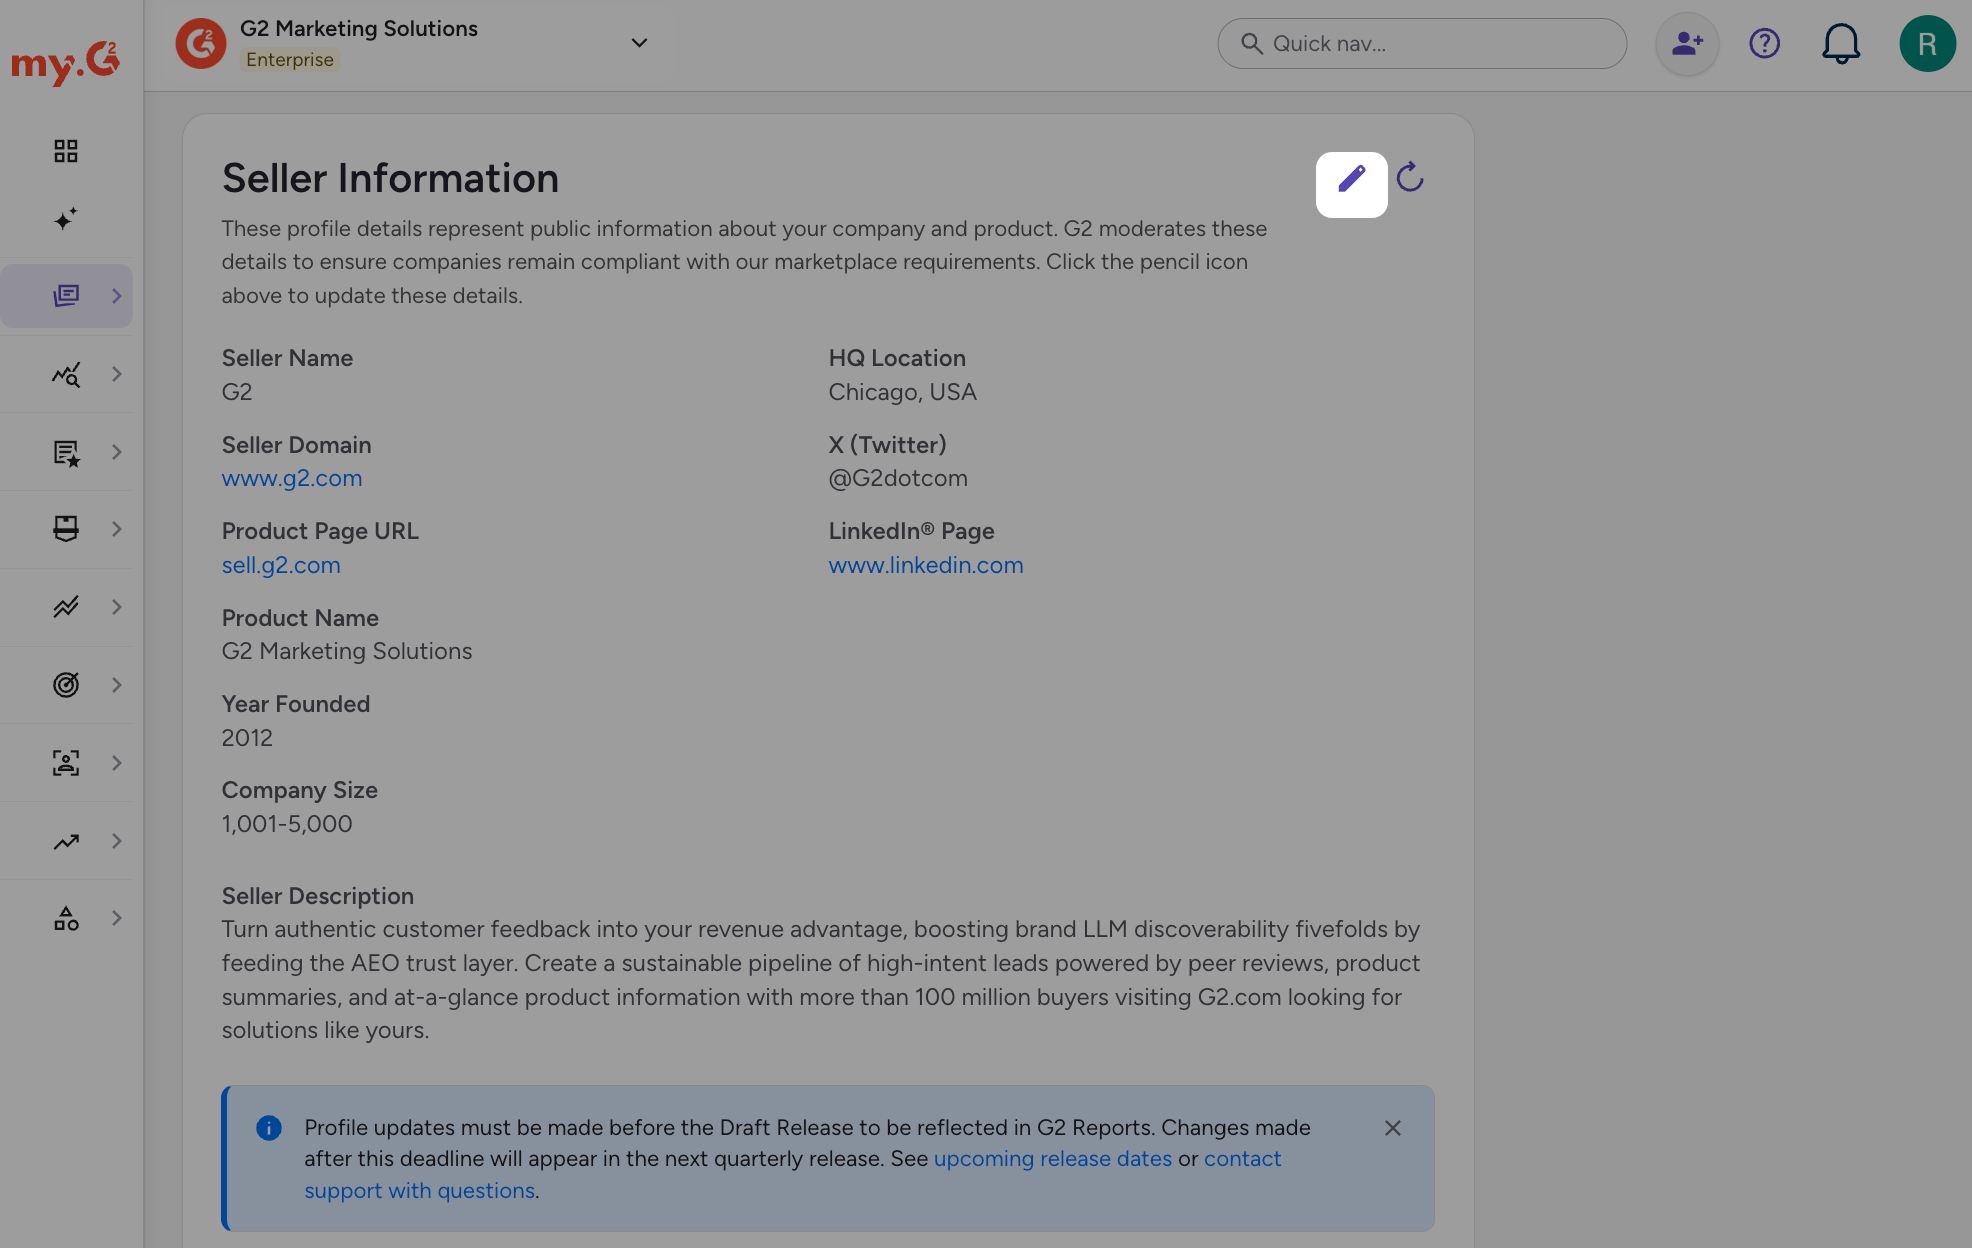
Make profile updates before the Draft Release for them to appear in G2 Reports. Changes made after that deadline appear in the next quarterly release.
To edit the fields yourself:
- Go to my.G2, then select Listings > Manage Listings > Product Information.
- In the Seller Information section, select the pencil icon.
- Enter your changes in the window that opens.
- Select Save Changes.
To retrieve latest profile details from external sources, select the refresh icon in the Seller Information section. Review each change, and discard any field you don’t want to apply before you save.
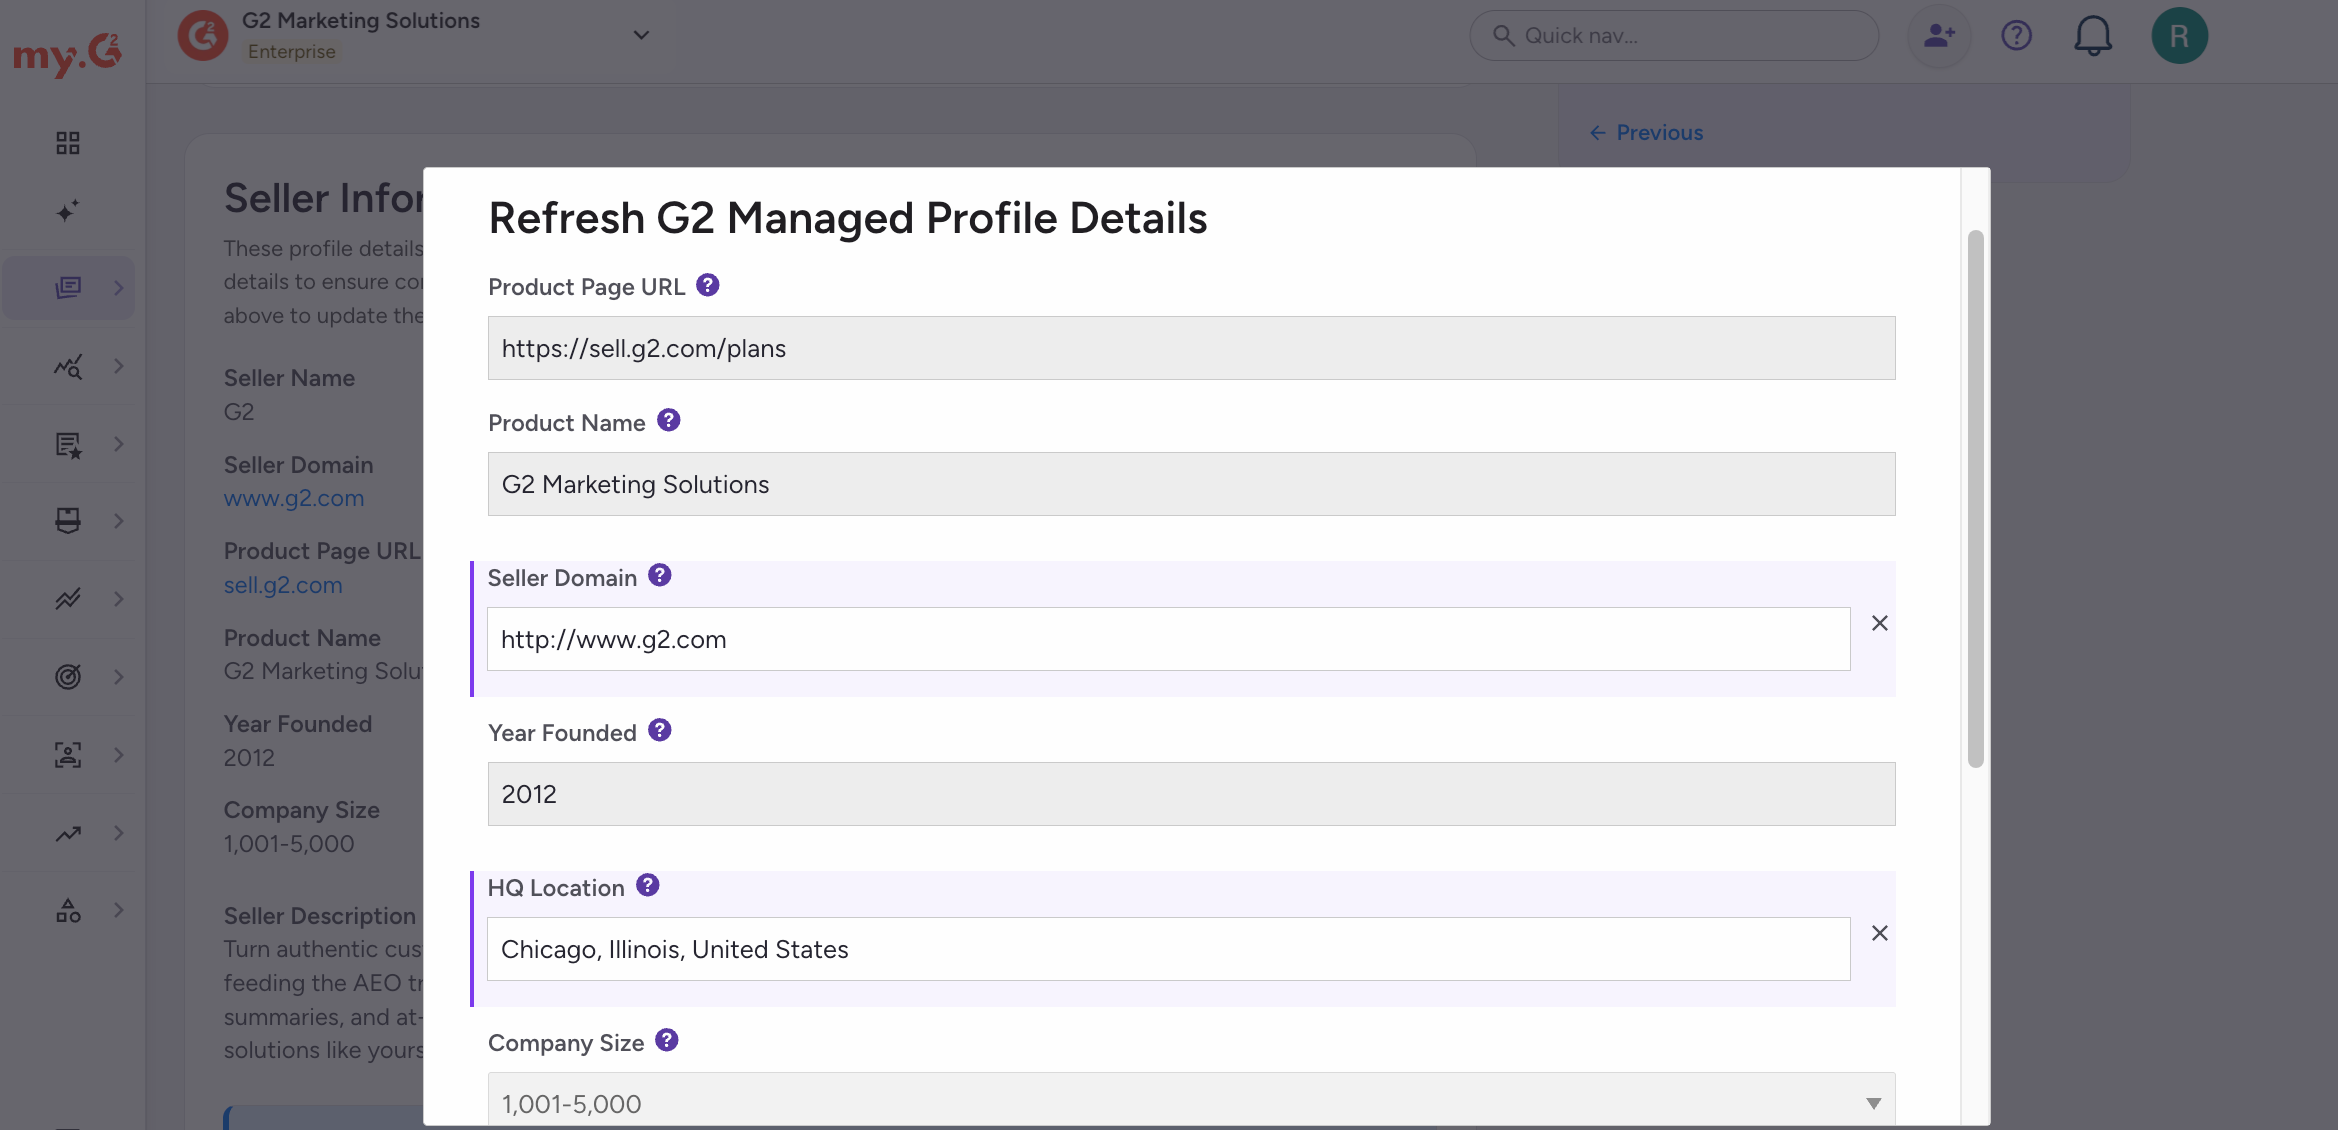
G2 validates updates automatically when changes are submitted.
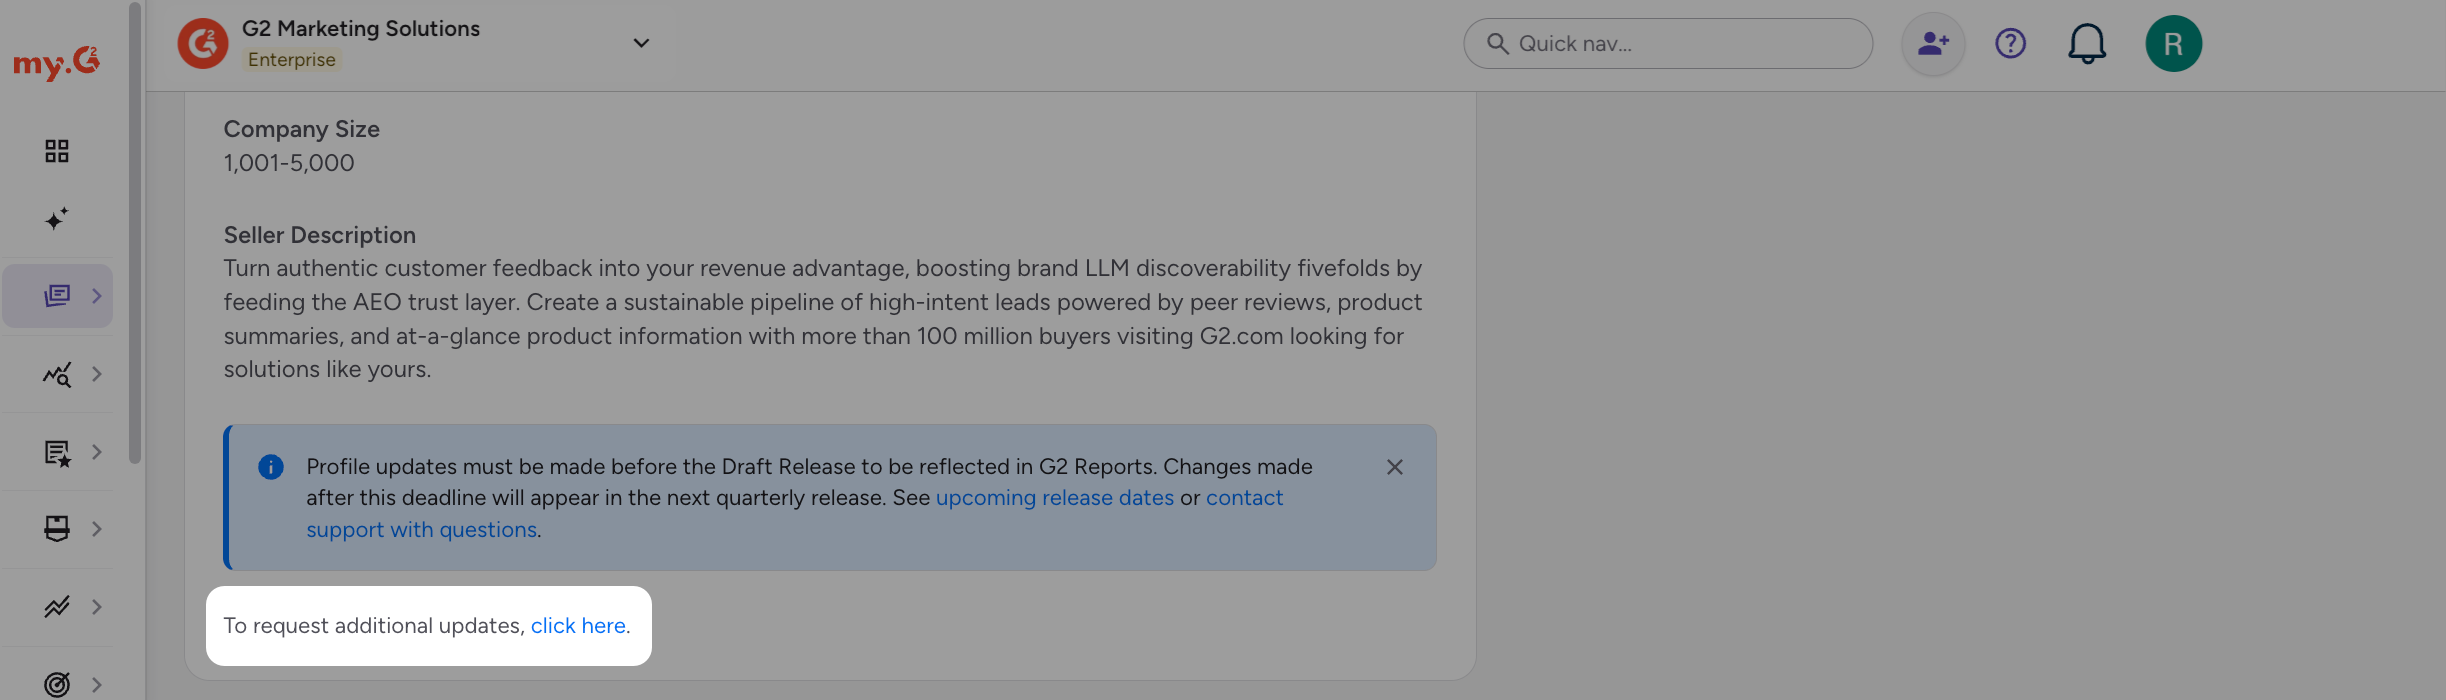
To request additional updates, select the click here link at the bottom of the section.
Updating your product or vendor name
Your product and vendor names on G2 should match how they appear on your website, without added marketing terms, keywords, or trademark symbols.
Follow these best practices when updating a name:
- Use the official name listed on your company’s website or legal documentation.
- Avoid promotional language, keywords, or symbols such as ™ or ®.
- If you are rebranding, you can include the former name in parentheses for clarity (e.g., New Brand (formerly Old Brand)).
You can change your Product Name yourself by following the steps in Seller Information. To change your Seller Name, use the click here link in that section to send G2 a request.
Packages and Pricing
Use the Packages & Pricing tab to add your pricing packages, pricing details, and free trial information.
To add your pricing information, go to my.G2, then select Listings > Manage Listings > Cross-Marketplaces > Packages & Pricing.
For steps and requirements, refer to Packages & Pricing.
Product Categories and Features
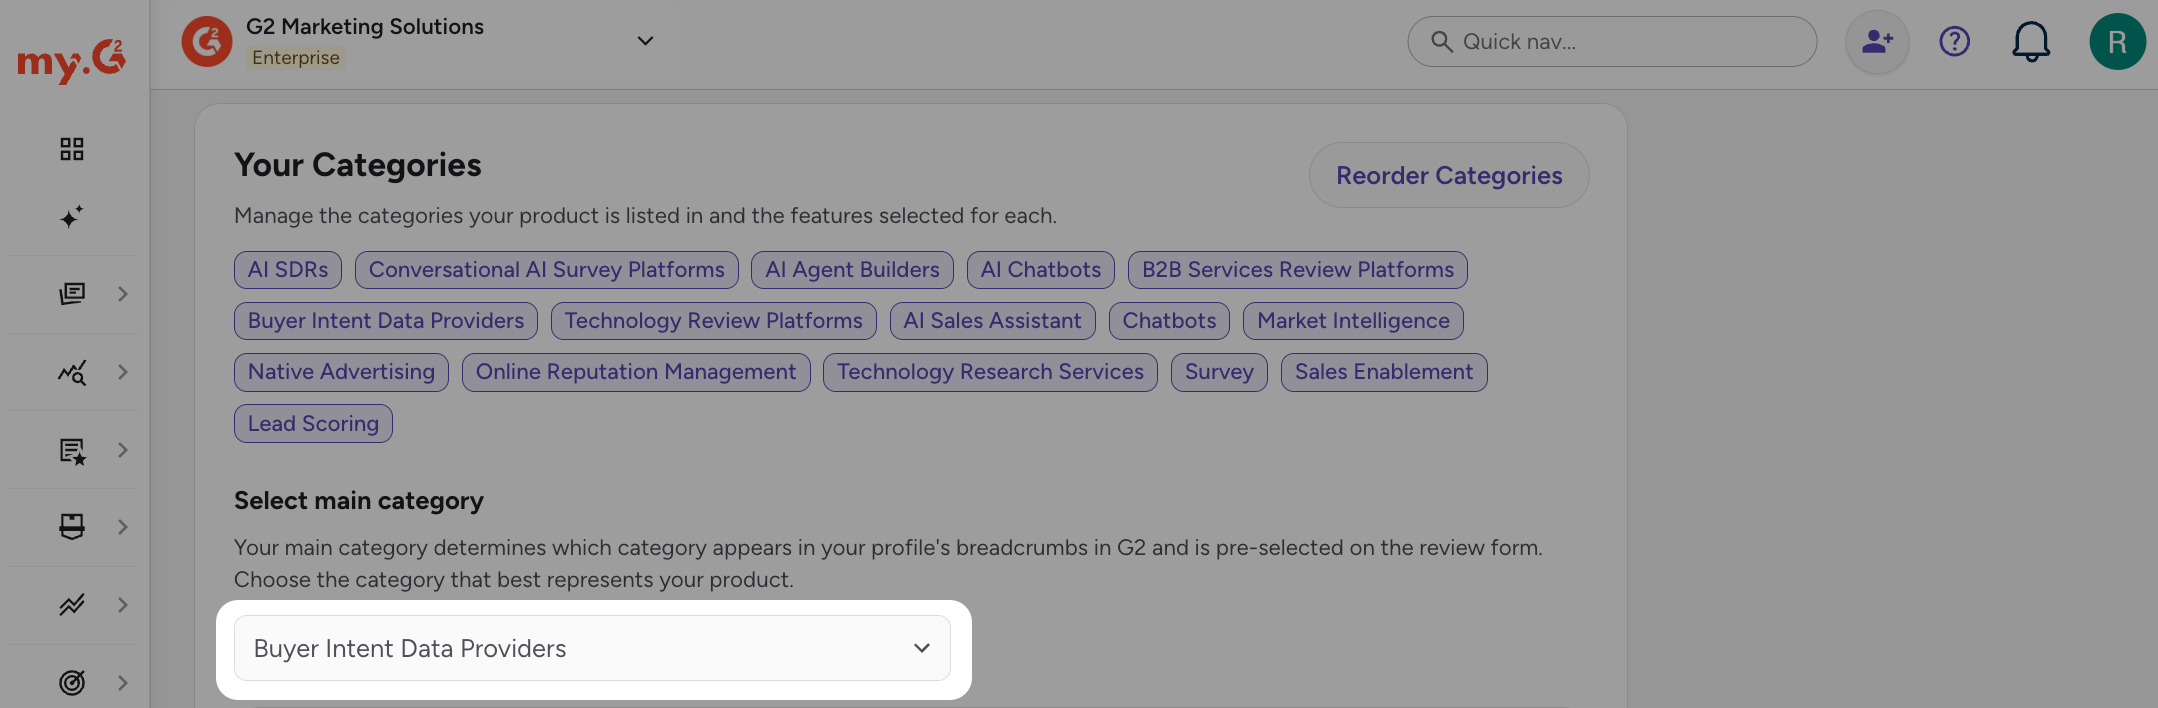
Use the Categories & Features tab to manage the G2 categories your product appears in. The Your Categories section lists each category that includes your product, and you can choose your main category and reorder the list. To manage the features of your product, refer to Features.
To view your categories, go to my.G2, then select Listings > Manage Listings > Categories & Features.
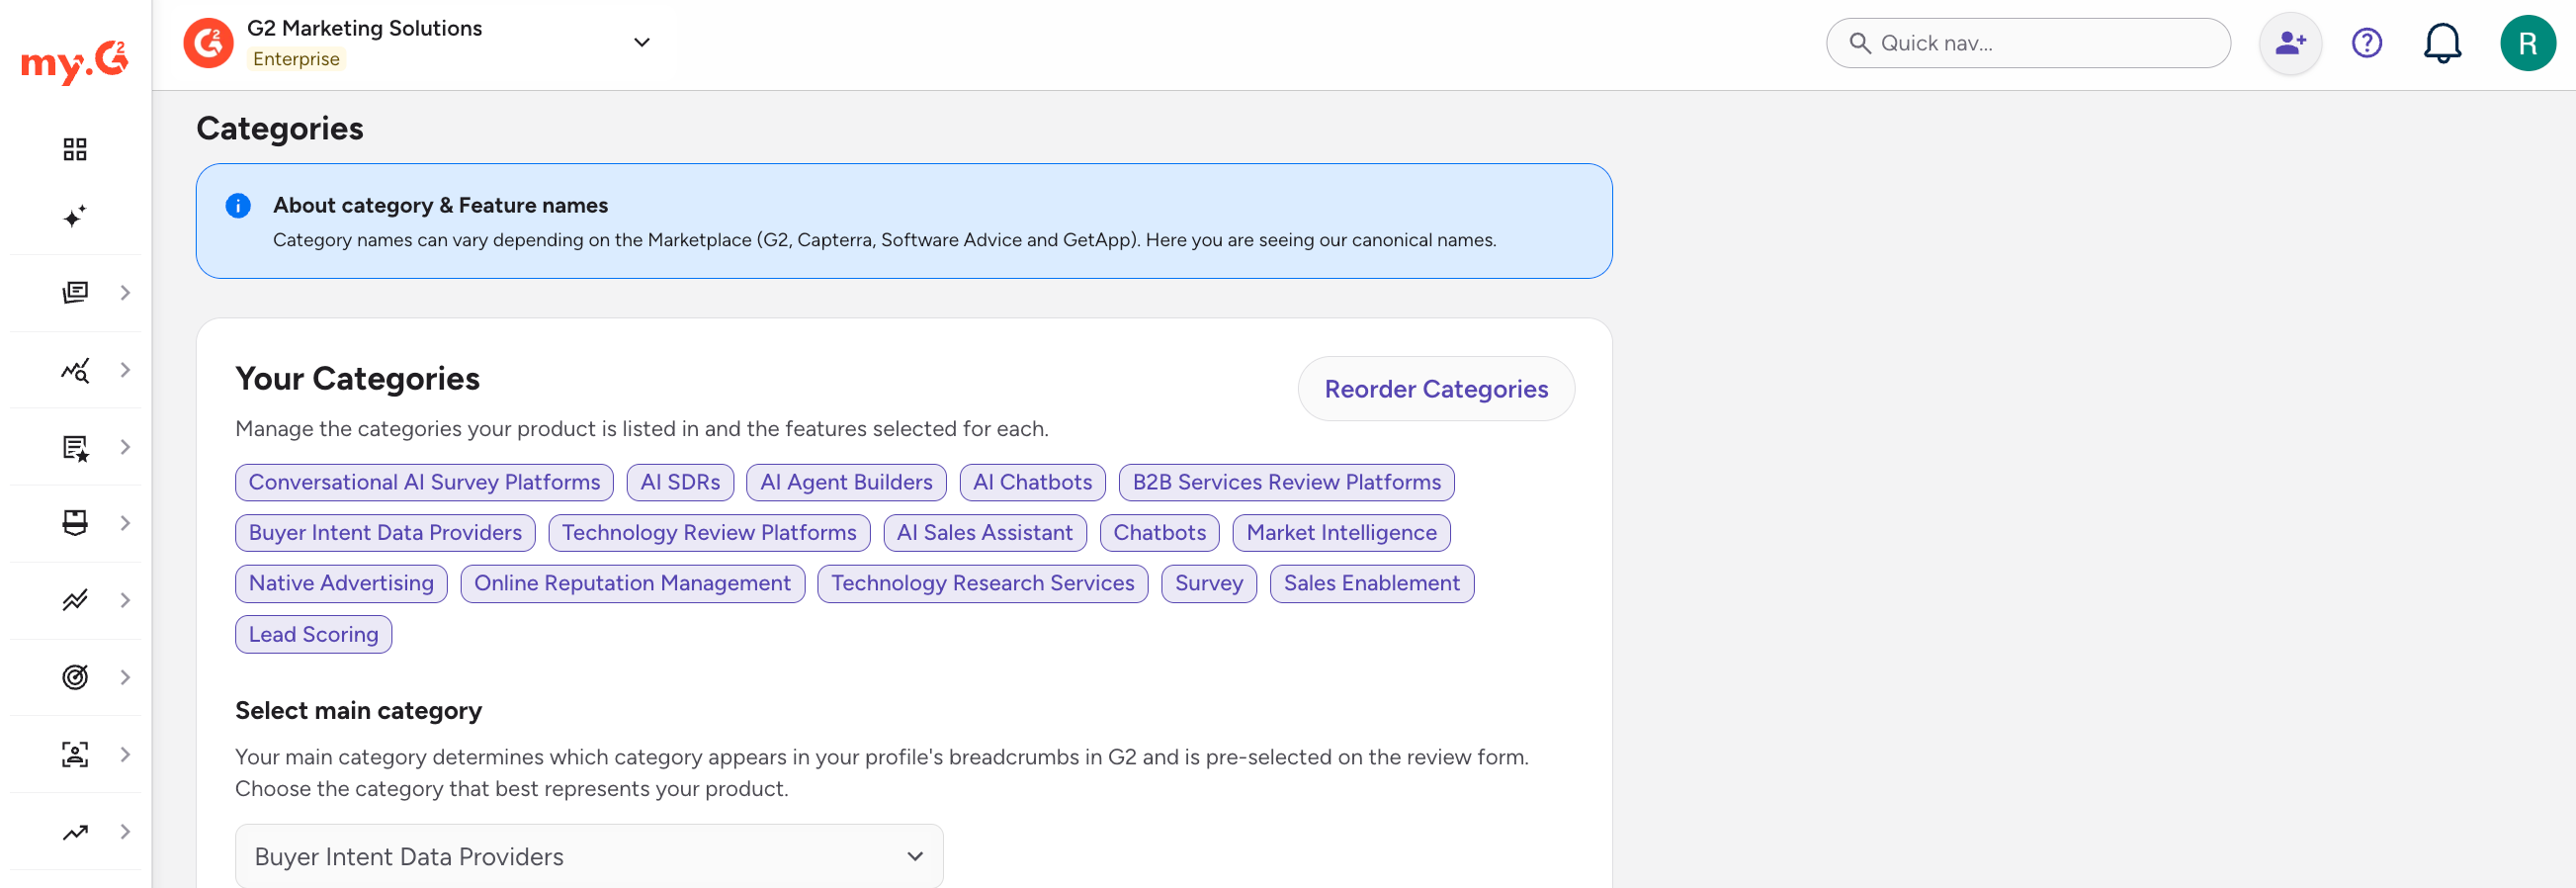
You can update your main category by selecting an option from the Select main category dropdown. The selected category must already be associated with your product.
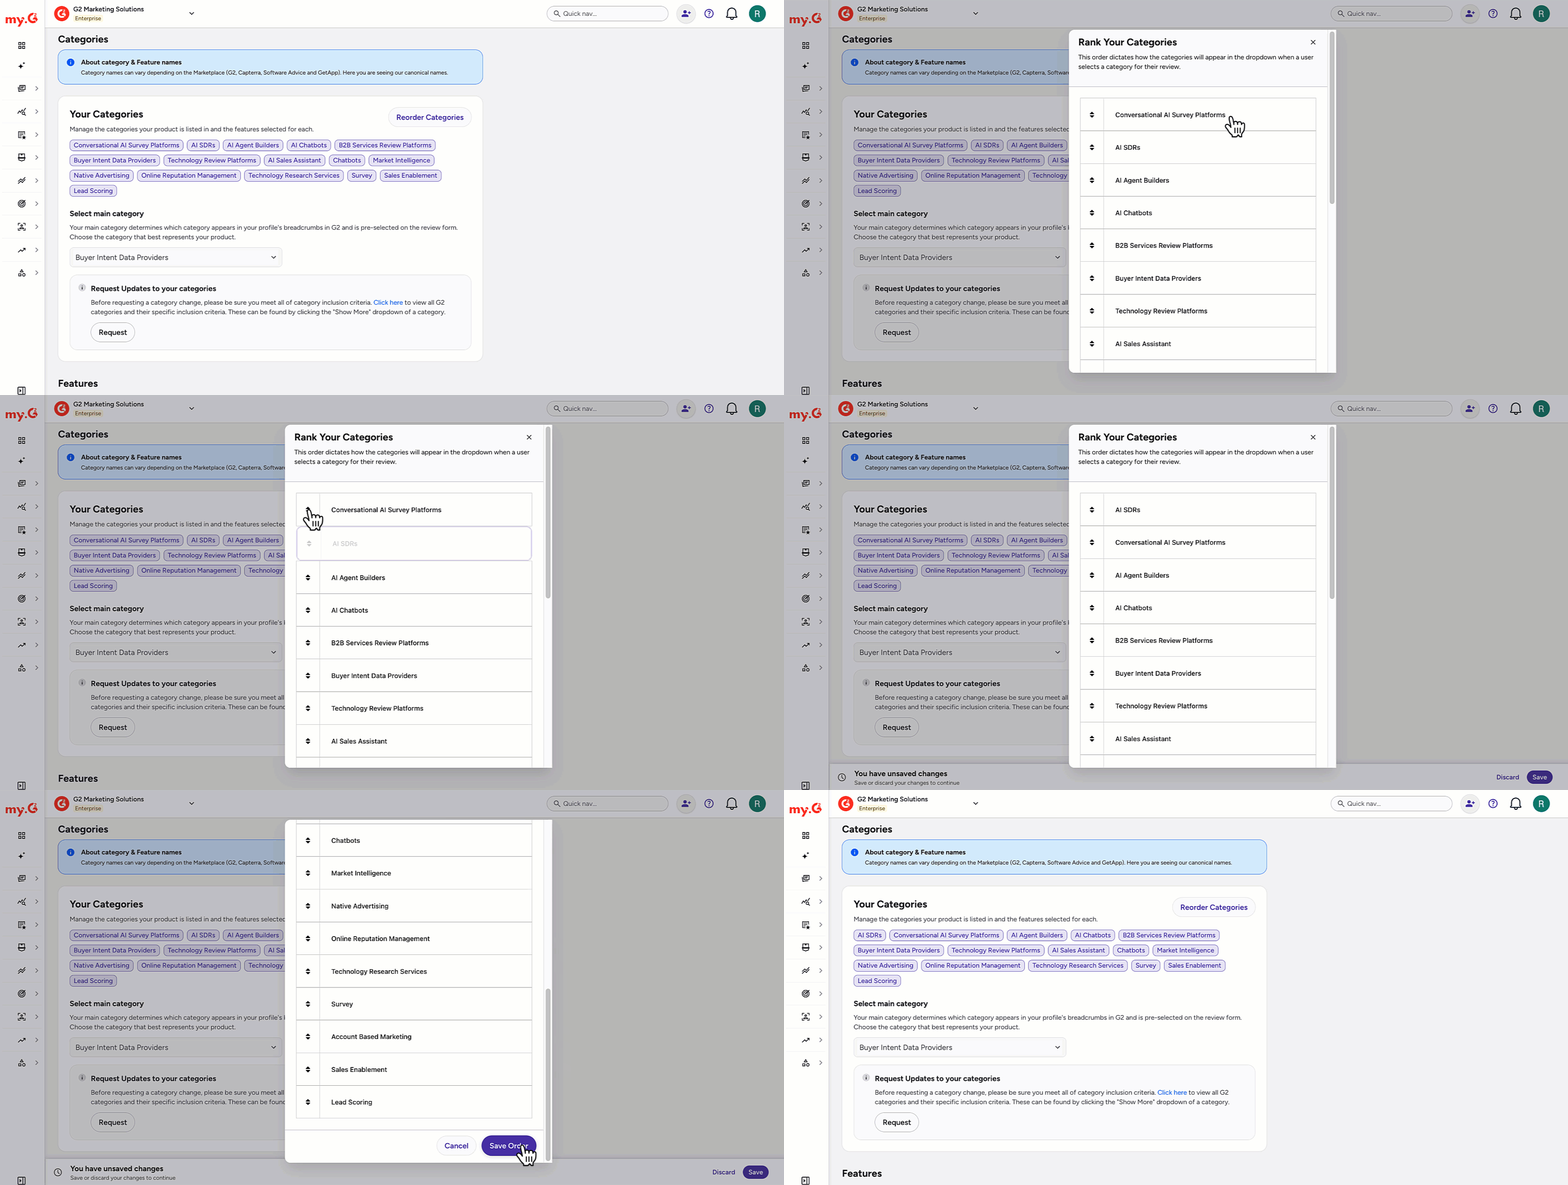
You can select Reorder Categories, then use the drag handles to rearrange the order of your categories. This order controls how categories appear in the dropdown when a reviewer selects a category for their review.
To update your full list of categories, select Request under Request Updates to your categories to contact G2 Support.
For a complete list of G2 categories, refer to the Browse All Categories page on G2.com.
To access the inclusion criteria for a specific category, navigate to the corresponding category page, then from the What is {category name}? section, select Show More.

Requesting a new category
If your product doesn’t fit into any existing G2 categories, you can submit a category creation request for G2’s Market Research team to review. This process helps ensure G2’s taxonomy continues to reflect how buyers search for, compare, and evaluate software.
To request a new category, contact G2 Support.
For a list of upcoming categories under consideration, refer to the Research Agenda.
Include the following information when submitting a request:
- Proposed category name
- Competitive landscape: List at least 10 products that would fall within this category.
- Category description: Briefly describe what these products do, who uses them, and for what purpose.
- Key functionality: List 3–5 essential features common to products in this space.
- Fit with existing taxonomy: Explain why your product’s current category doesn’t accurately reflect its capabilities.
- Differentiation: Describe how this new category is distinct from existing G2 categories, and note any overlaps.
Integrations
Use the Integrations tab to showcase the integrations your product supports and whether you offer an open API.
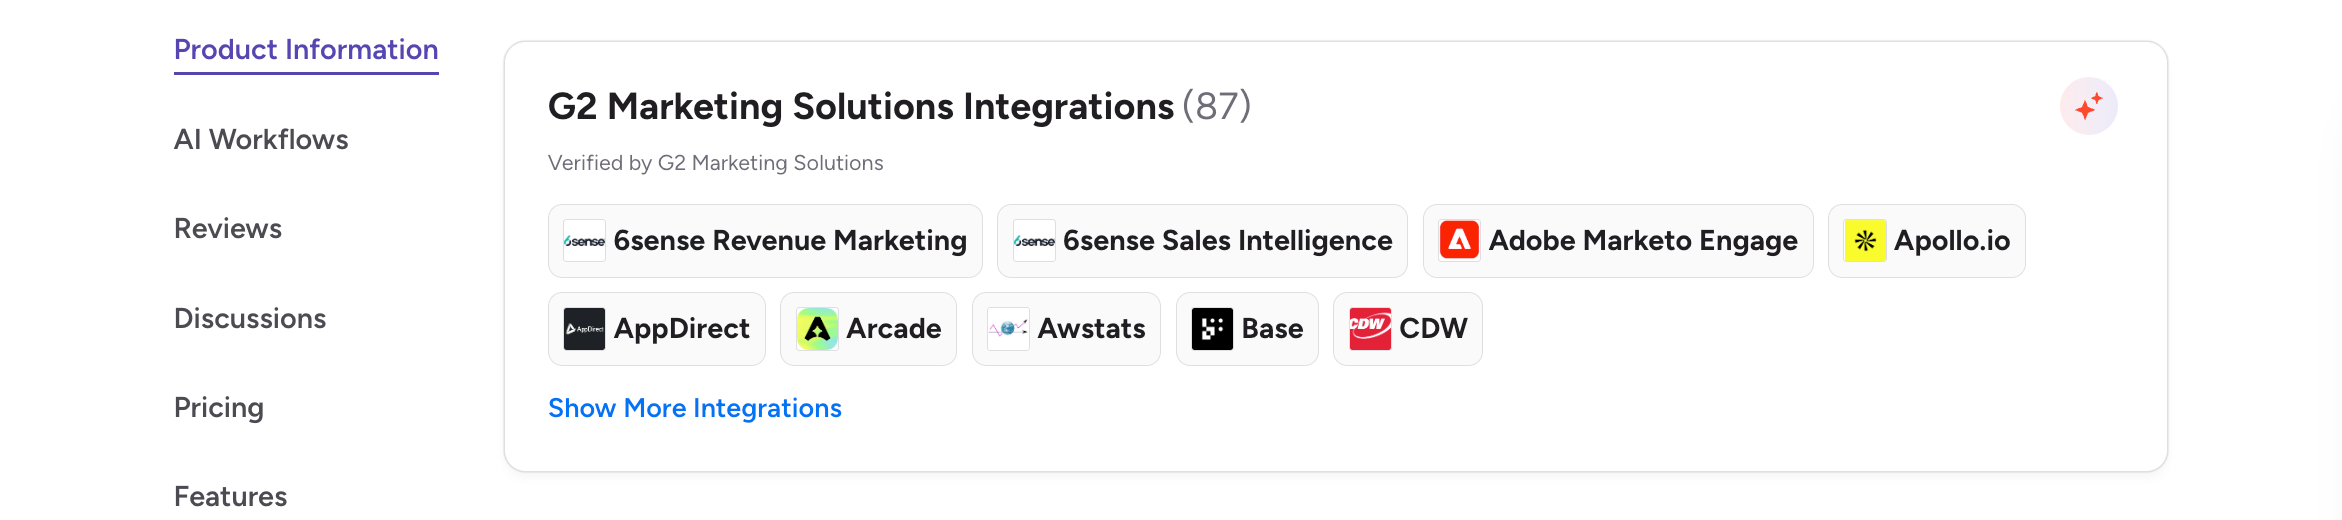
To edit your Integrations, go to my.G2, then select Listings > Manage Listings > Integrations.
For steps and requirements, refer to Integrations.
Target Buyers
Use the Target Buyers tab to tell G2 which buyers your product is built for. Select the company sizes, number of users, industries, and countries you want to target. All four fields are required.
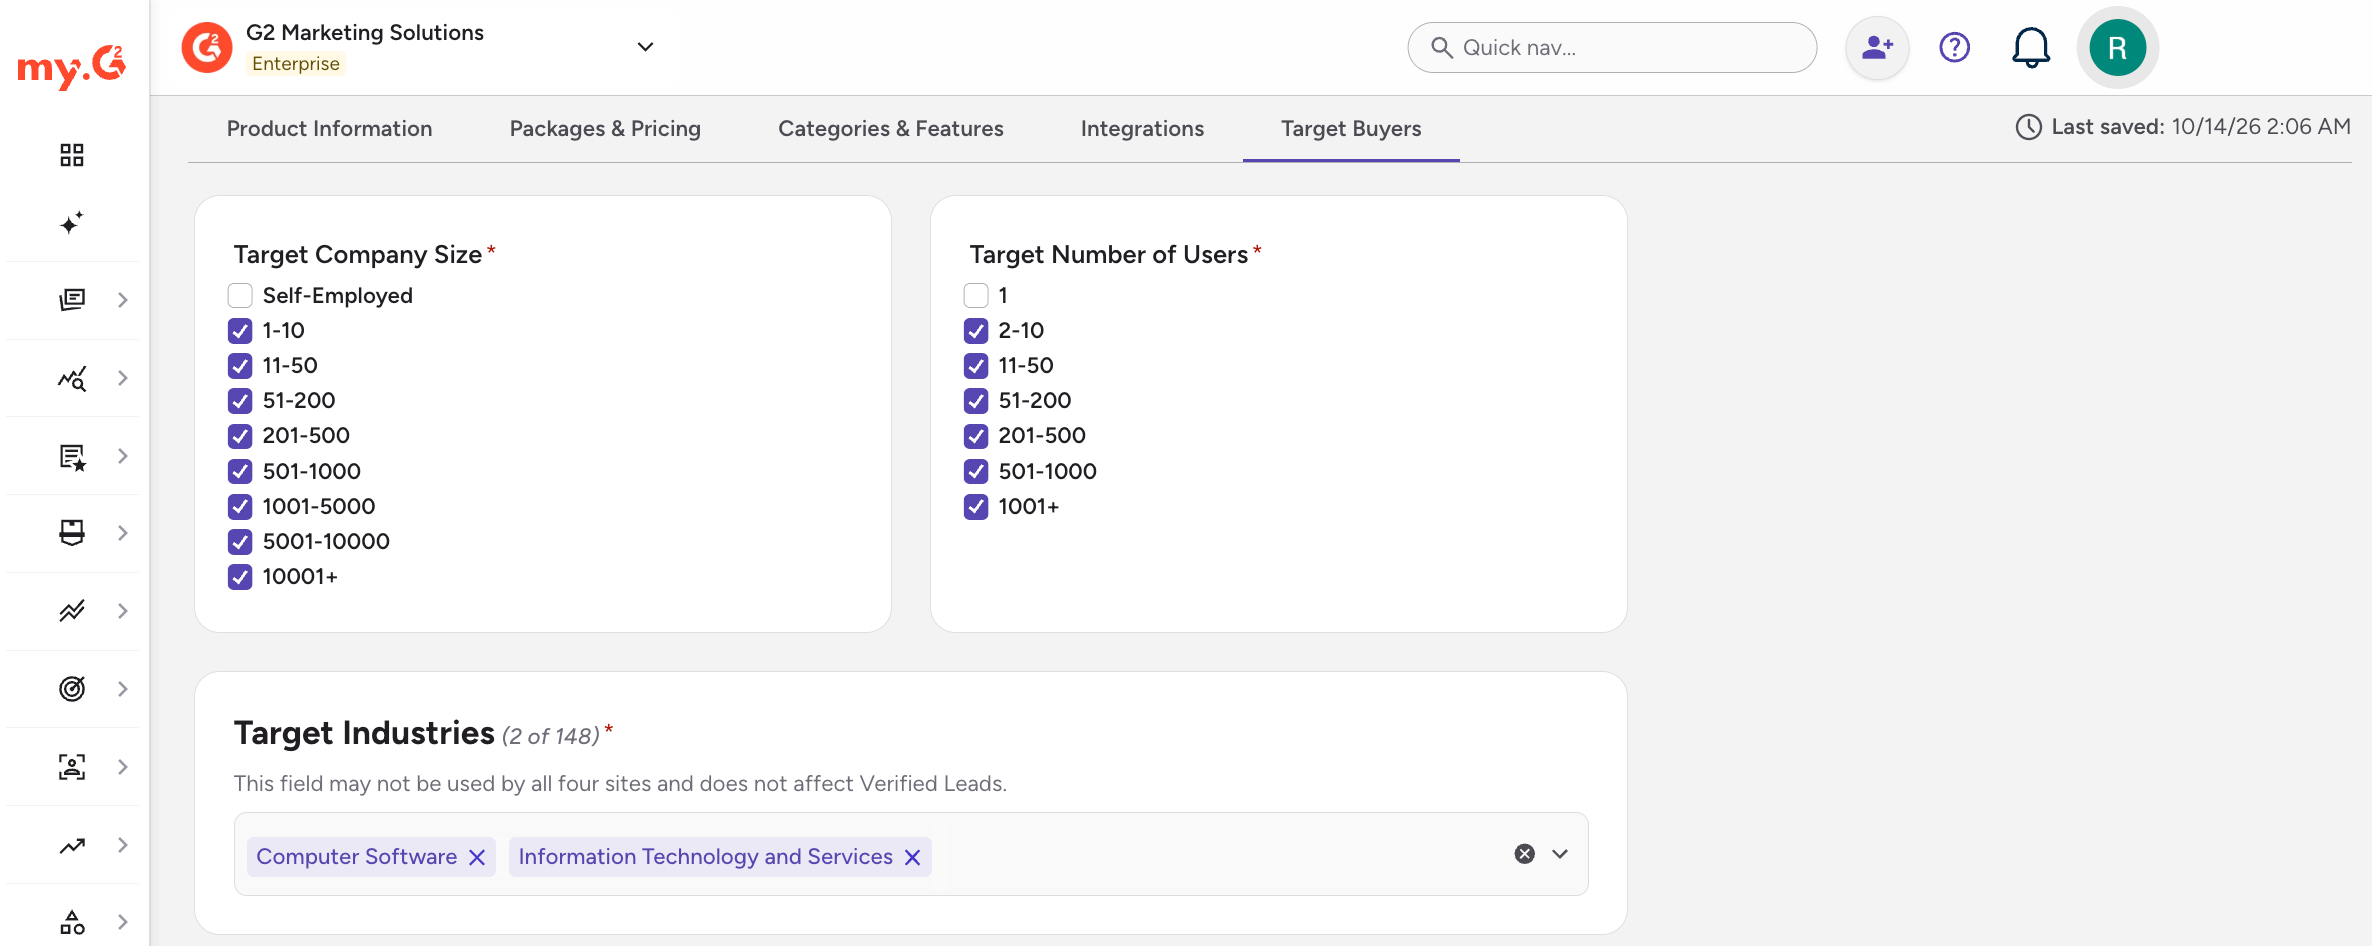
To set your target buyers, go to my.G2, then select Listings > Manage Listings > Target Buyers.
The Target Industries and country fields might not be used by all four marketplaces, and they don't impact Verified Leads.
G2
Select G2 to customize how your product appears on G2.
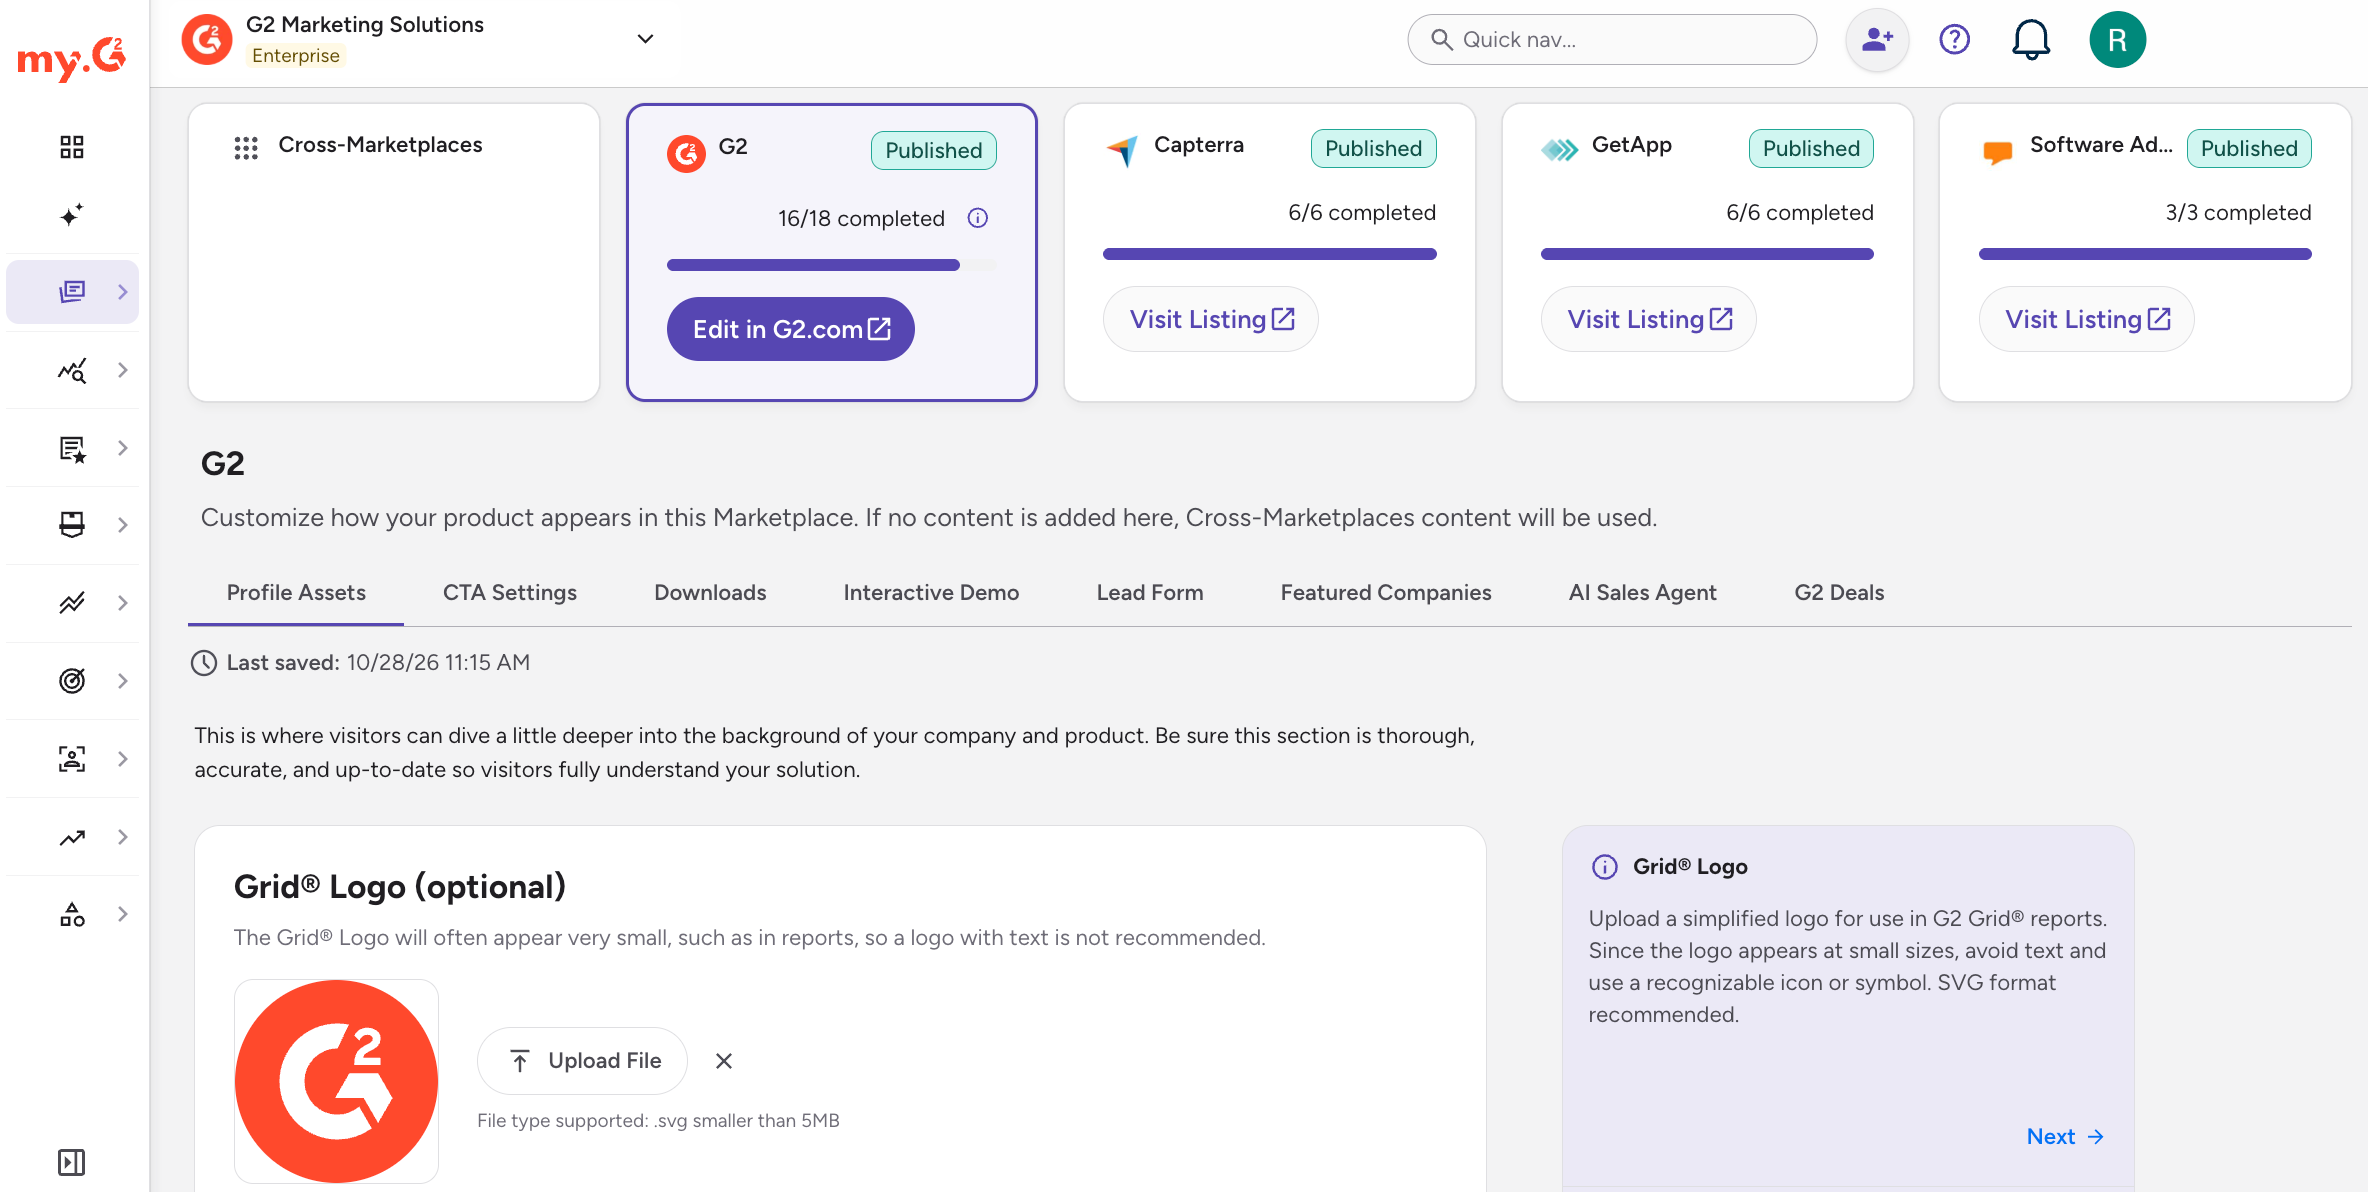
Select Edit in G2.com to edit your Product Description, screenshots, and videos. To manage downloads and your interactive demo, refer to Downloads and Interactive Demo.
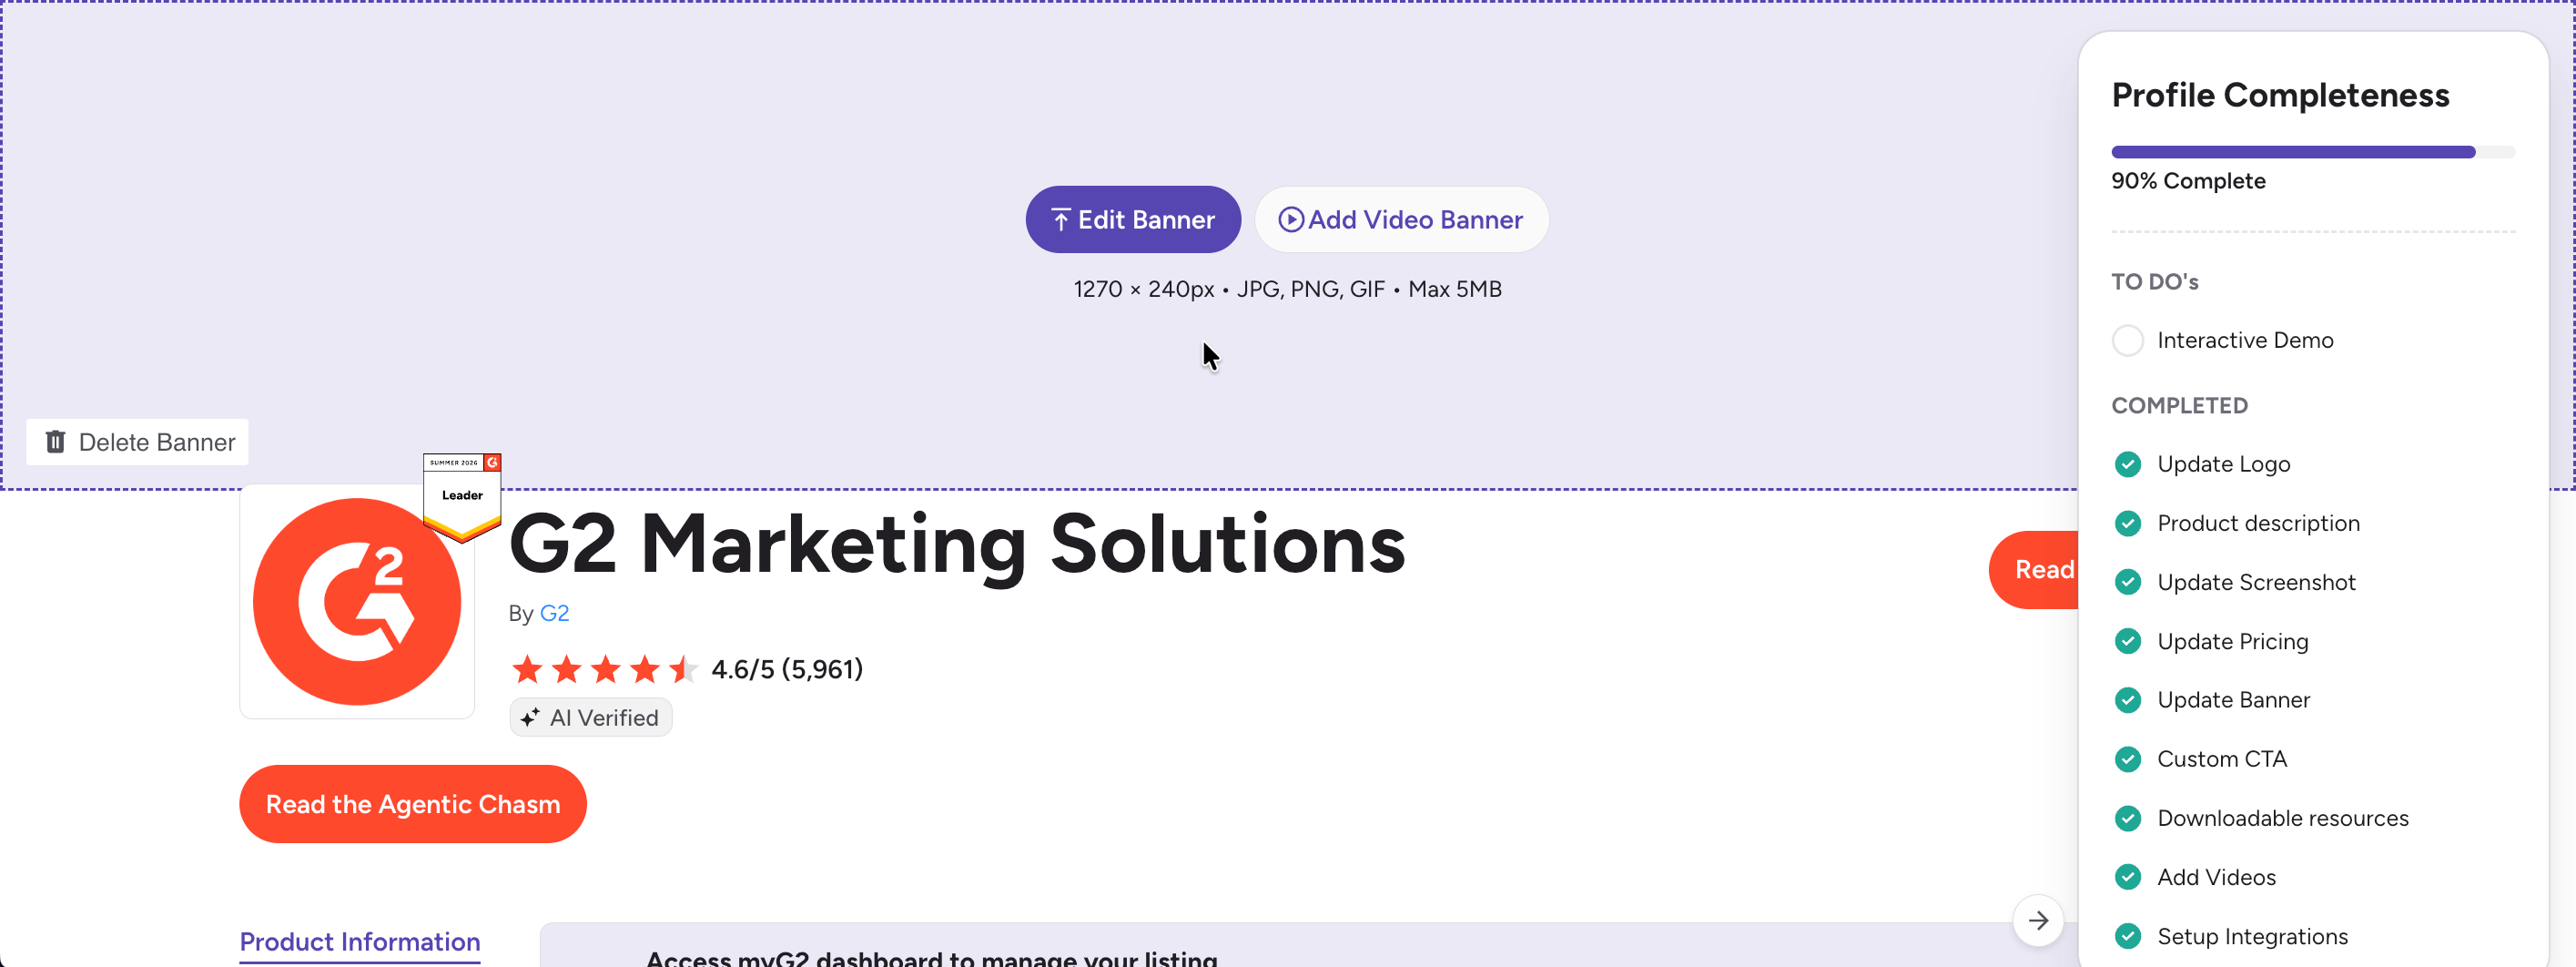
Profile Banner
Your profile banner is an image or video that appears in the header of your G2 product profile.
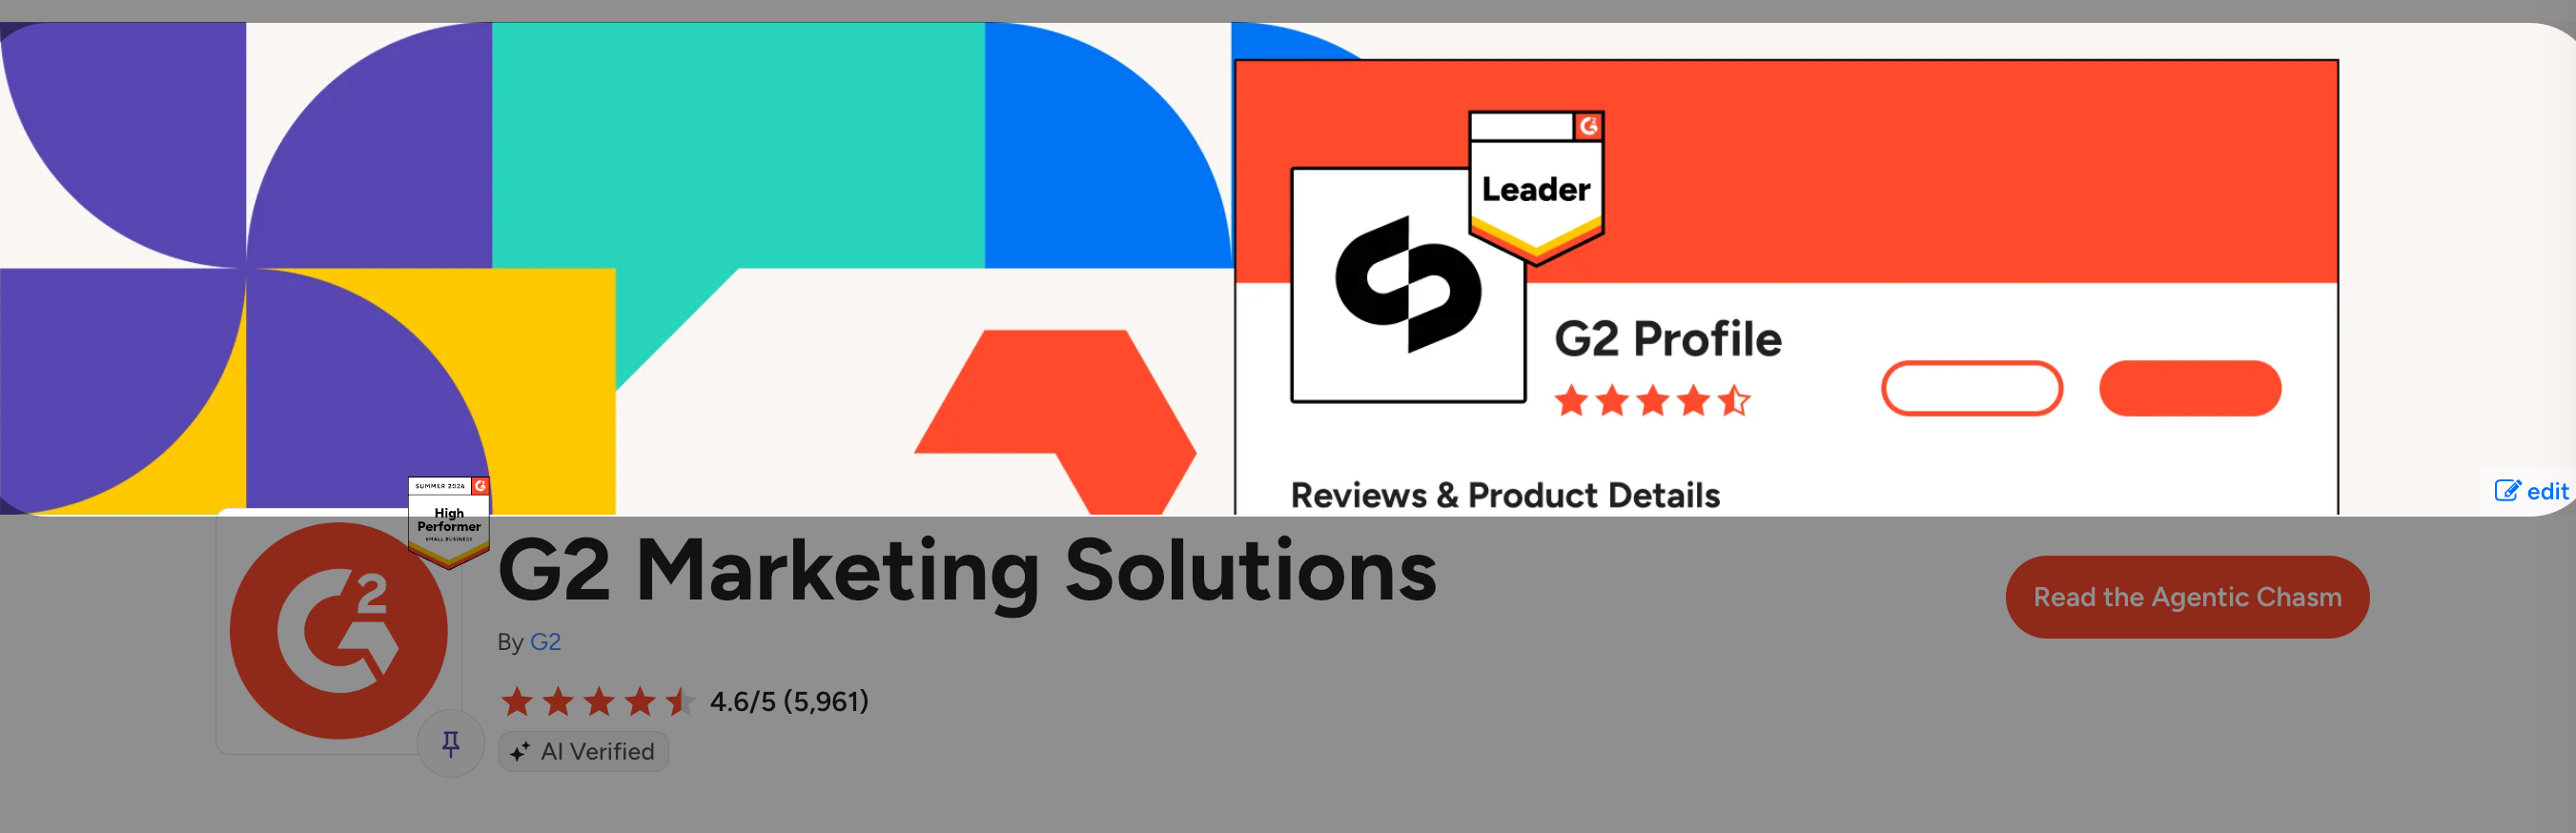
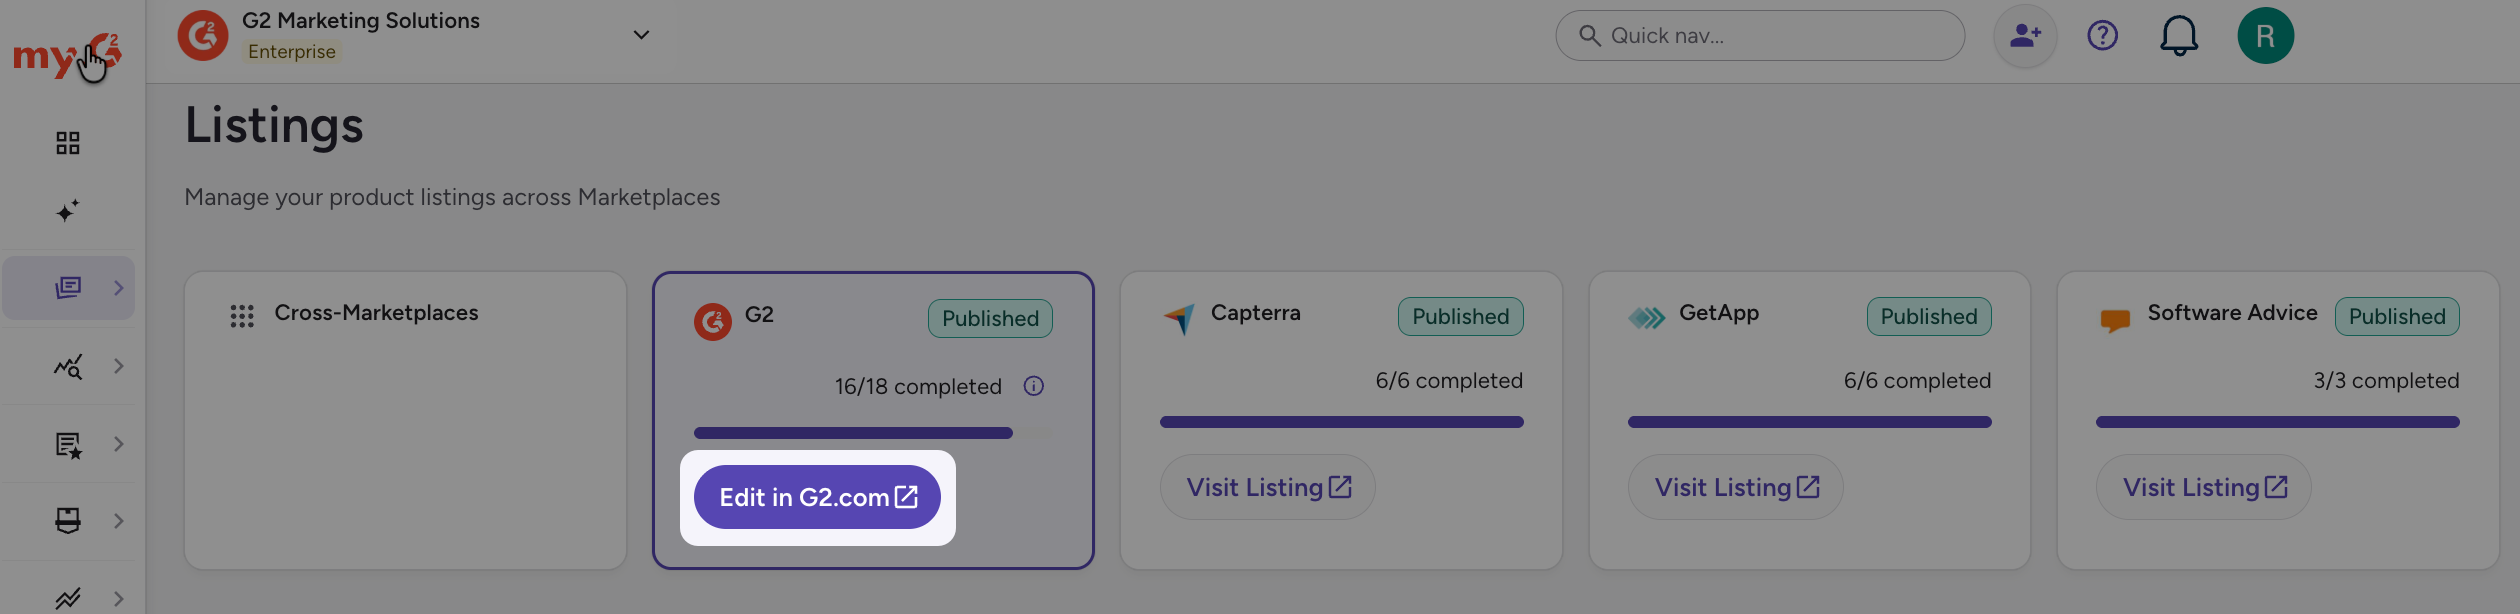
To edit your profile banner, select Edit in G2.com.
Your profile banner image must be smaller than 5 MB and be one of the following support file types: JPG, PNG, or GIF.
The dimensions of the profile banner should be 1260 x 240 pixels. If your banner doesn’t render correctly, G2 recommends uploading a version sized 2500 × 476 pixels with a minimum resolution of 72 PPI.
You can link your banner image to a video to make your profile banner interactive and provide more information about your product.

G2 supports Vimeo, Vidyard, Wistia, and YouTube Universal Links for your banner video.
Grid Logo
The Grid logo section enables you to add a product specific image that is displayed when your product appears in any G2 Grid.
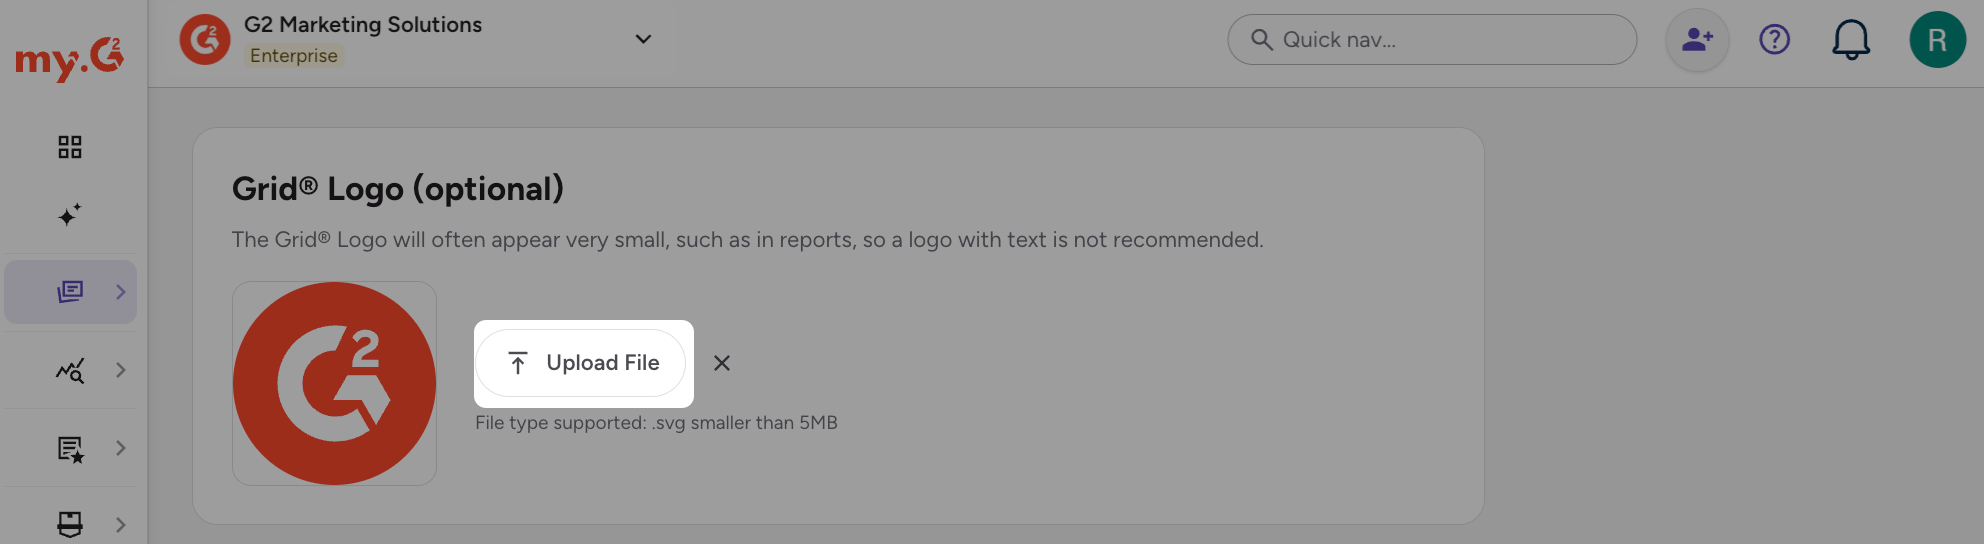
Due to the small size of the grid logo, G2 recommends using an image-based logo rather than a text-based logo.
Your Grid logo must be smaller than 5MB and be the following support file type: SVG.
To add a grid logo:
- Go to my.G2, then select Listings > Manage Listings > G2 > Profile Assets.
- Select Upload File and choose a supported image from your local machine.
- Select Save.

Profile G2 Badge
The Profile G2 Badge section enables you to select a G2 Badge to display on your G2 product profile.
For more information on G2 Badges, refer to the G2 Badges documentation.
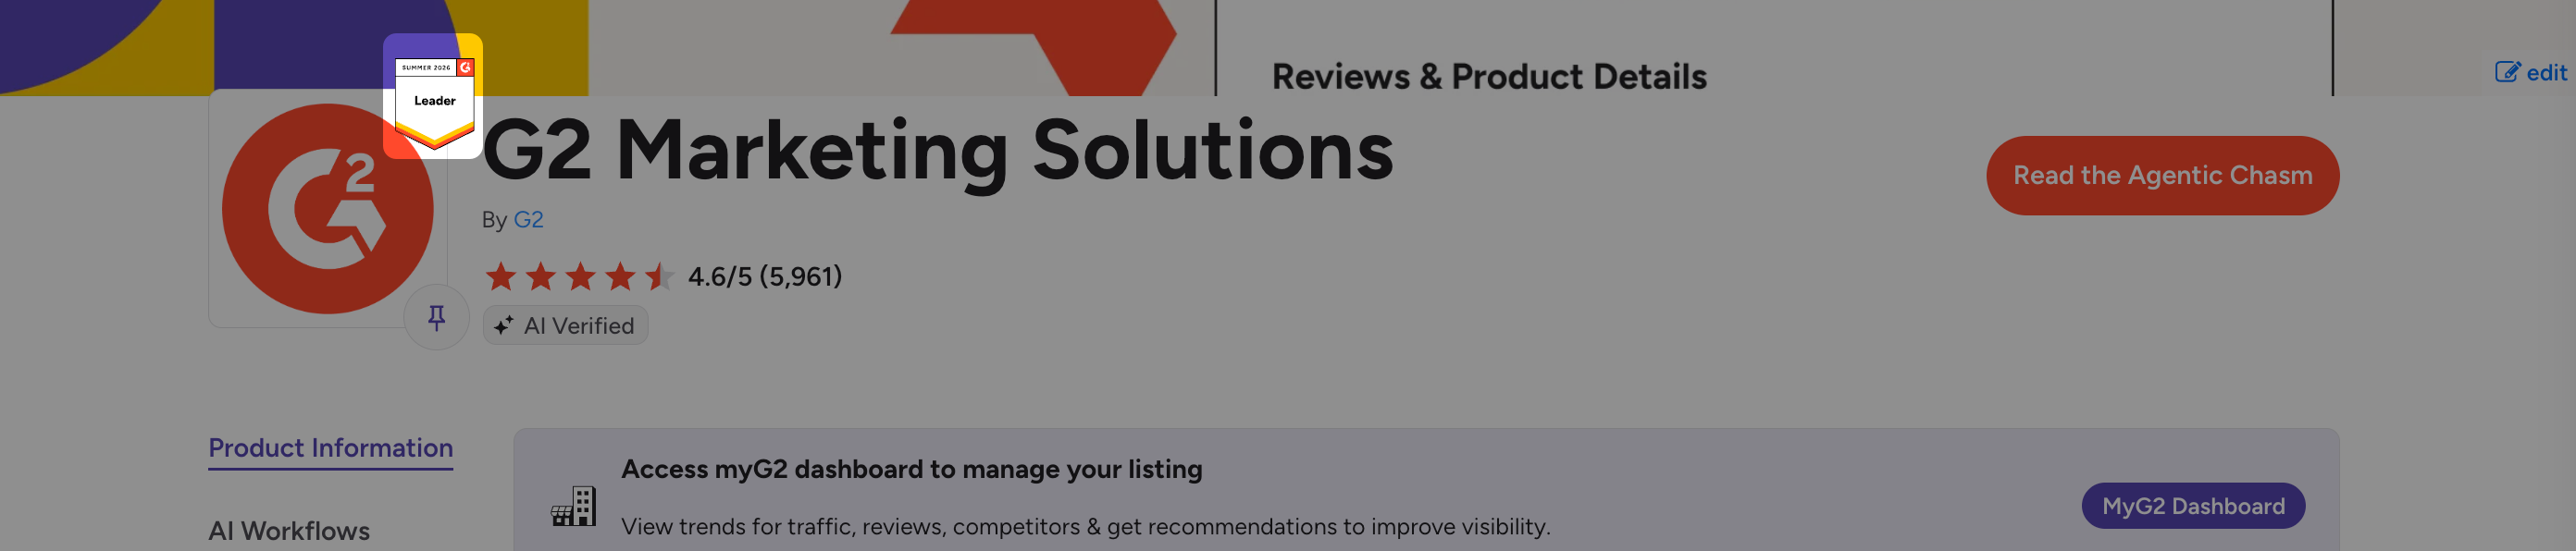
As your product earns new Badges, G2 automatically updates your profile Badge with one from the most recent reporting season.
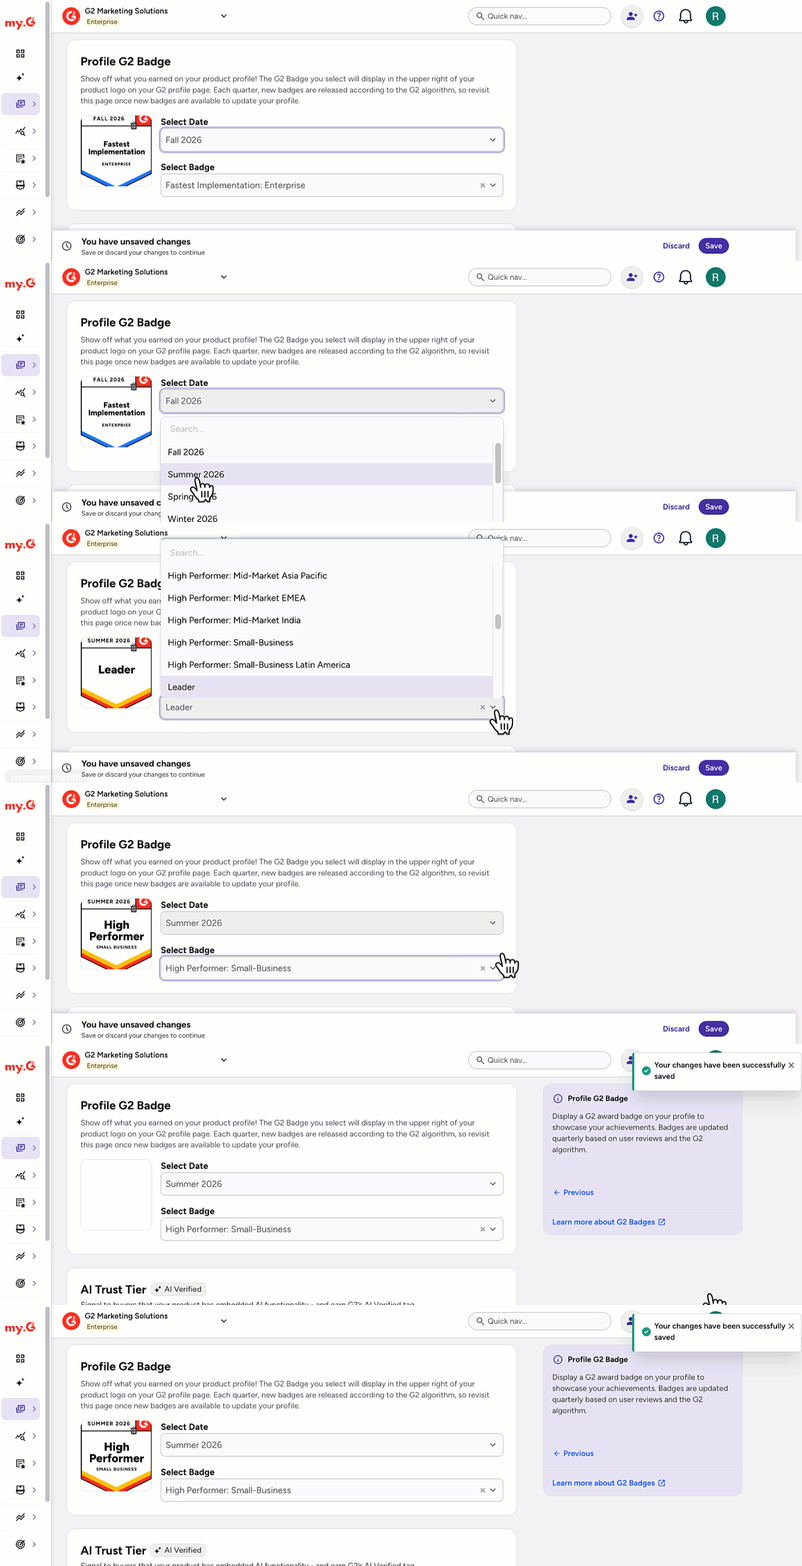
Selecting your own Badge in this section disables G2's automatic profile Badge update. If you opt to choose your own Badge, you must manually update your profile Badge as your product earns new Badges.
To manually select a Badge for your product profile, go to my.G2, then select Listings > Manage Listings > G2 > Profile Assets.
Use the dropdown filters to choose a Badge from a specific reporting season. After making your selection, select Save to commit the changes to your G2 product profile.
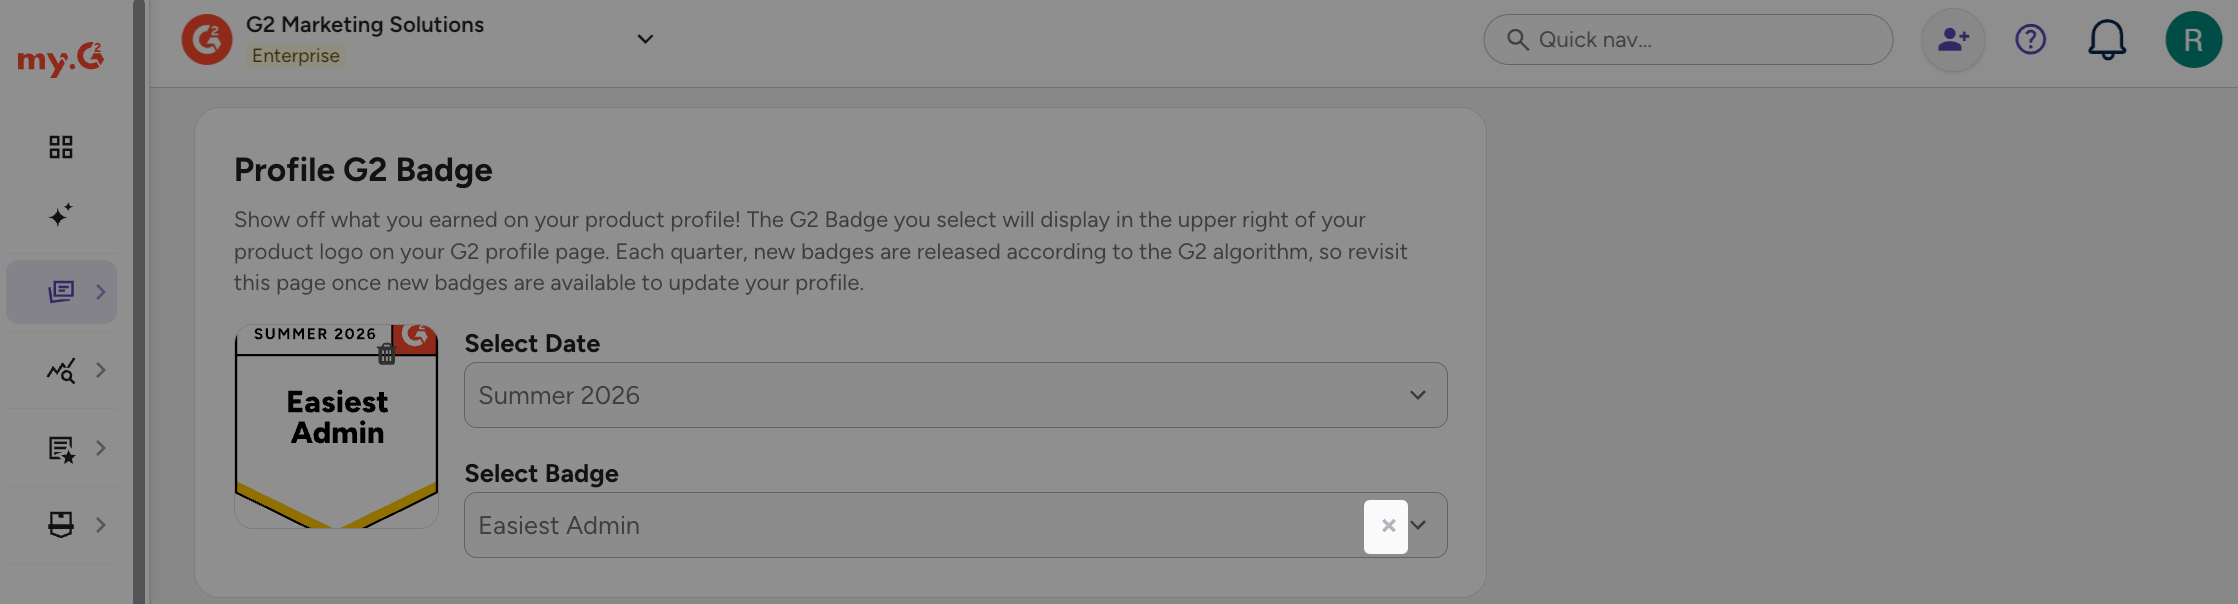
If you do not want a Badge to appear on your G2 profile, select the X in the Select Badge dropdown to clear your selection, then select Save.
Badges displayed on G2 Profiles are automatically translated according to the language set in the user’s browser. Supported languages include German, Spanish, French, and Portuguese.

AI Trust Tier
The AI Trust Tier helps buyers identify products with embedded artificial intelligence (AI). Products can receive one of two AI tags: AI Enabled or AI Verified. These tags appear on your product profile and category listings.
To enable AI Trust Tier, turn on the Enable toggle in the AI Trust Tier section of Profile Assets.
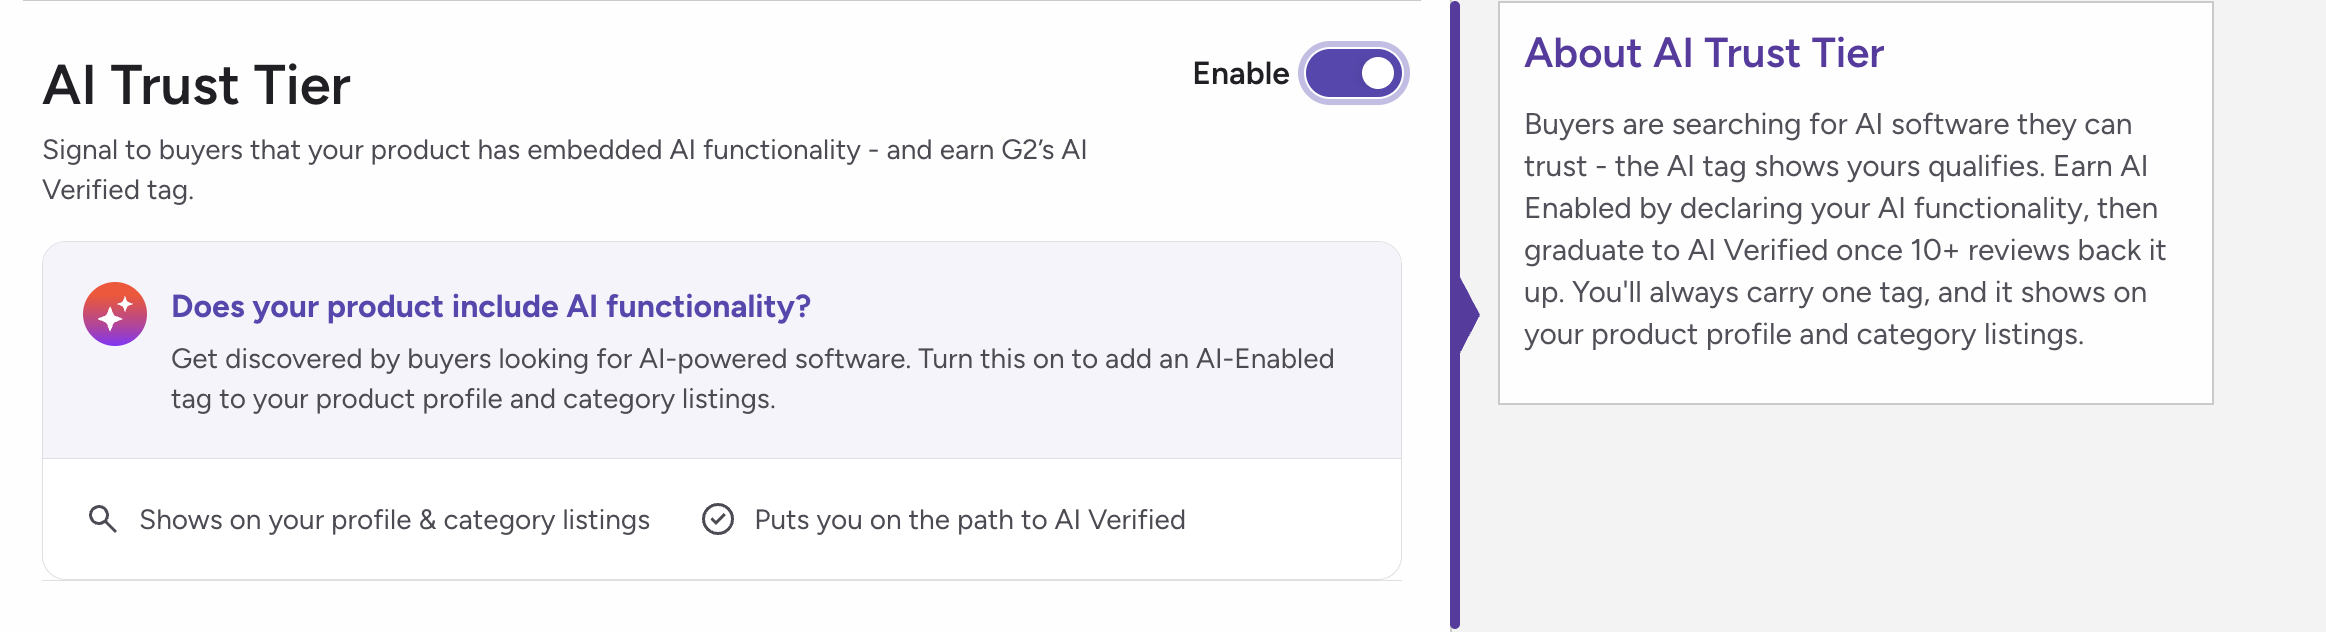
A product can have only one AI tag at a time. AI tags are awarded independently of G2 Score and do not affect Grid® placement.
AI Enabled
The AI Enabled tag indicates that AI enhances your product's capabilities, but your product's core value exists independently of AI.
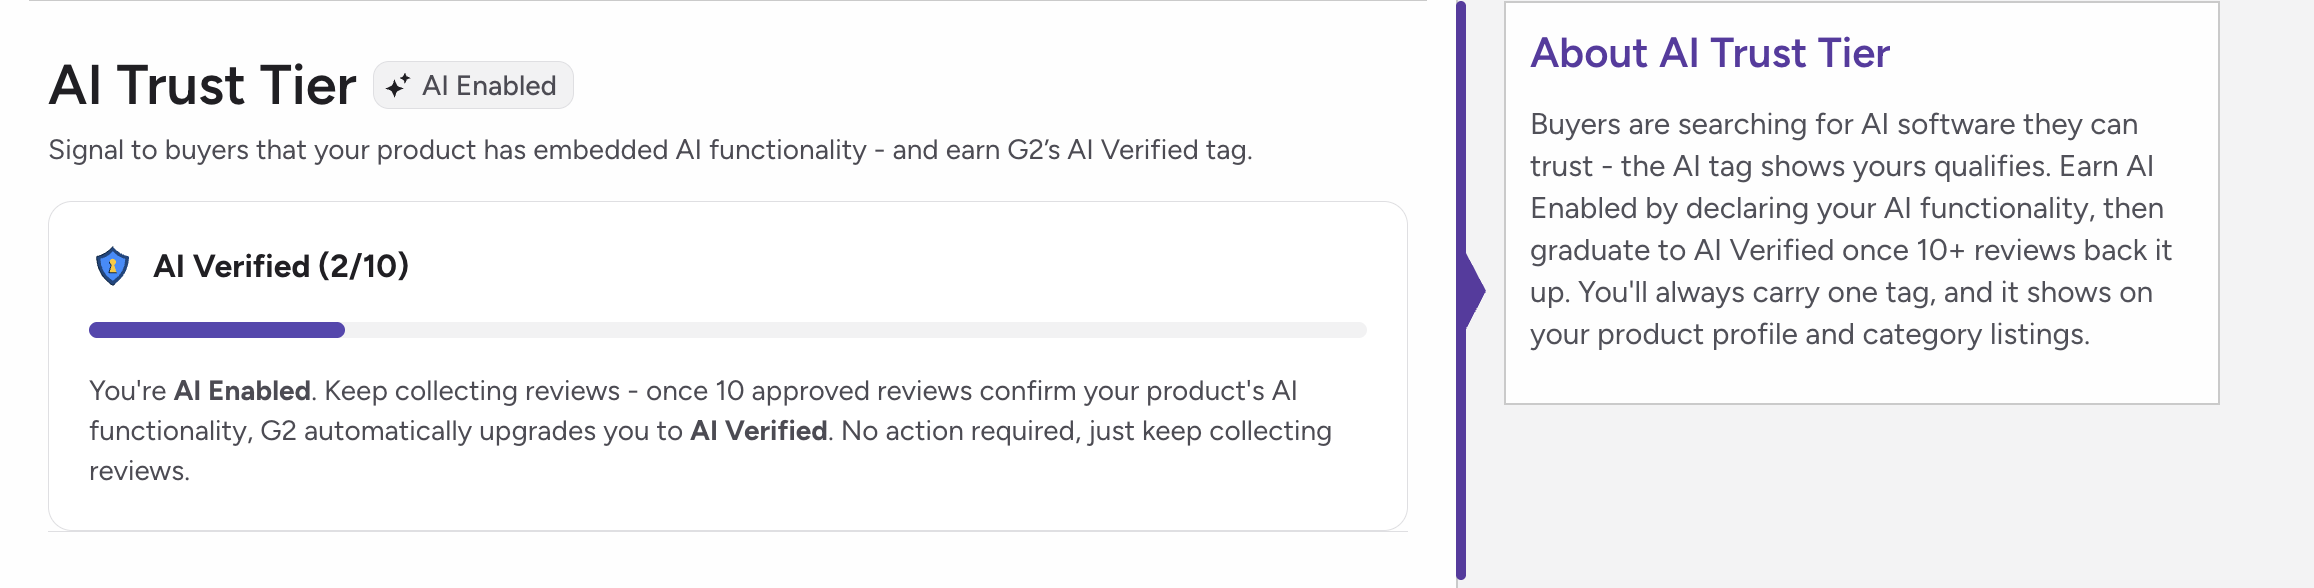
Products that incorporate technologies such as machine learning (ML), large language models (LLMs), generative AI, natural language processing (NLP), computer vision, or neural network-based predictive analytics may qualify for the AI Enabled tag. Basic rules-based automation and standard search indexing do not qualify.
G2 Market Research may also add or update the AI Enabled tag based on the best available evidence of your product's AI functionality.
The AI Enabled tag does not mean your product is AI Native. AI Enabled products use AI to enhance or extend their core functionality. AI Native products are built with AI as their core architecture and rely on AI to deliver their primary functionality.
AI Verified
The AI Verified tag indicates that customers have validated your product's AI functionality.
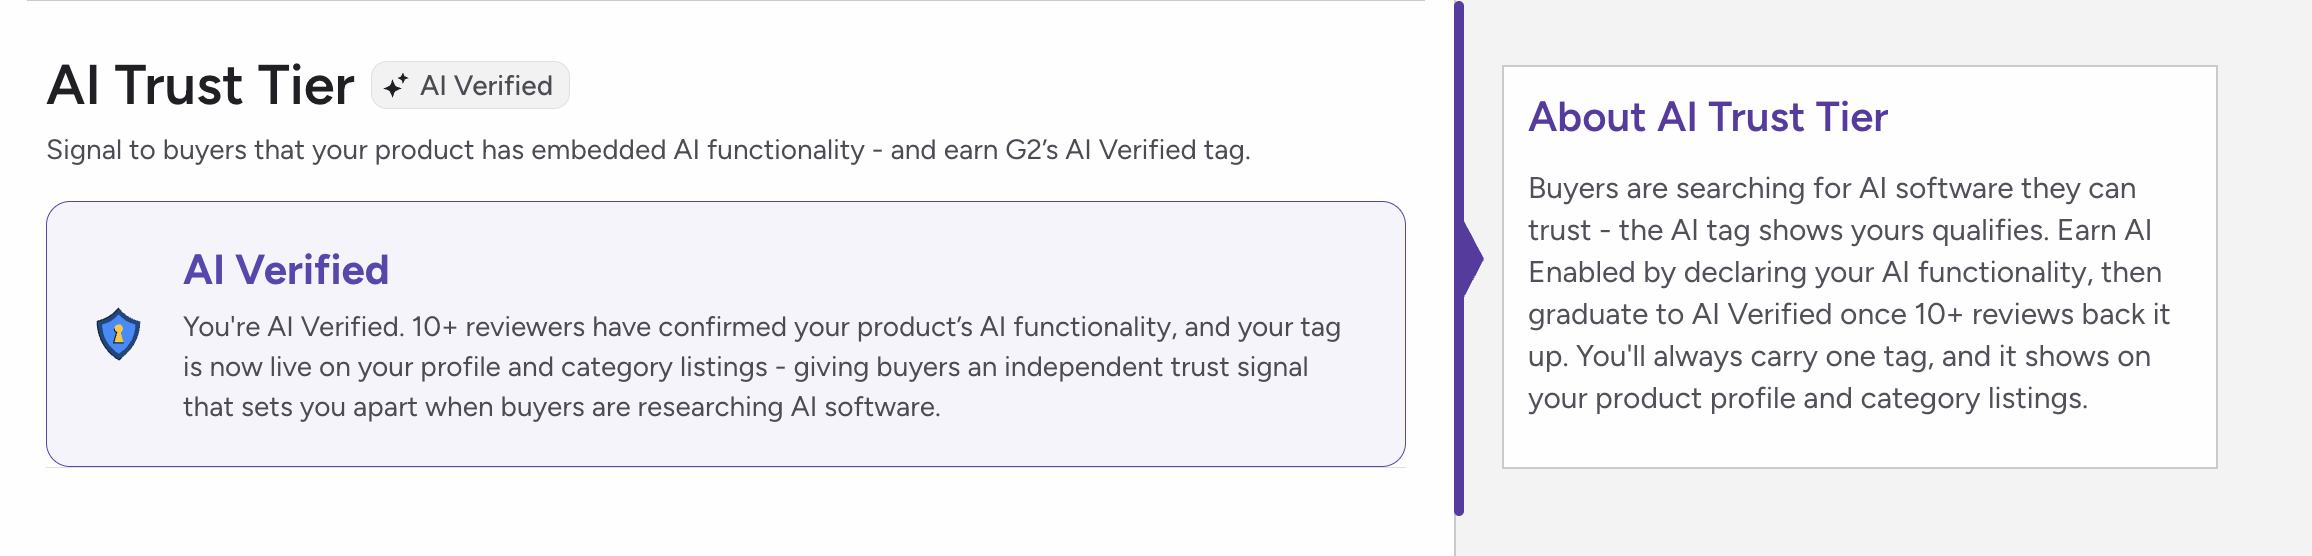
After your product receives the AI Enabled tag, G2 automatically upgrades it to the AI Verified tag once 10 or more approved reviews confirm customers have used your product's AI features.
Reviewers validate AI functionality by answering Yes to the review question, "Have you used artificial intelligence (AI) features as part of this product?"
If you believe your product's AI tag is incorrect, contact G2 Support and explain why your product qualifies for the requested tag. G2 reviews each request before updating your product's AI tag.
AI Users Trust Badges
The AI Users Trust Badge program is currently in beta. For this initial launch, only products in G2's HR category are eligible.
Once your product earns the AI Verified tag and meets additional eligibility requirements, it can also earn a Gold, Silver, or Bronze AI Users Trust badge. This scored designation reflects how much users trust your product's AI capabilities.
During the beta, G2 notifies vendors of newly awarded badges by email; badges do not yet appear in my.G2.
For details on eligibility, scoring, and badge tiers, refer to AI Users Trust Badges in G2's Research Scoring Methodologies documentation.
UTM Params
Use the UTM Params section to set UTM parameters for your product and company website URLs on G2, enabling you to easily track direct referral traffic from G2 in your third-party analytics software.
To set your UTM parameters, go to my.G2, then select Listings > Manage Listings > G2 > CTA Settings.
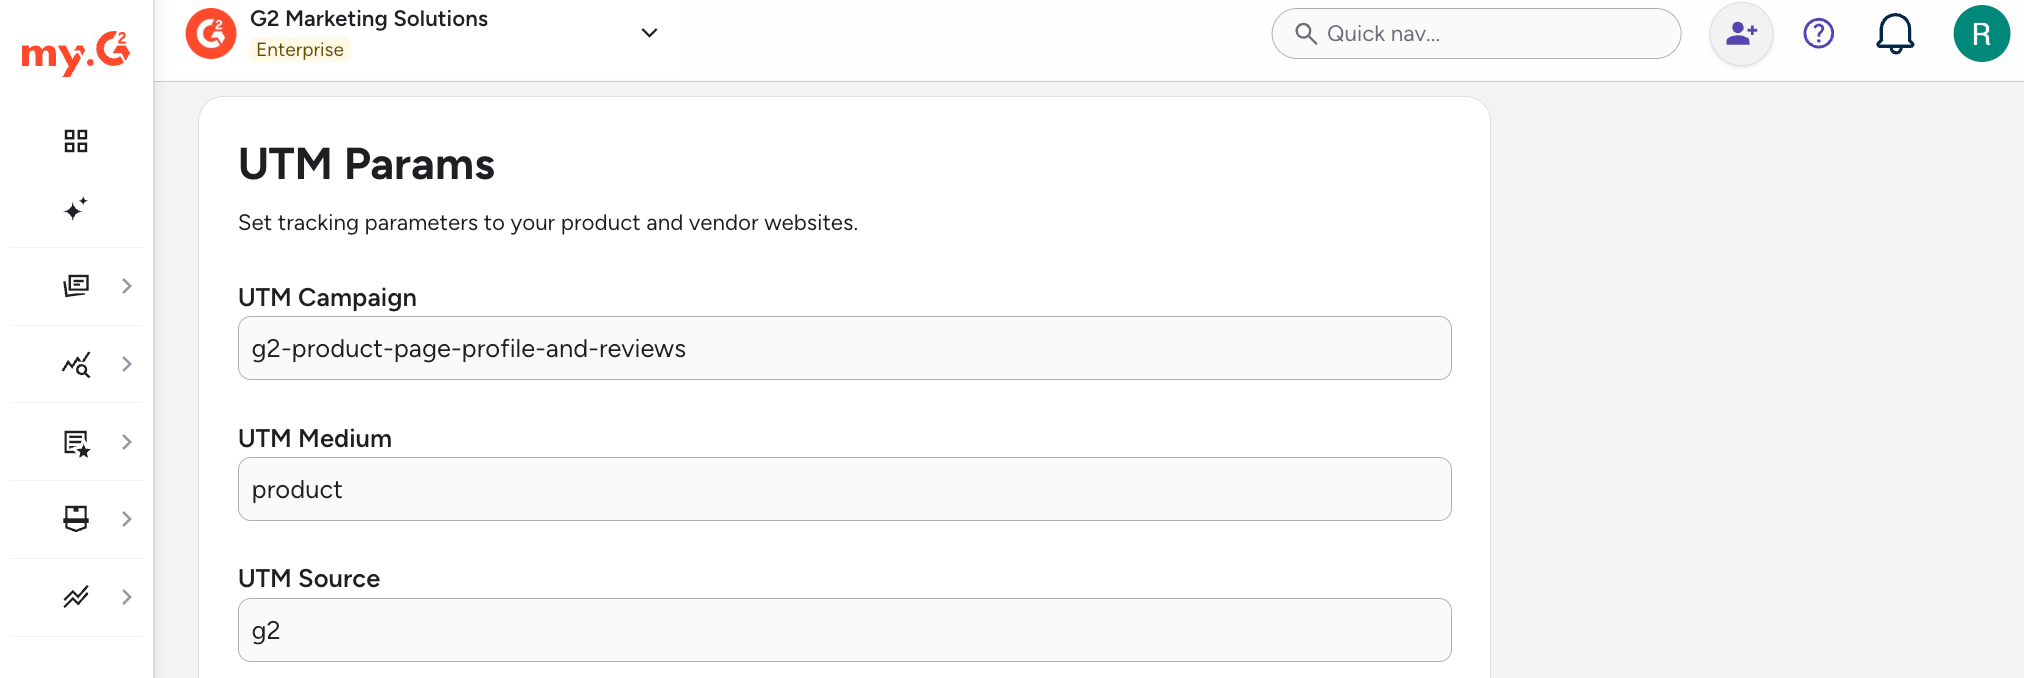
In addition to the Campaign, Medium, and Source parameters, G2 also appends a default Content parameter, which includes information about the G2 page that generated the click.
The UTM Content parameter follows the format {page type}-{page name}-{page subtype}. For example, a click generated from the Pricing tab of the SaaS Company X product profile page would have a UTM Content of products-saascompanyx-pricing.
The UTM Content Examples section shows the expected UTM Content value for several G2 pages that include your website URL.
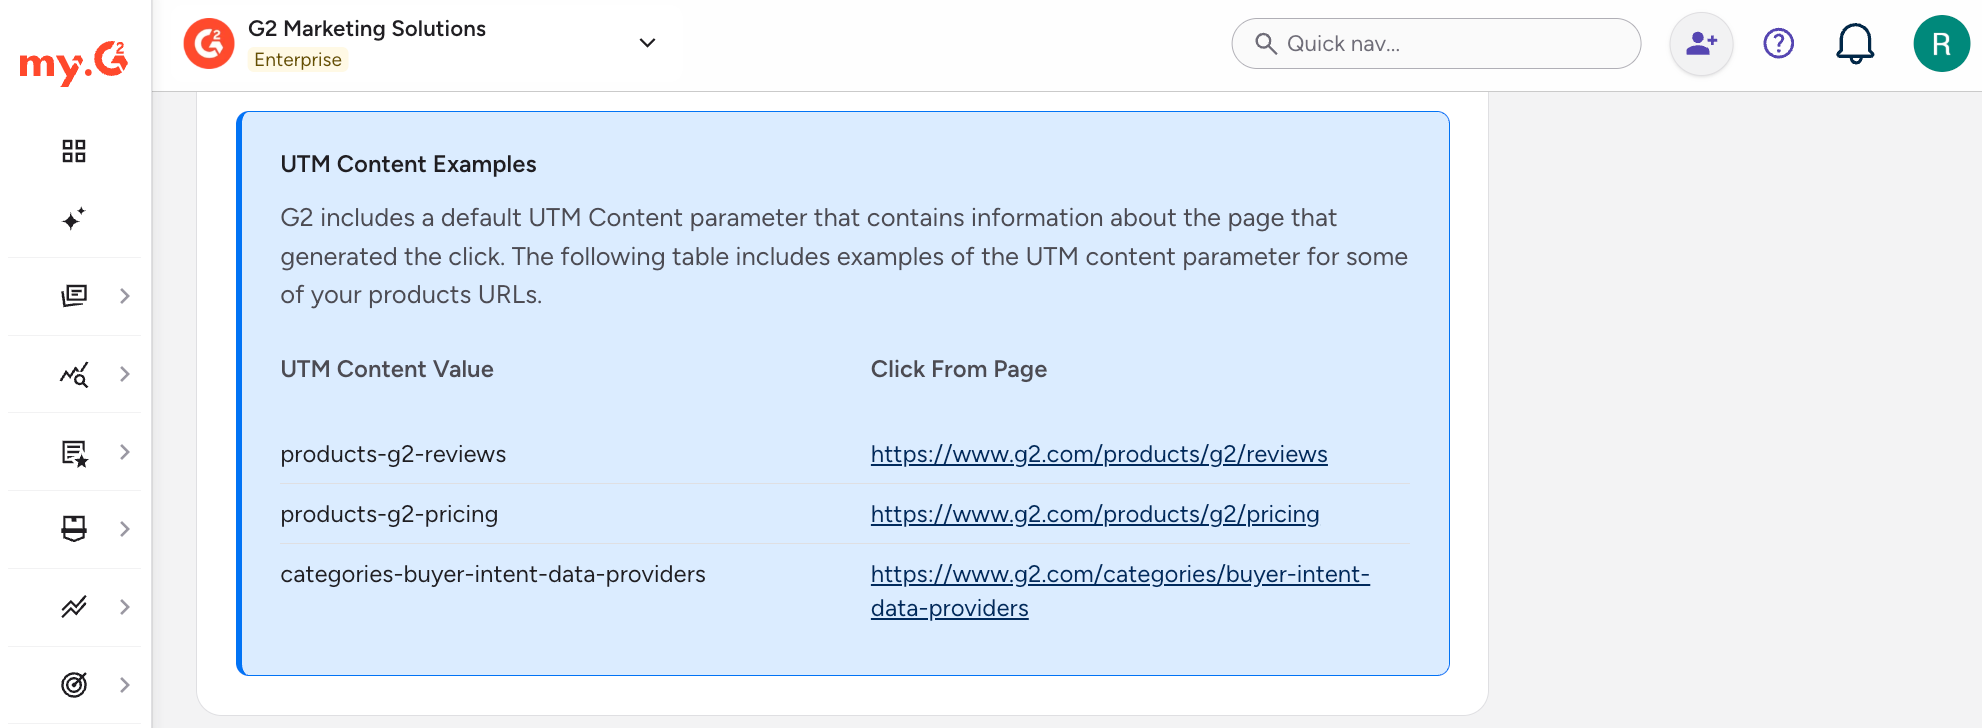
You can also track clicks to your website from Listings Performance (Listings > Listings Performance) in my.G2.
Lead Form
Use the Lead Form tab to customize the form buyers complete on your G2 profile, for example when they download content or request a custom quote. You can change whether the Phone Number field is required, add custom fields, and add your own privacy policy.
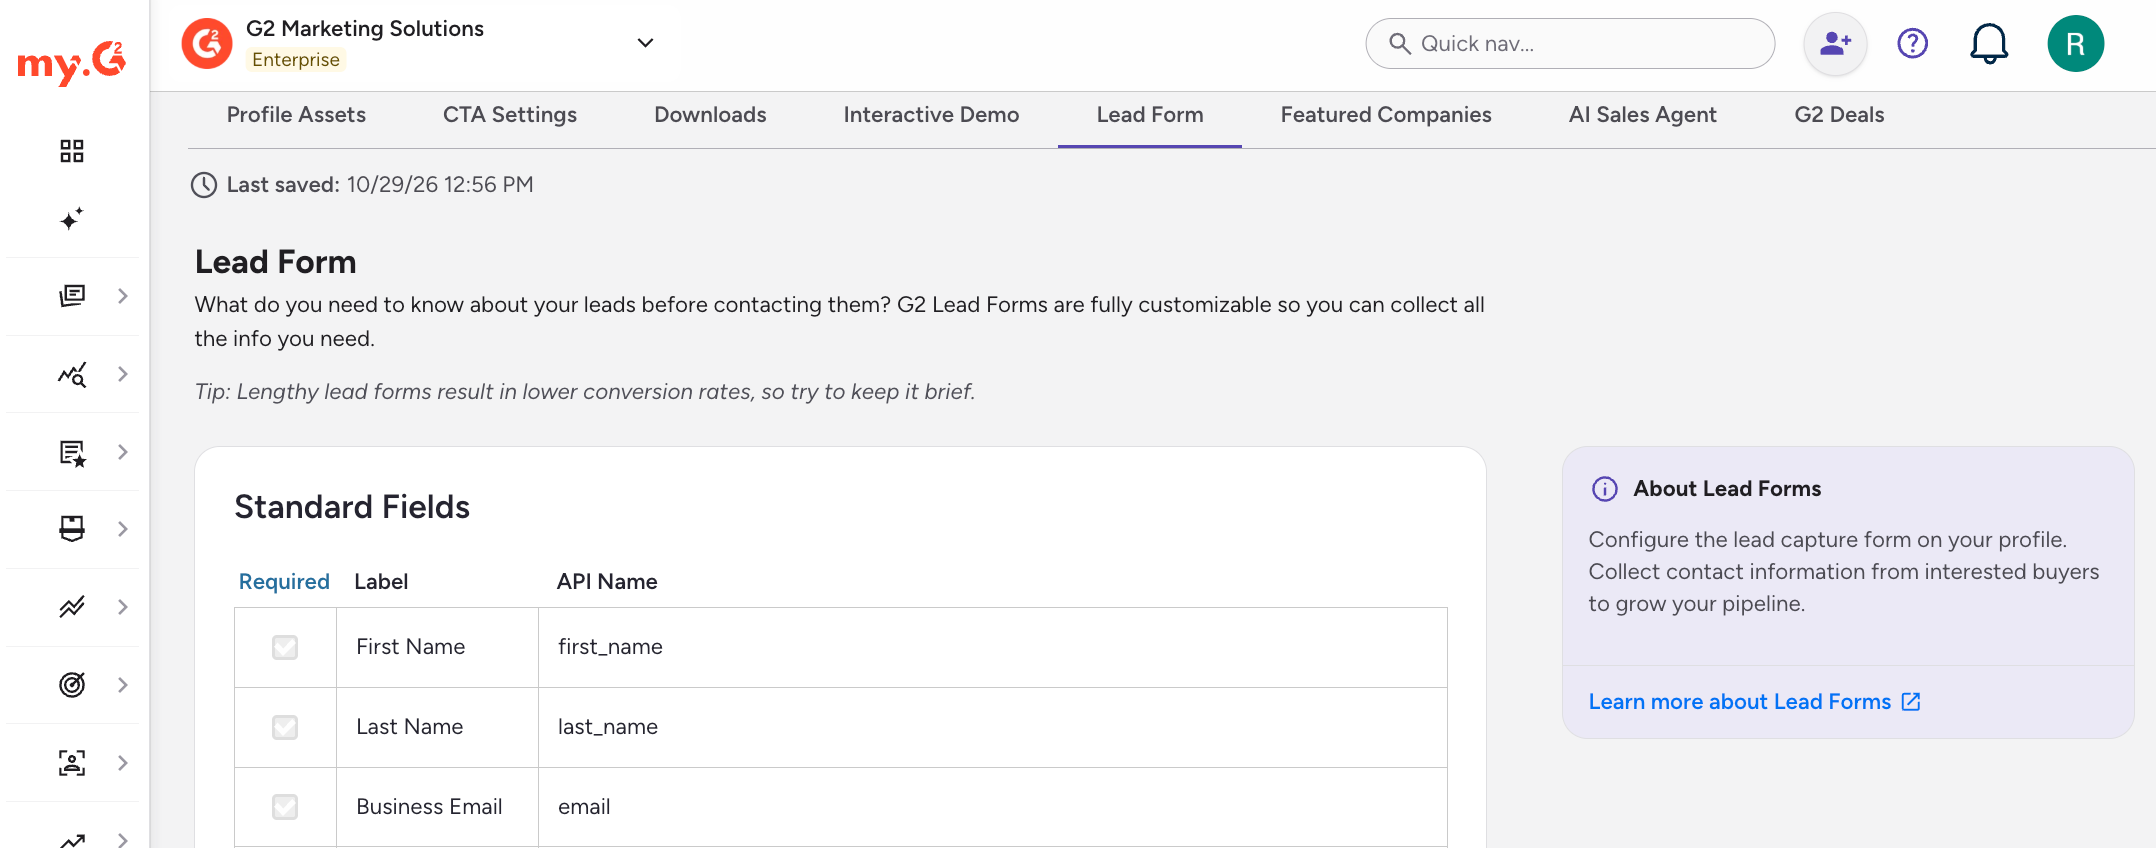
To customize your lead form, go to my.G2, then select Listings > Manage Listings > G2 > Lead Form.
For steps, standard fields, and custom fields, refer to Leads.
Featured Companies
The Featured Companies section shows buyers which companies already use your product, surfacing up to 15 customer logos and company names directly on your G2 product profile.
Featured Companies is available on paid G2 product profiles only.
How featured companies are selected
By default, G2 automatically populates your featured companies using verified review data, pulling company names from buyers who have submitted approved reviews for your product. You can also customize the list yourself by adding companies.
The Source column shows how each company was added. Companies you add show Vendor curated, and companies G2 adds show Auto generated.
Add at least three companies for the Used by section to appear on your profile.
Customizing your featured companies
To curate your own list:
- Go to my.G2, then select Listings > Manage Listings > G2 > Featured Companies.
- Select Add New.
- Search for and select a company.
- Select Add Company.
To remove a company, hover over the company in the list, then select Remove.
Only add companies that have genuinely used your product. G2 may remove featured companies that don't meet this requirement.
AI Sales Agent
Use the AI Sales Agent tab to add an AI selling assistant to your G2 profile and your company website.
To set it up, go to my.G2, then select Listings > Manage Listings > G2 > AI Sales Agent.
For setup steps and settings, refer to AI Sales Agent.
G2 Deals
Use the G2 Deals tab to advertise exclusive software deals to buyers researching your product or category on G2.
To manage your deals, go to my.G2, then select Listings > Manage Listings > G2 > G2 Deals.
For steps and requirements, refer to G2 Deals.
All-in-One and Best-of-Breed
G2 classifies eligible software products as either All-in-One or Best-of-Breed to help buyers understand whether a product is designed for broad functionality or specialized expertise.
The classification appears on your product profile and can be used as a filter on category pages and live Grid® reports.
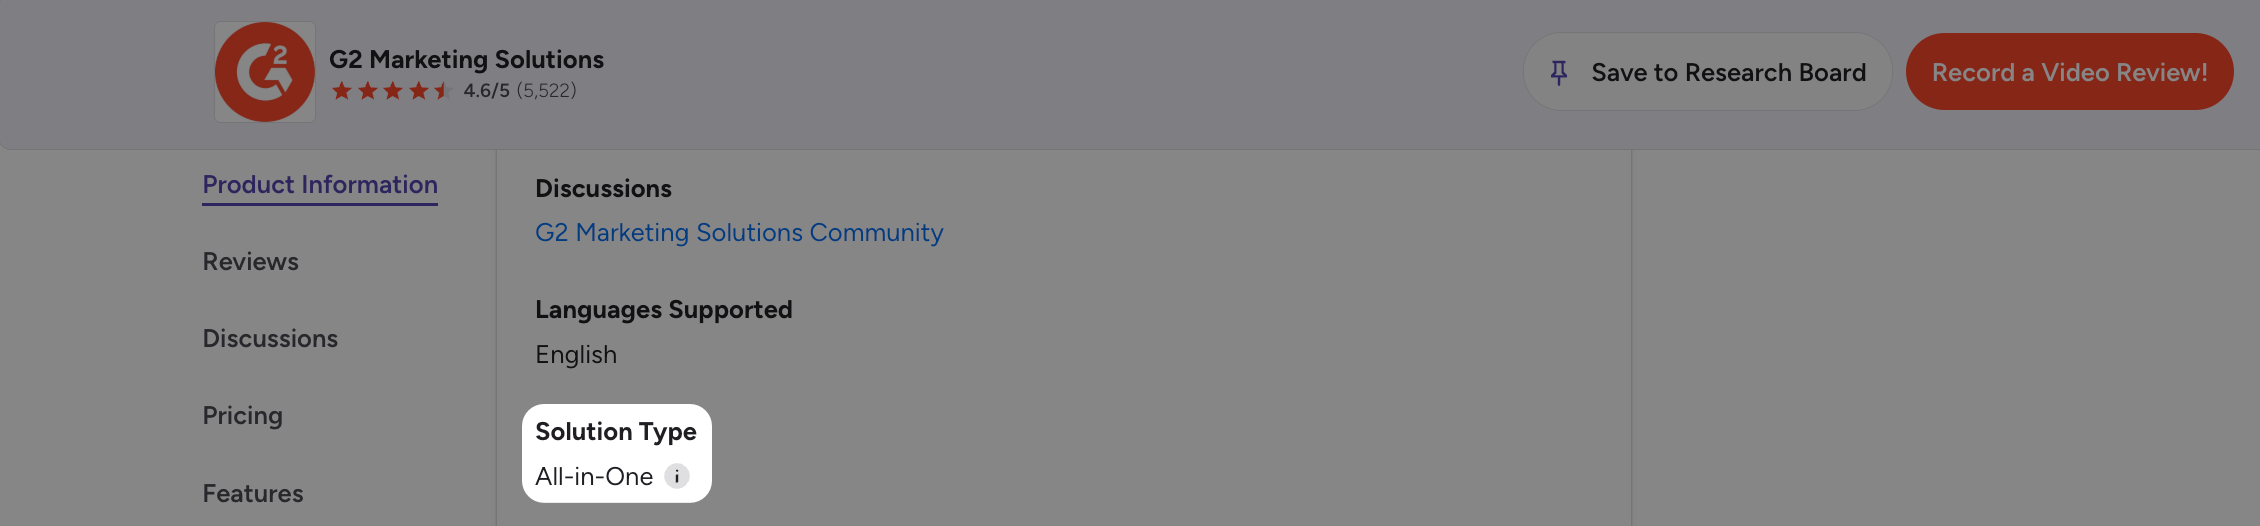
The classification applies to the product as a whole and does not affect G2 Score.
| Attribute | Details |
|---|---|
| Eligibility | Products with 25 or more reviews on G2 |
| Assignment | Assigned algorithmically by G2 and evaluated weekly |
| Scope | Applies to the product, not individual categories |
| Impact on G2 Score | None |
Classification definitions
All-in-One: An all-in-one product provides functionality across multiple business functions within a single platform and is designed to support a broad range of workflows and use cases.
Best-of-Breed: A best-of-breed product focuses on a specific business function or use case and prioritizes depth and specialization within a particular domain.
Requesting a classification update
If you believe your product has been assigned the incorrect classification, contact G2 Support to submit a request for G2 review.
Include an explanation of why your product should be classified as either All-in-One or Best-of-Breed. G2 will review the request and follow up with a decision.
Capterra, Software Advice, and GetApp
Select Capterra, Software Advice, or GetApp to customize how your product appears on that marketplace. If you don't add content for a marketplace, G2 uses your Cross-Marketplaces content.
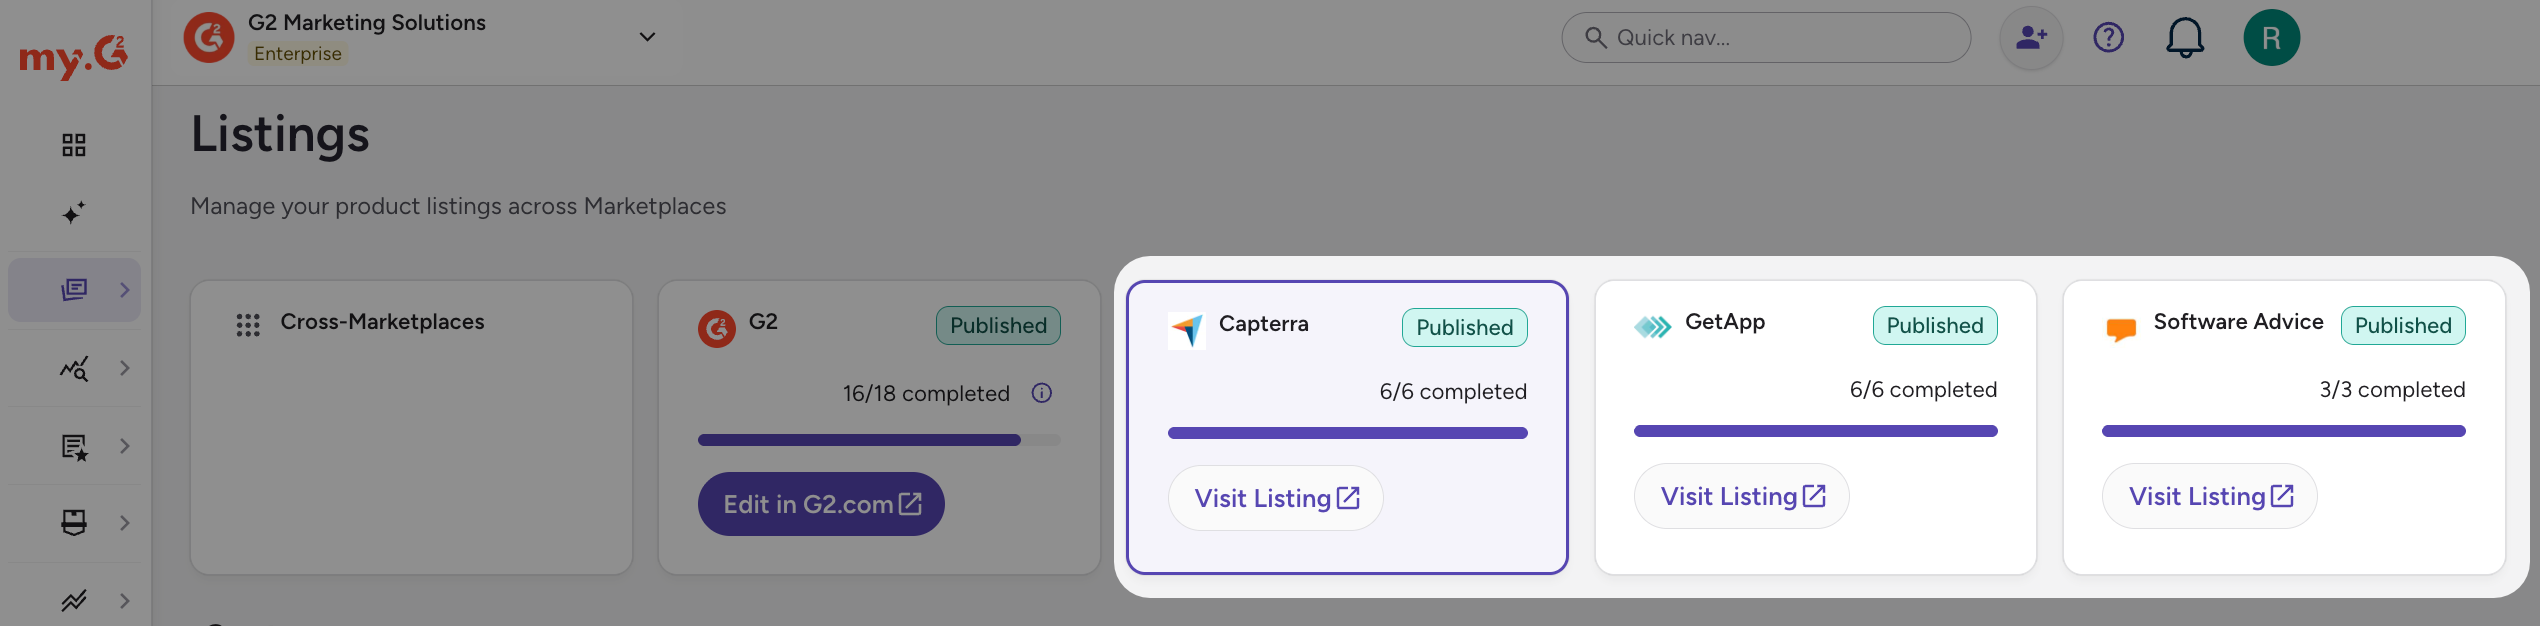
To open a marketplace, go to my.G2, then select Listings > Manage Listings and select the marketplace.
For each marketplace, you can customize the following areas of your profile:
| Tab | What you manage |
|---|---|
| Descriptions | The descriptions for the marketplace. Refer to Descriptions. |
| Screenshots | The screenshots on your listing. Refer to Screenshots. |
| Videos | The videos on your listing. Refer to Videos. |
| International Markets | Translated versions of your listing. Refer to International Markets. |
You can manage screenshots and videos in each marketplace's Screenshots and Videos tabs. Refer to Screenshots and Videos for the steps.
Descriptions
Each marketplace reaches a different kind of buyer, so write a unique description for each.
- Capterra reaches busy, experienced software buyers looking for a trustworthy, informational resource. Give a clear, high-level overview of your product's core functions and the benefit to your users.
- Software Advice reaches buyers who aren't tech-focused and want personalized guidance from software experts. Keep your description simple and easy to scan, and focus on your ideal user, your unique benefits, and the support you provide.
- GetApp reaches tech-savvy buyers who want in-depth detail to make an informed decision. Describe your product's functions and specifications in detail, and mention integrations, API requirements, native mobile apps, data security and compliance, and feature configurations to show how your product fits into an existing tech stack.
International Markets
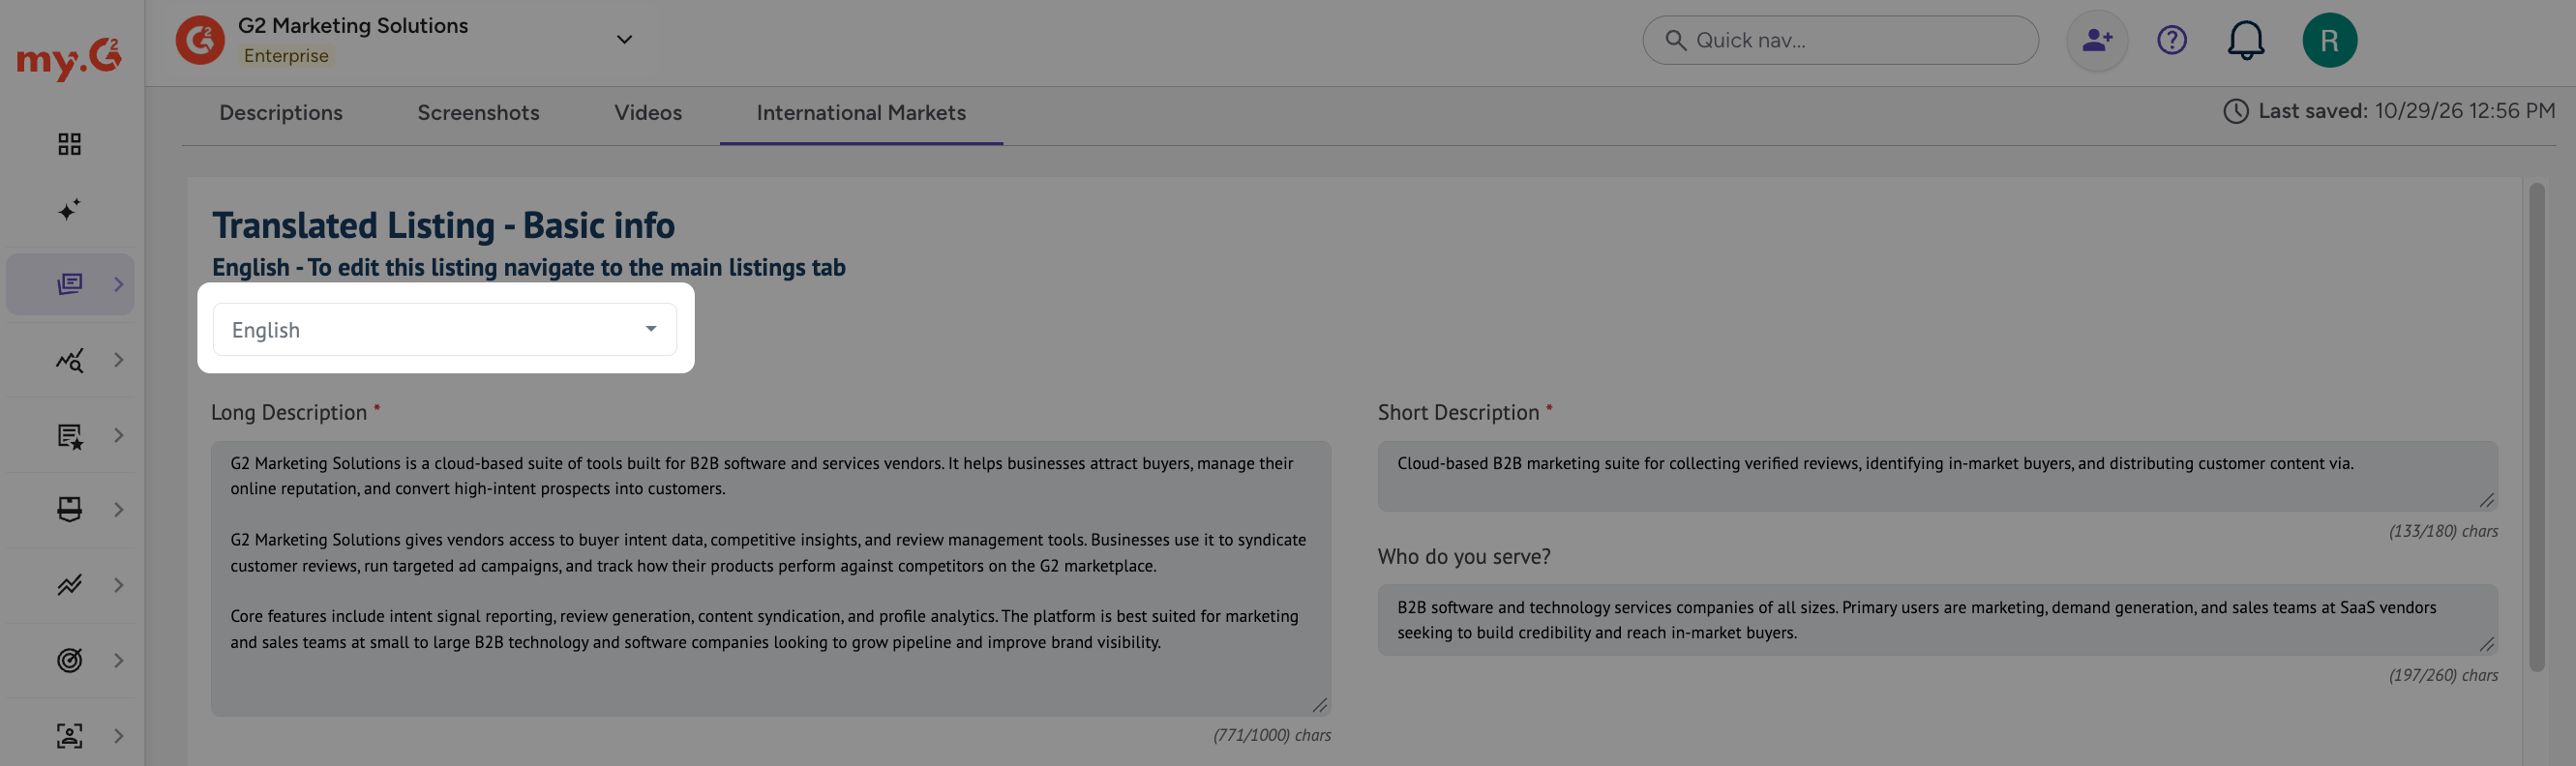
Use the International Markets tab to translate your listing for the countries you target. The language dropdown lists the languages and country variants you can edit, based on your current geo-filters.
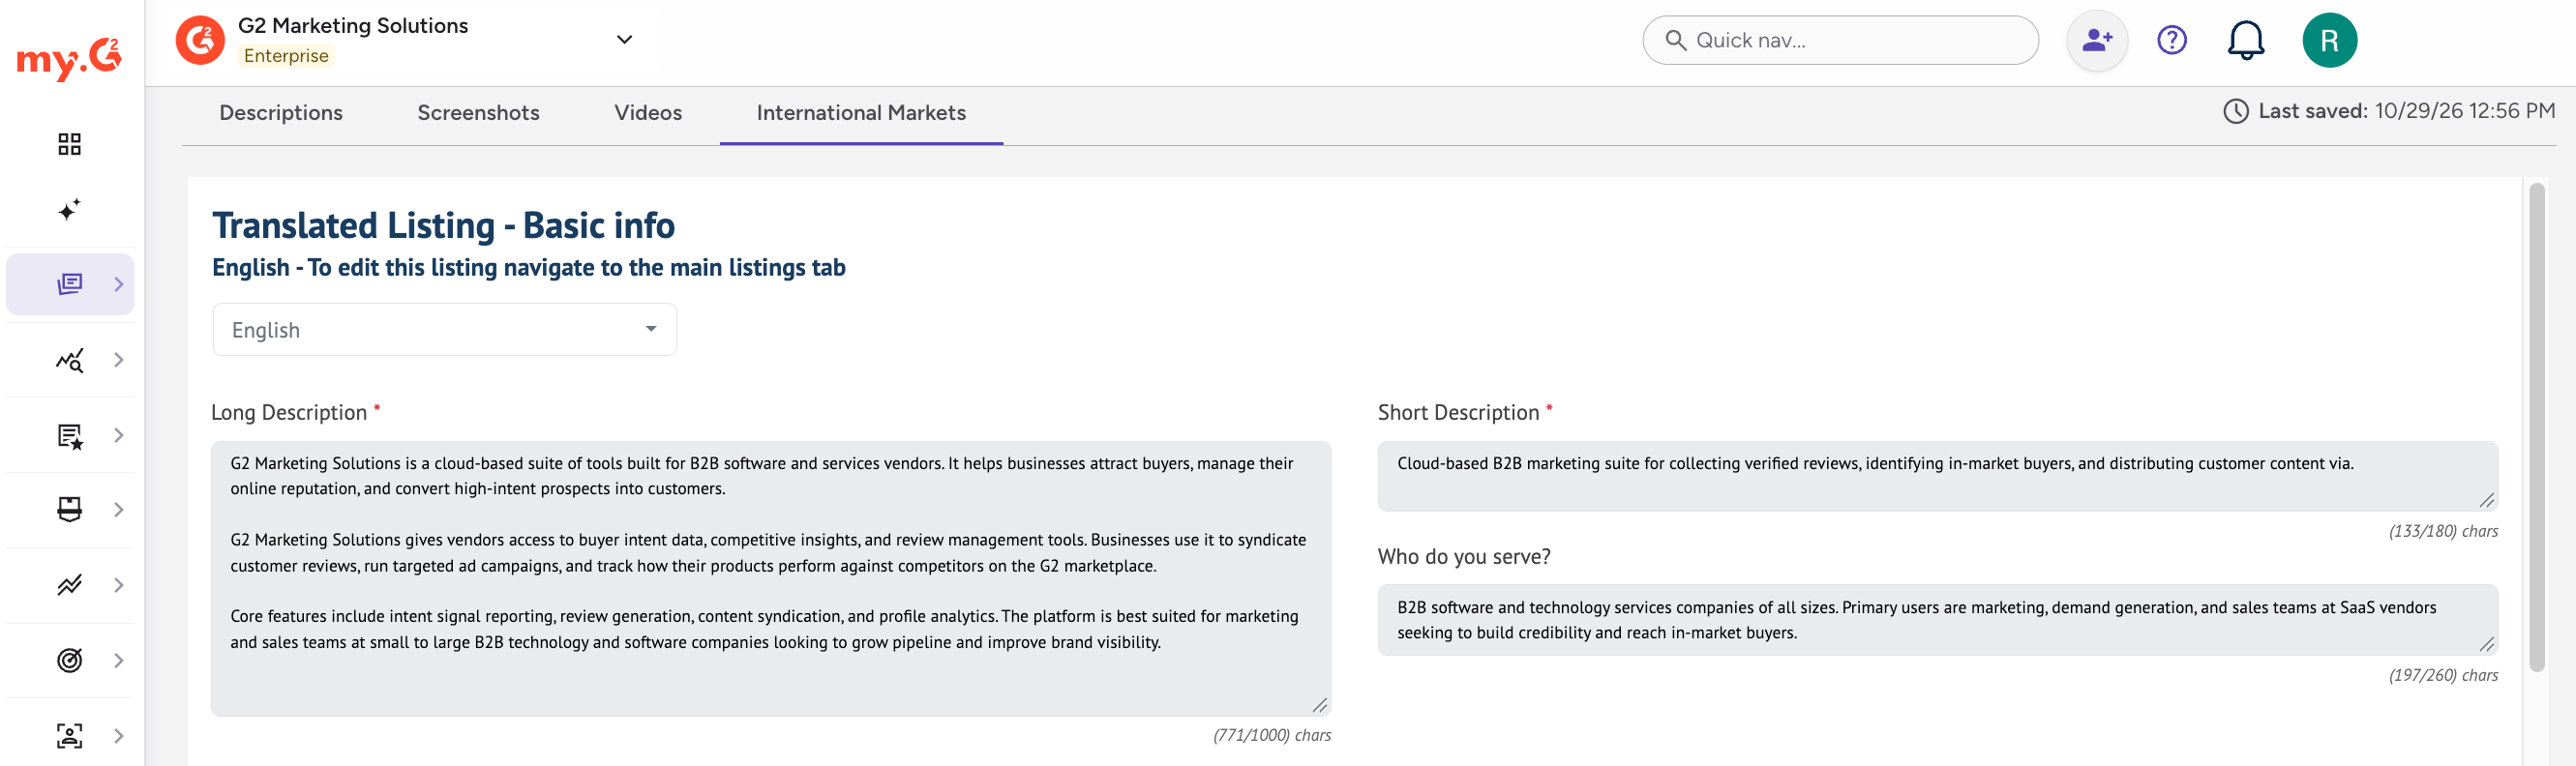
Select a language, then write the descriptions for it. Your content for a language appears in all countries that use that language. To customize it for one country, select that country, such as German (Austria), then edit the content. To edit your English listing, use the Descriptions tab.
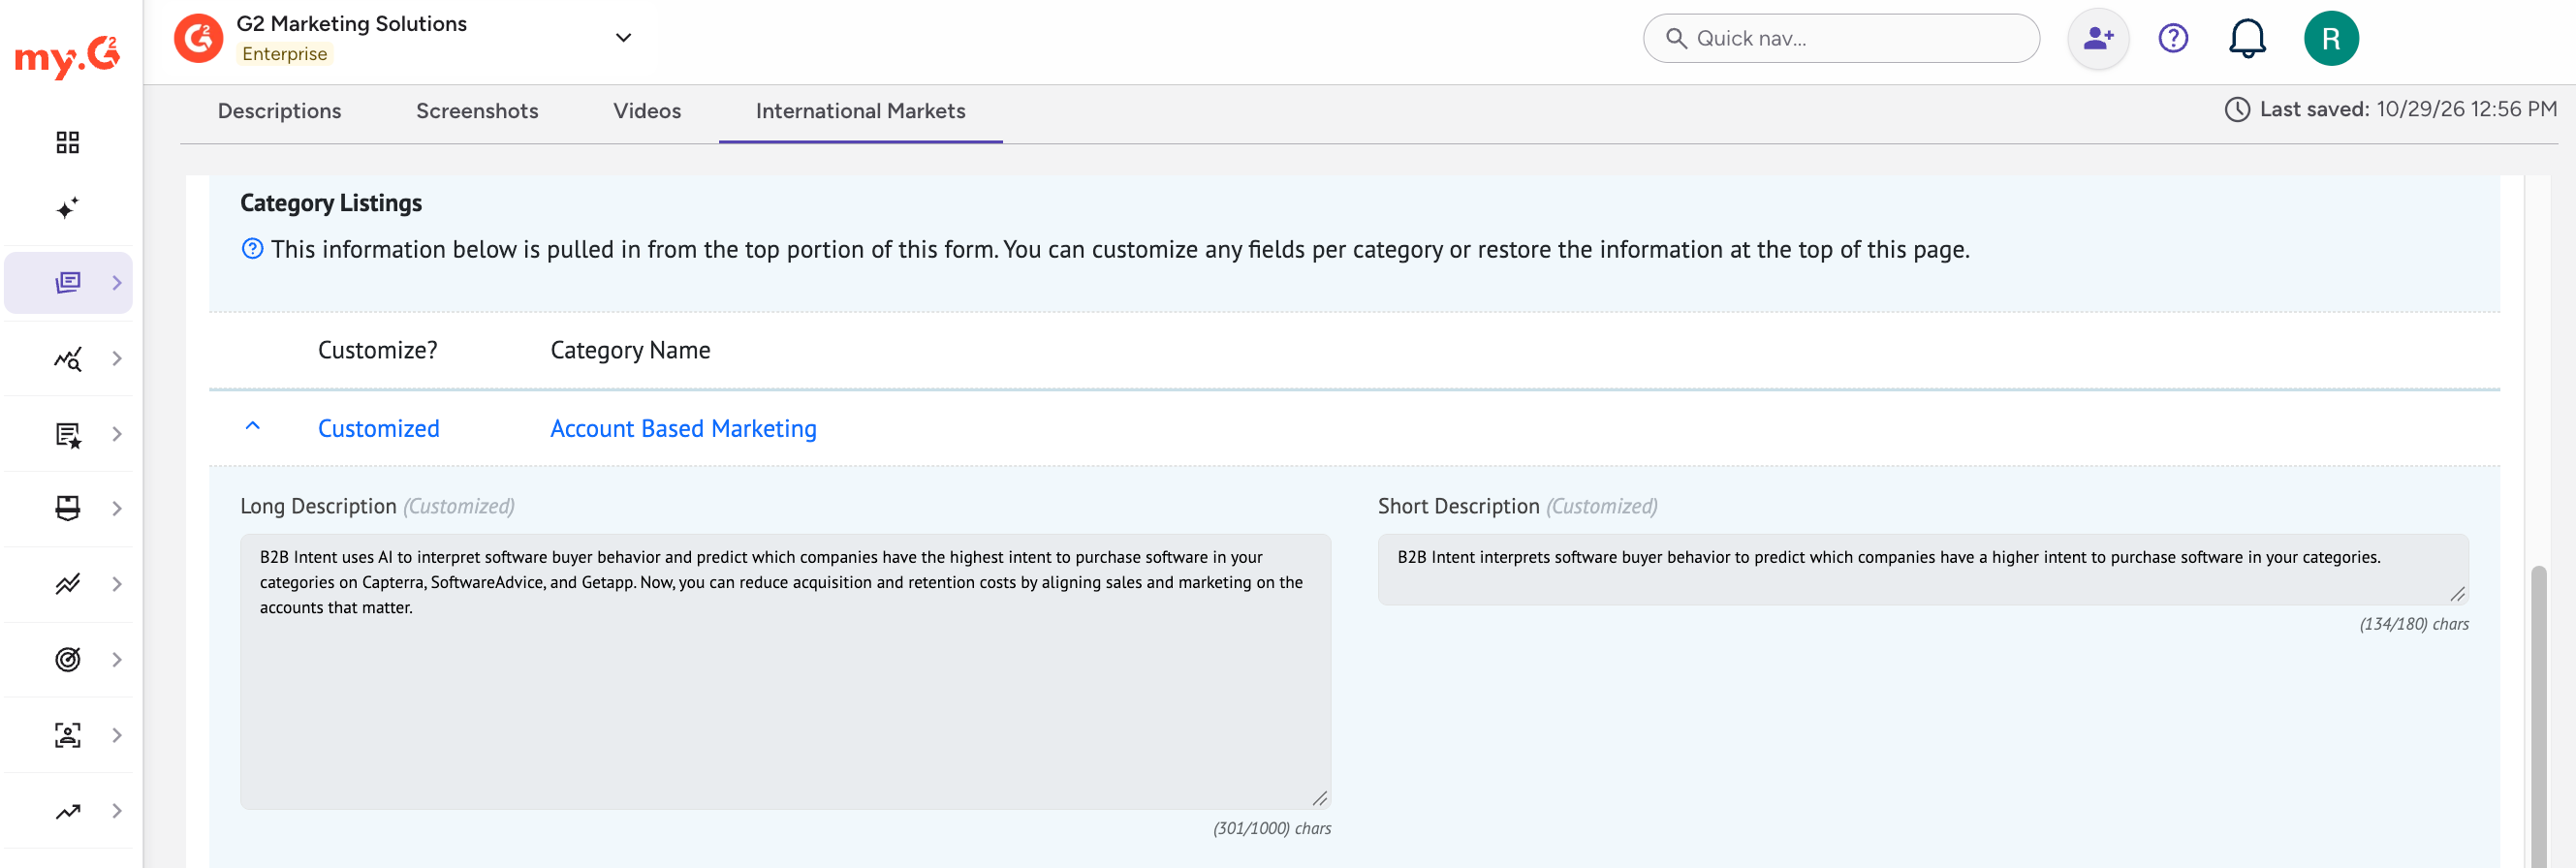
Category listings start with the information you enter at the top of the page. You can add a custom description for each category or restore the top-level information.
To receive traffic for a country-specific listing, add the country to your campaign targeting. Refer to G2 Ads Clicks.